
How to Import Expenses
Outcome
- Capture all key details from receipts without manual entry
- Categorizes expenses according to Australian Taxation Office standards.
- Organize your expenses for faster, hassle-free reporting
- Works with almost any receipt image or PDF layout.
Steps
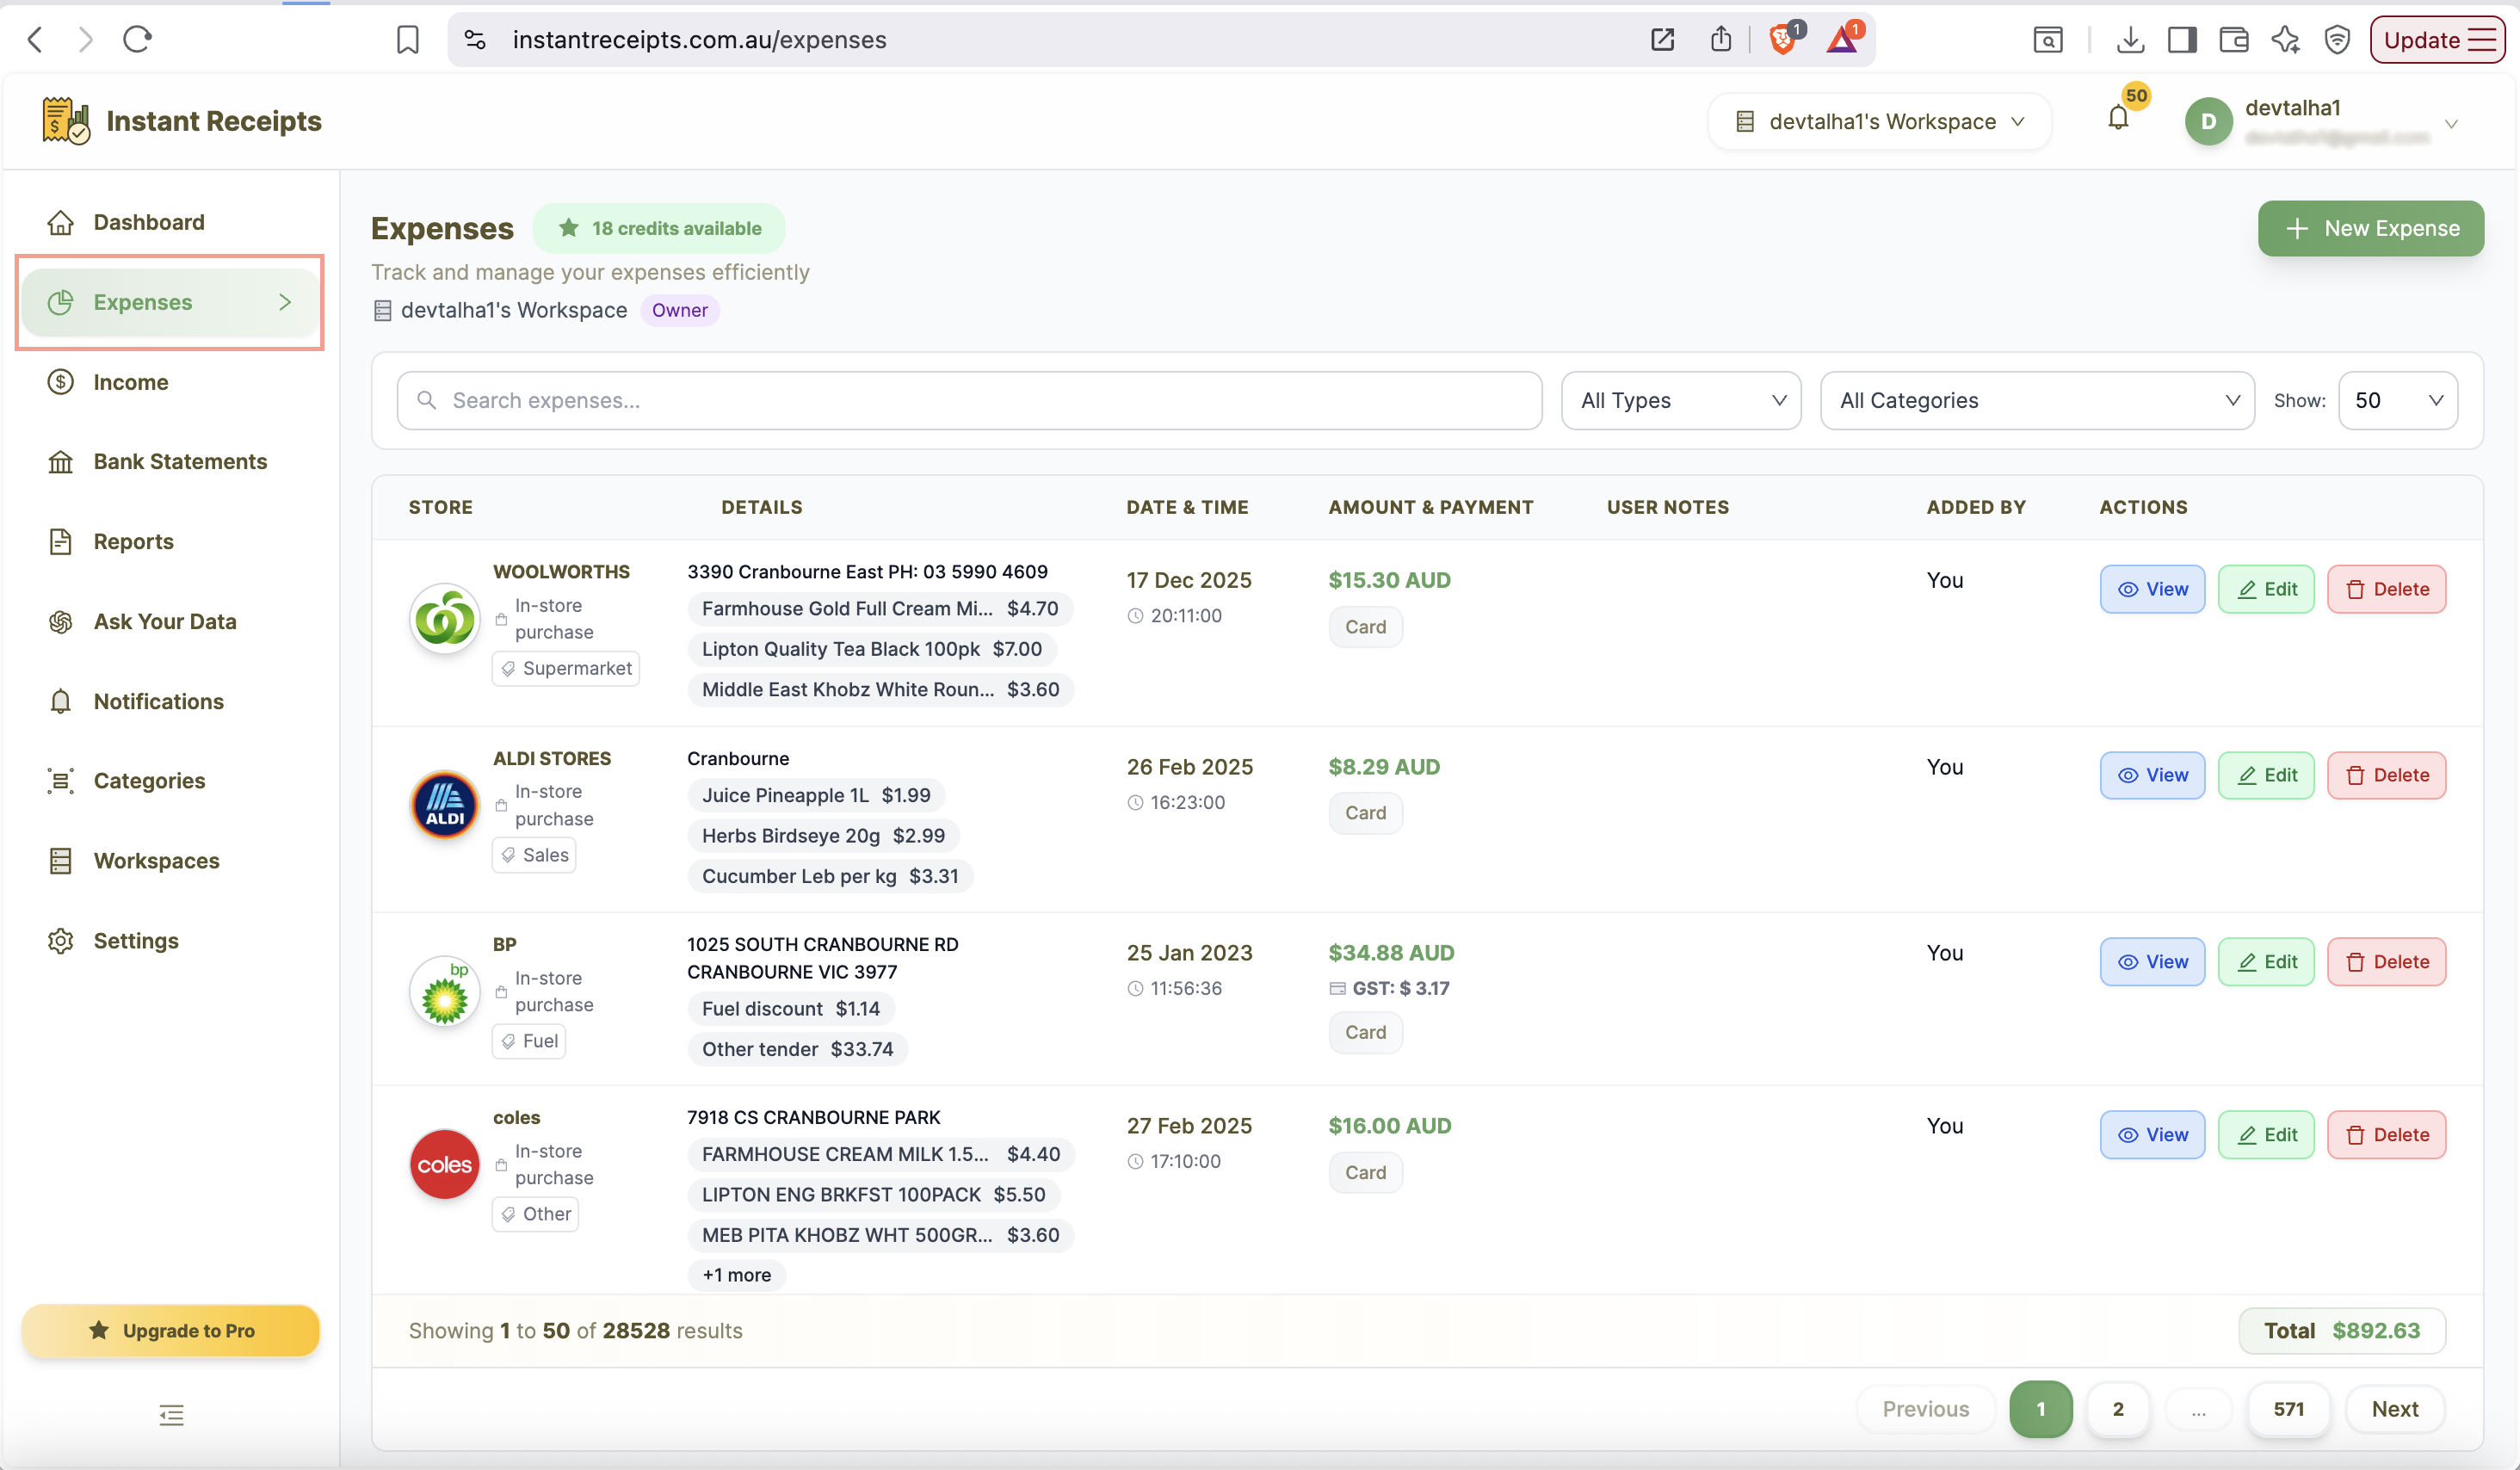
Navigate to Expenses
In order to import expenses, browse the instantReceipt and go to your instant receipt dashboard. Now go to the expense section by clicking on "expenses" on left hand side trail.
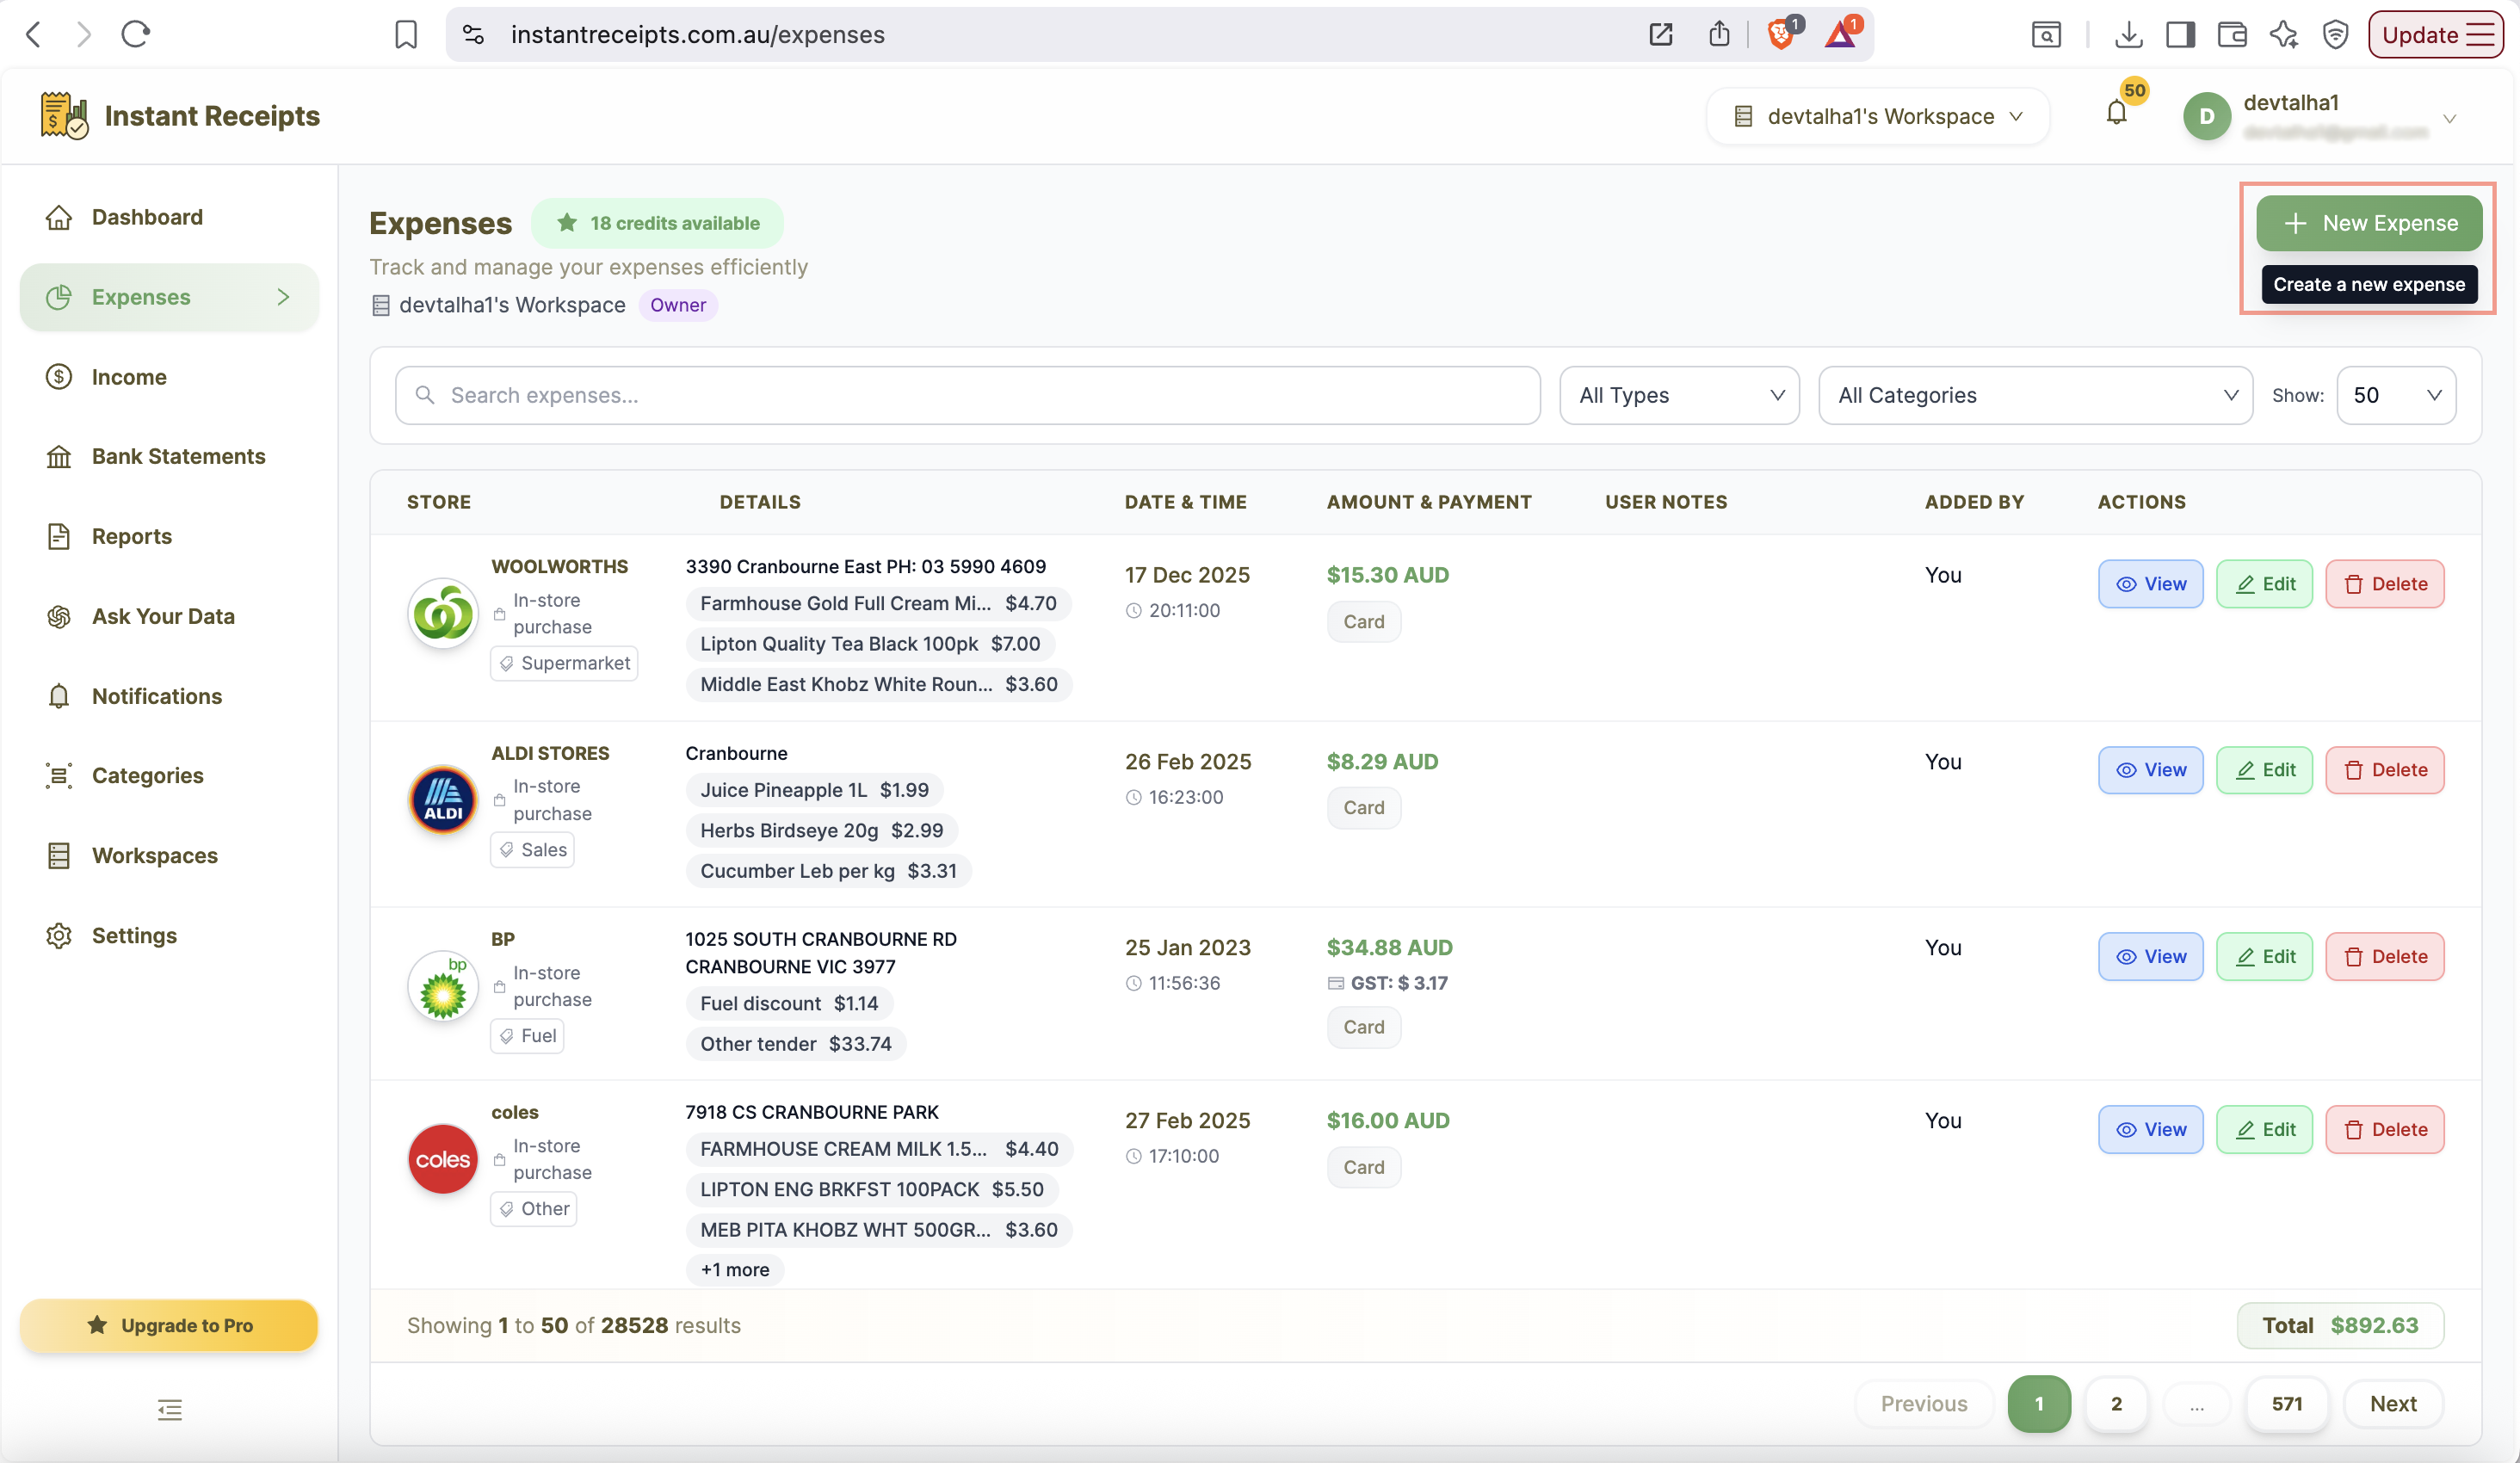
Click Import Expenses
By clicking on expenses, a new section will appear on the right side of the side bar. Now look for the import button and click on it.
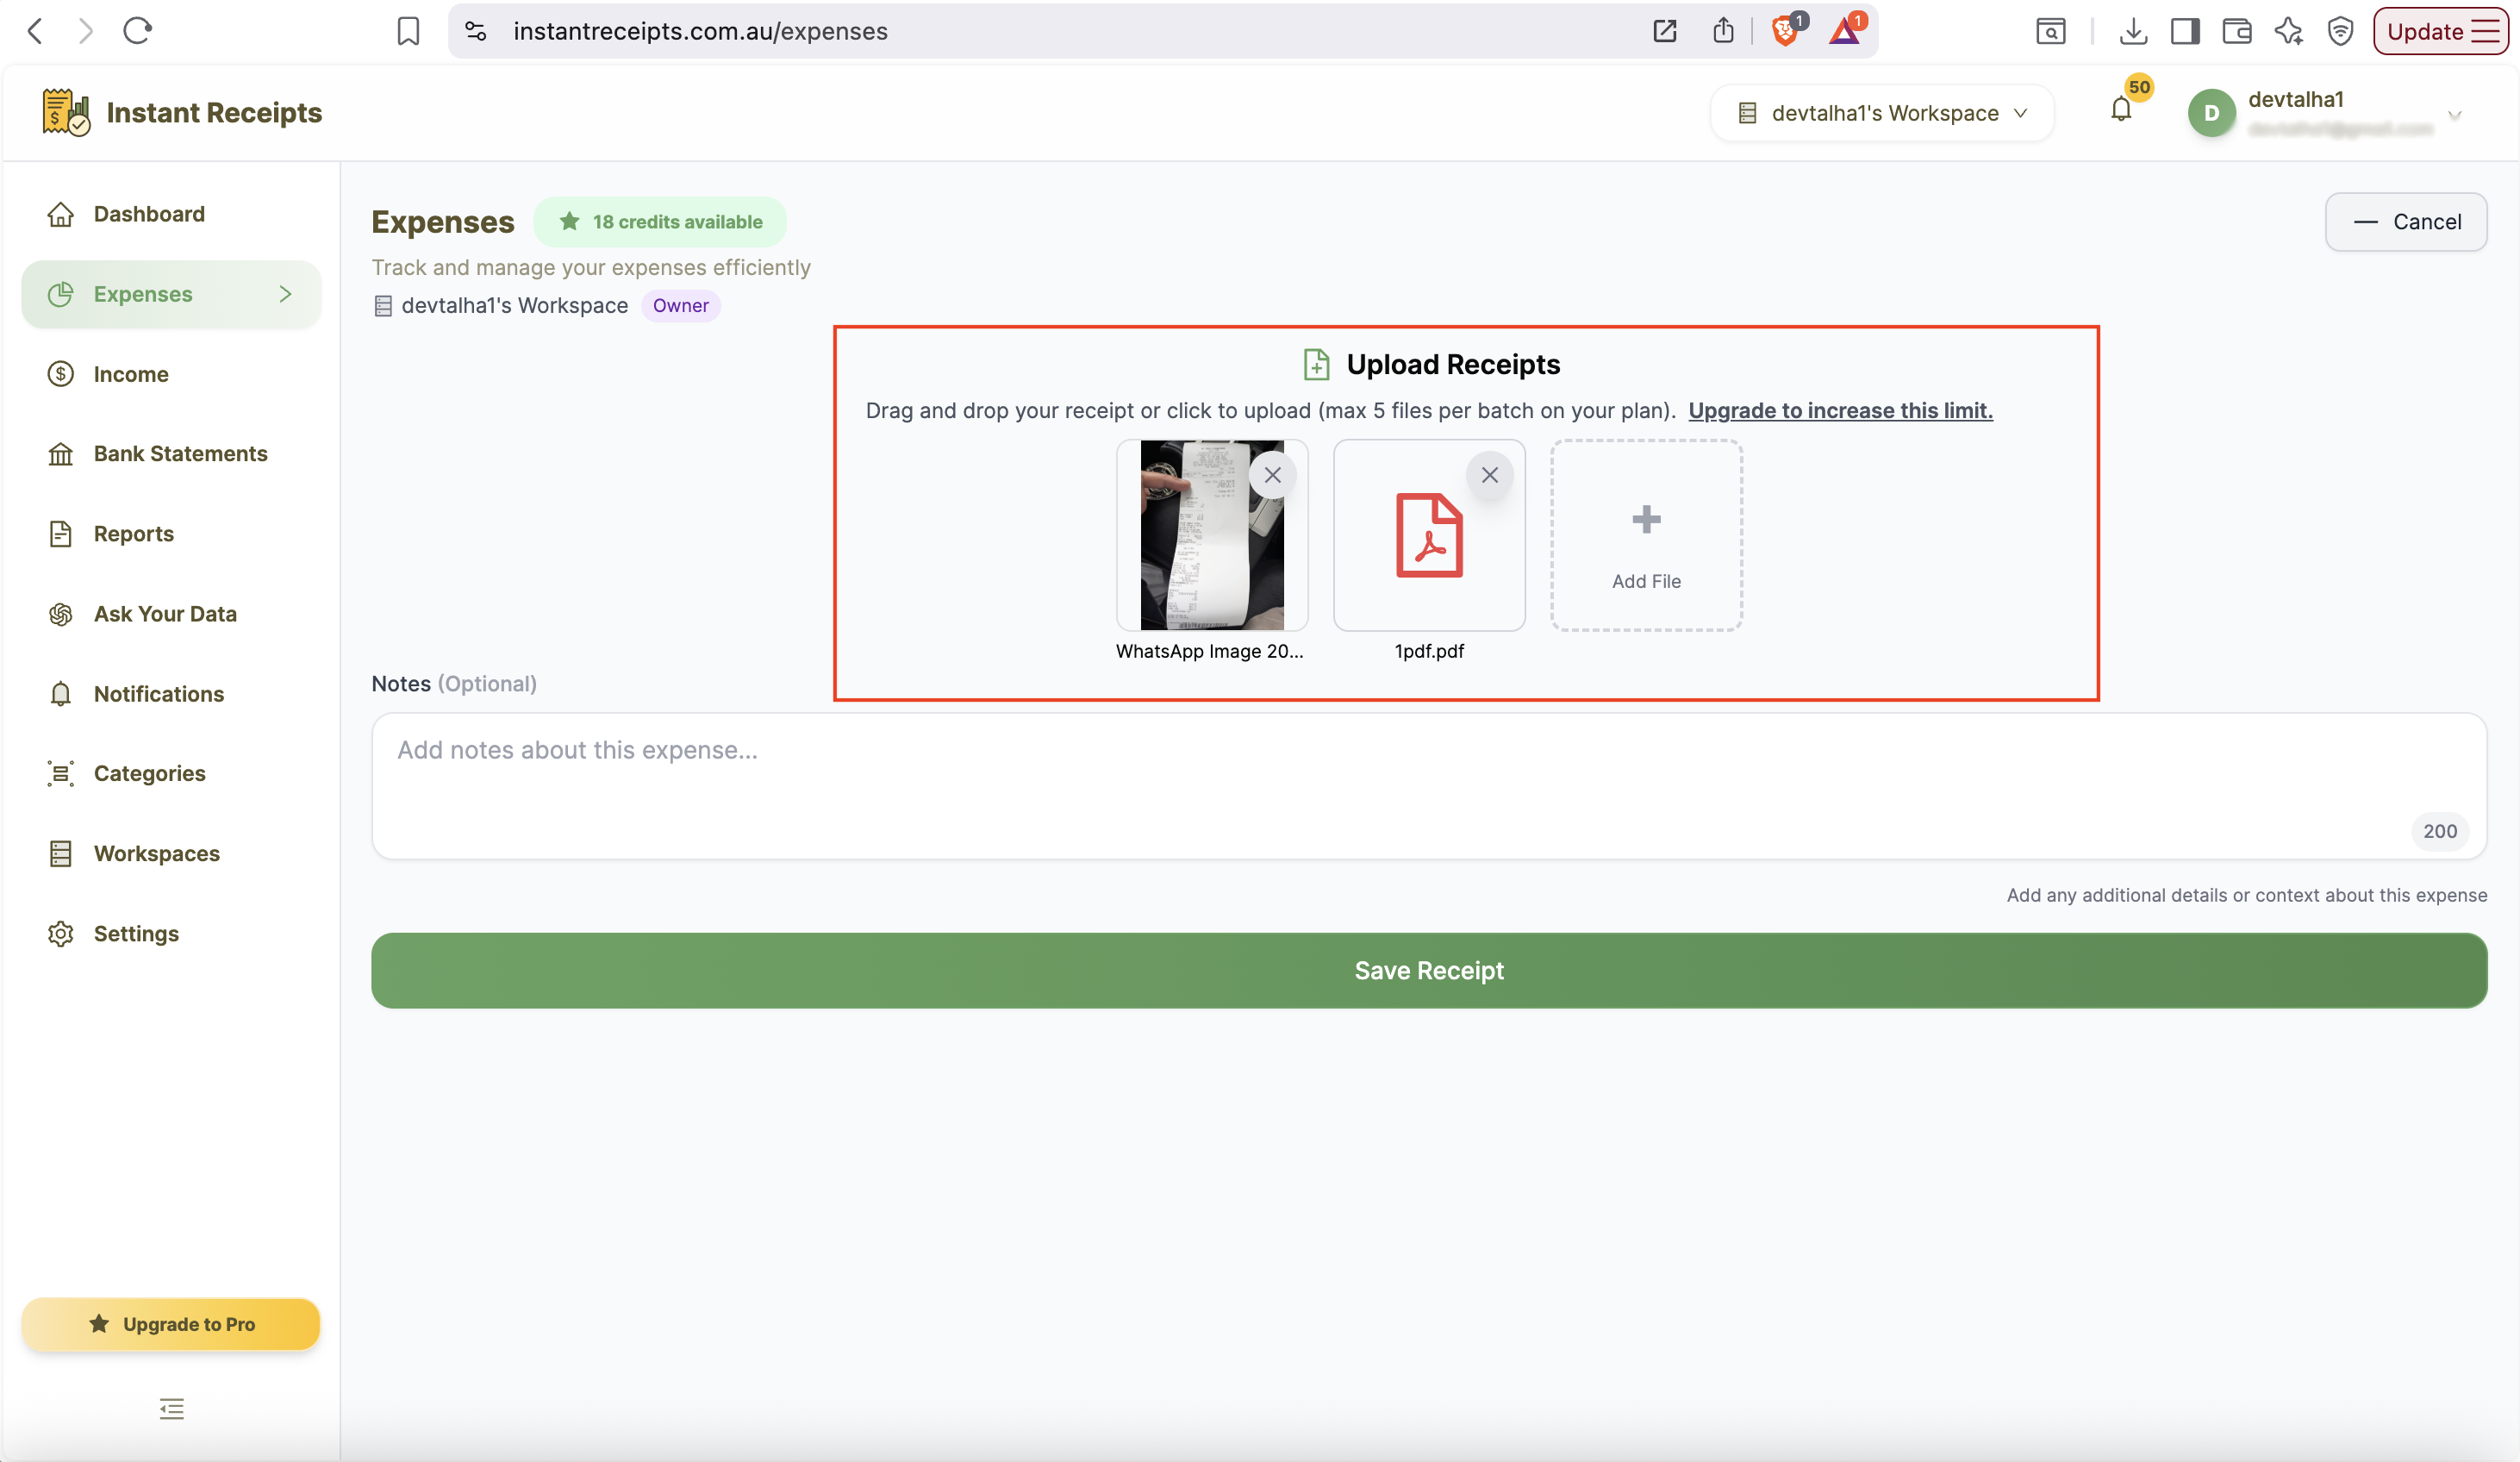
Select Your Receipt Files
After clicking on import, you will be taken to select an image or PDF. You can also add key notes about these expense receipts. After selecting the image or pdf files, click on Save Receipt.
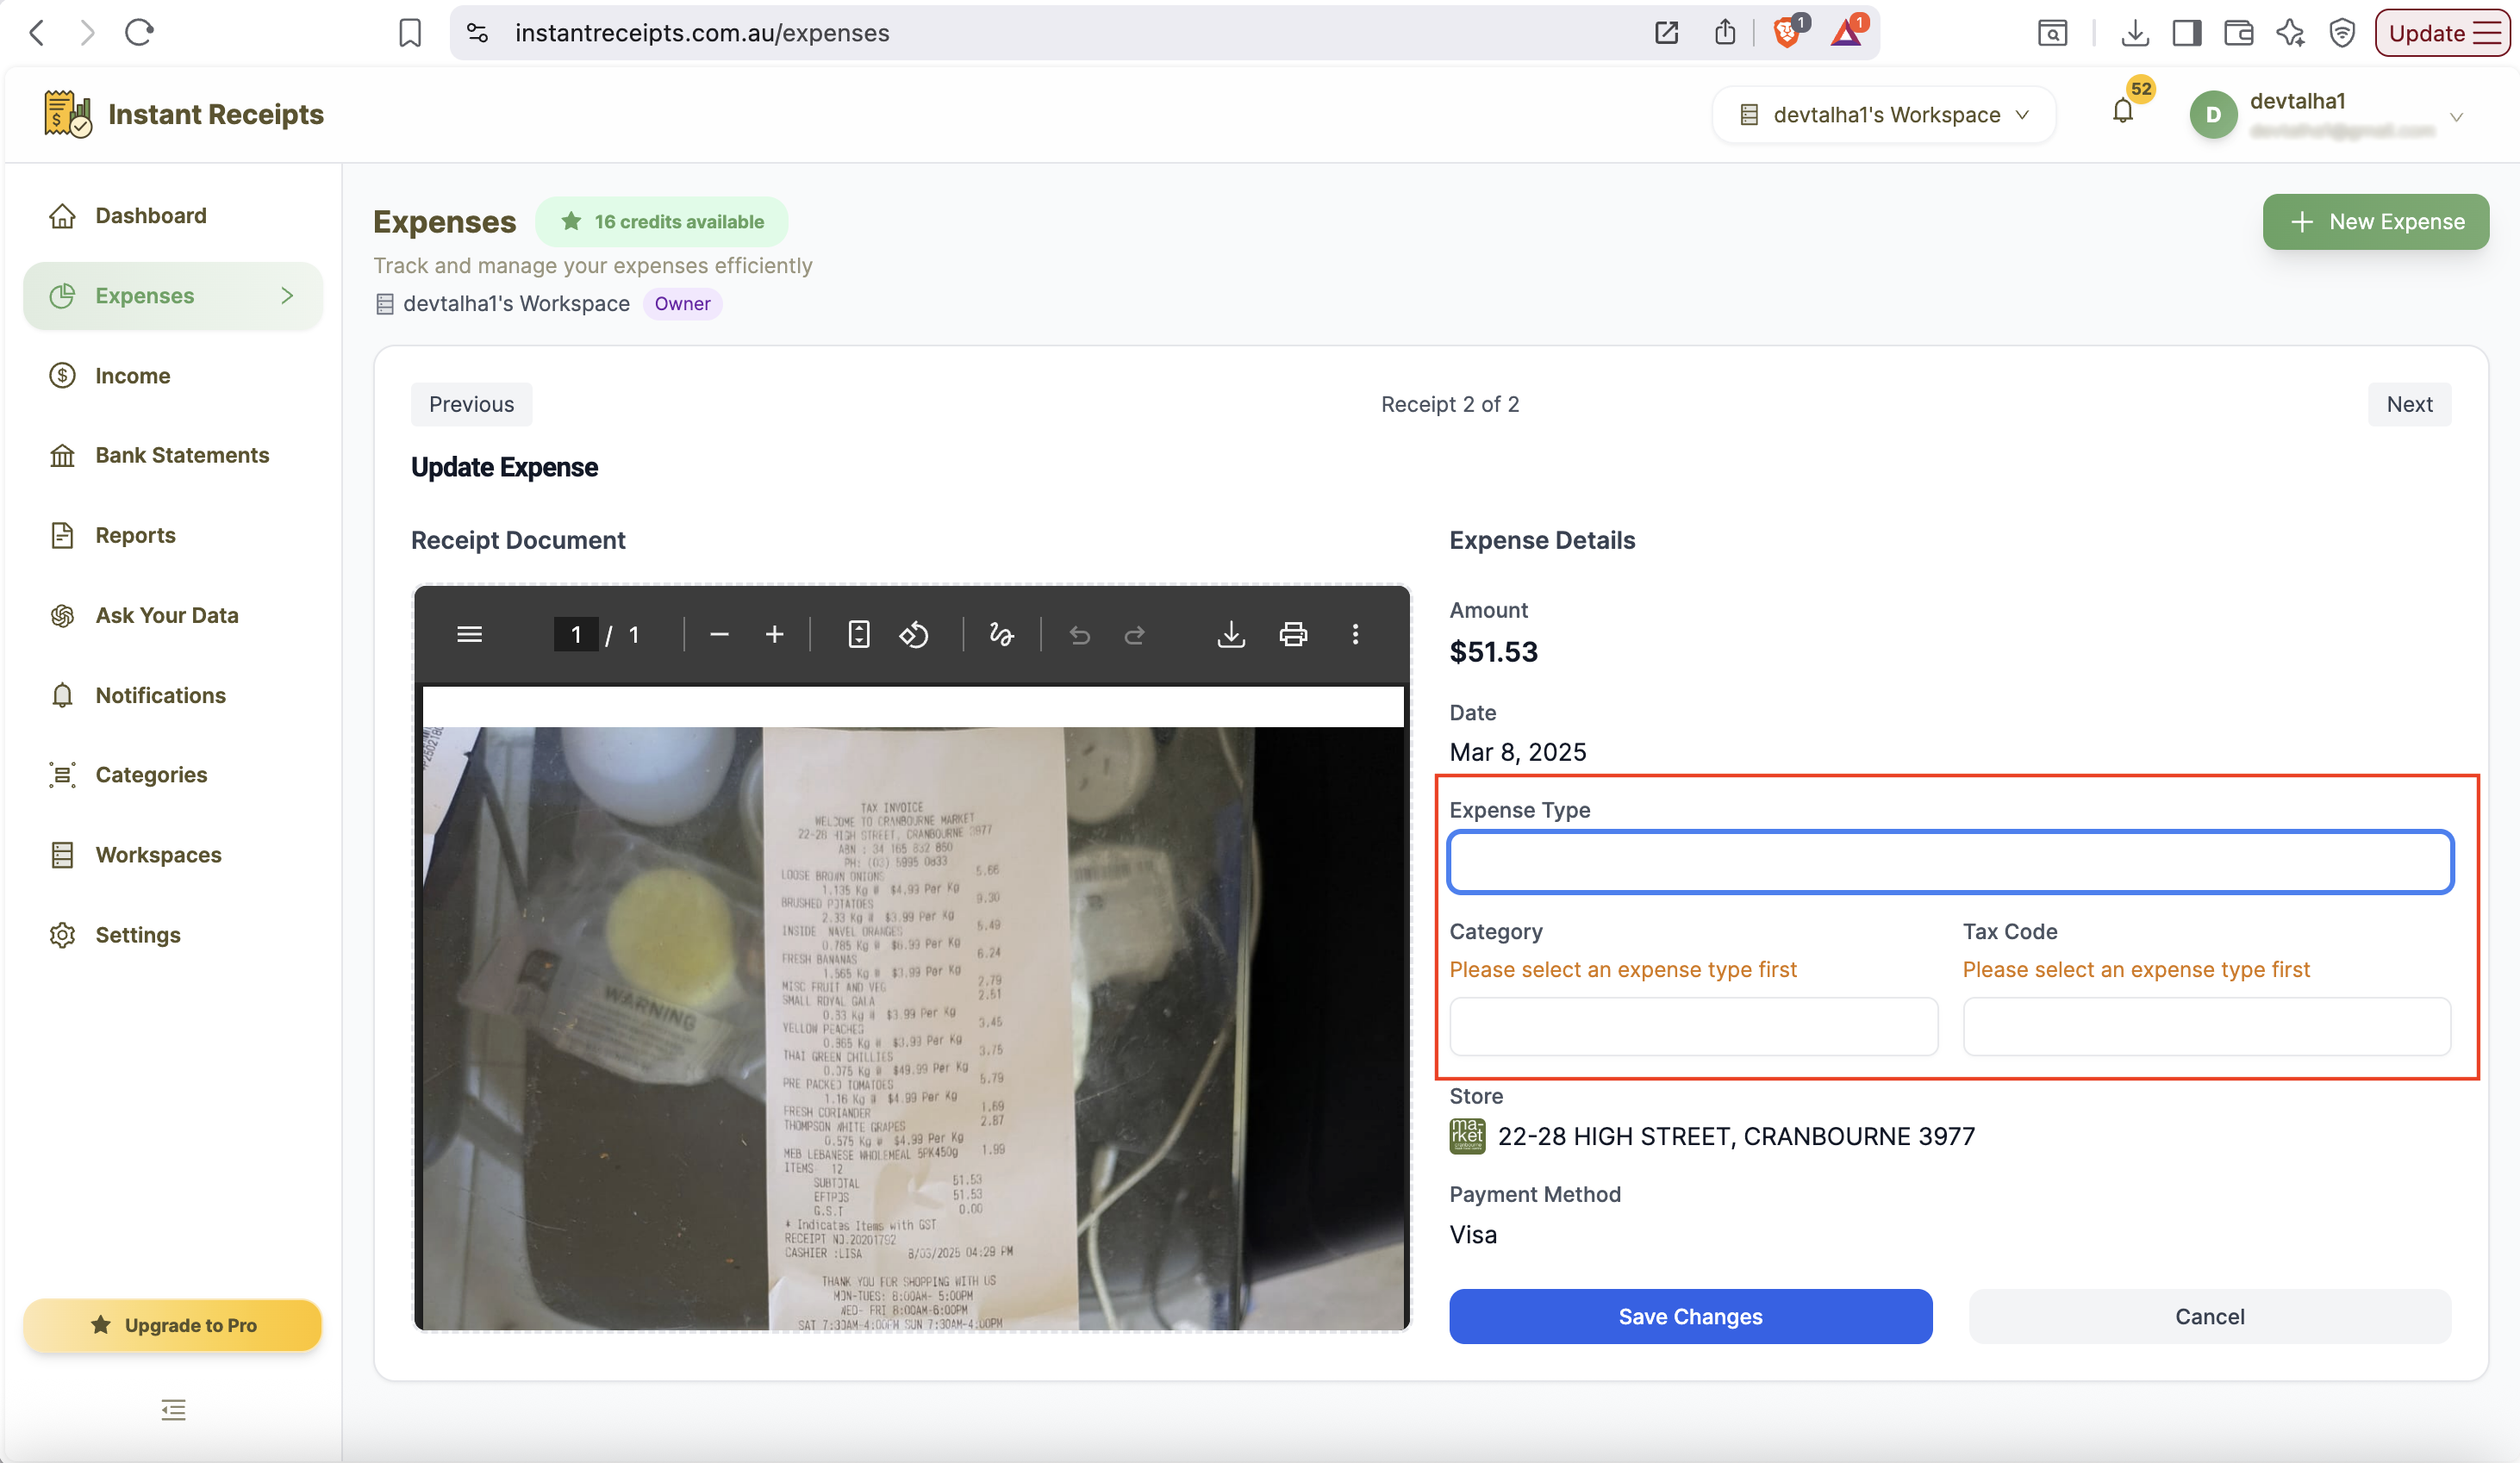
Review Extracted Data
Once the recipe is saved, you will see a preview of the extracted data. Here you can double-check that the data extracted is correct and there is no error.
Handle Duplicates
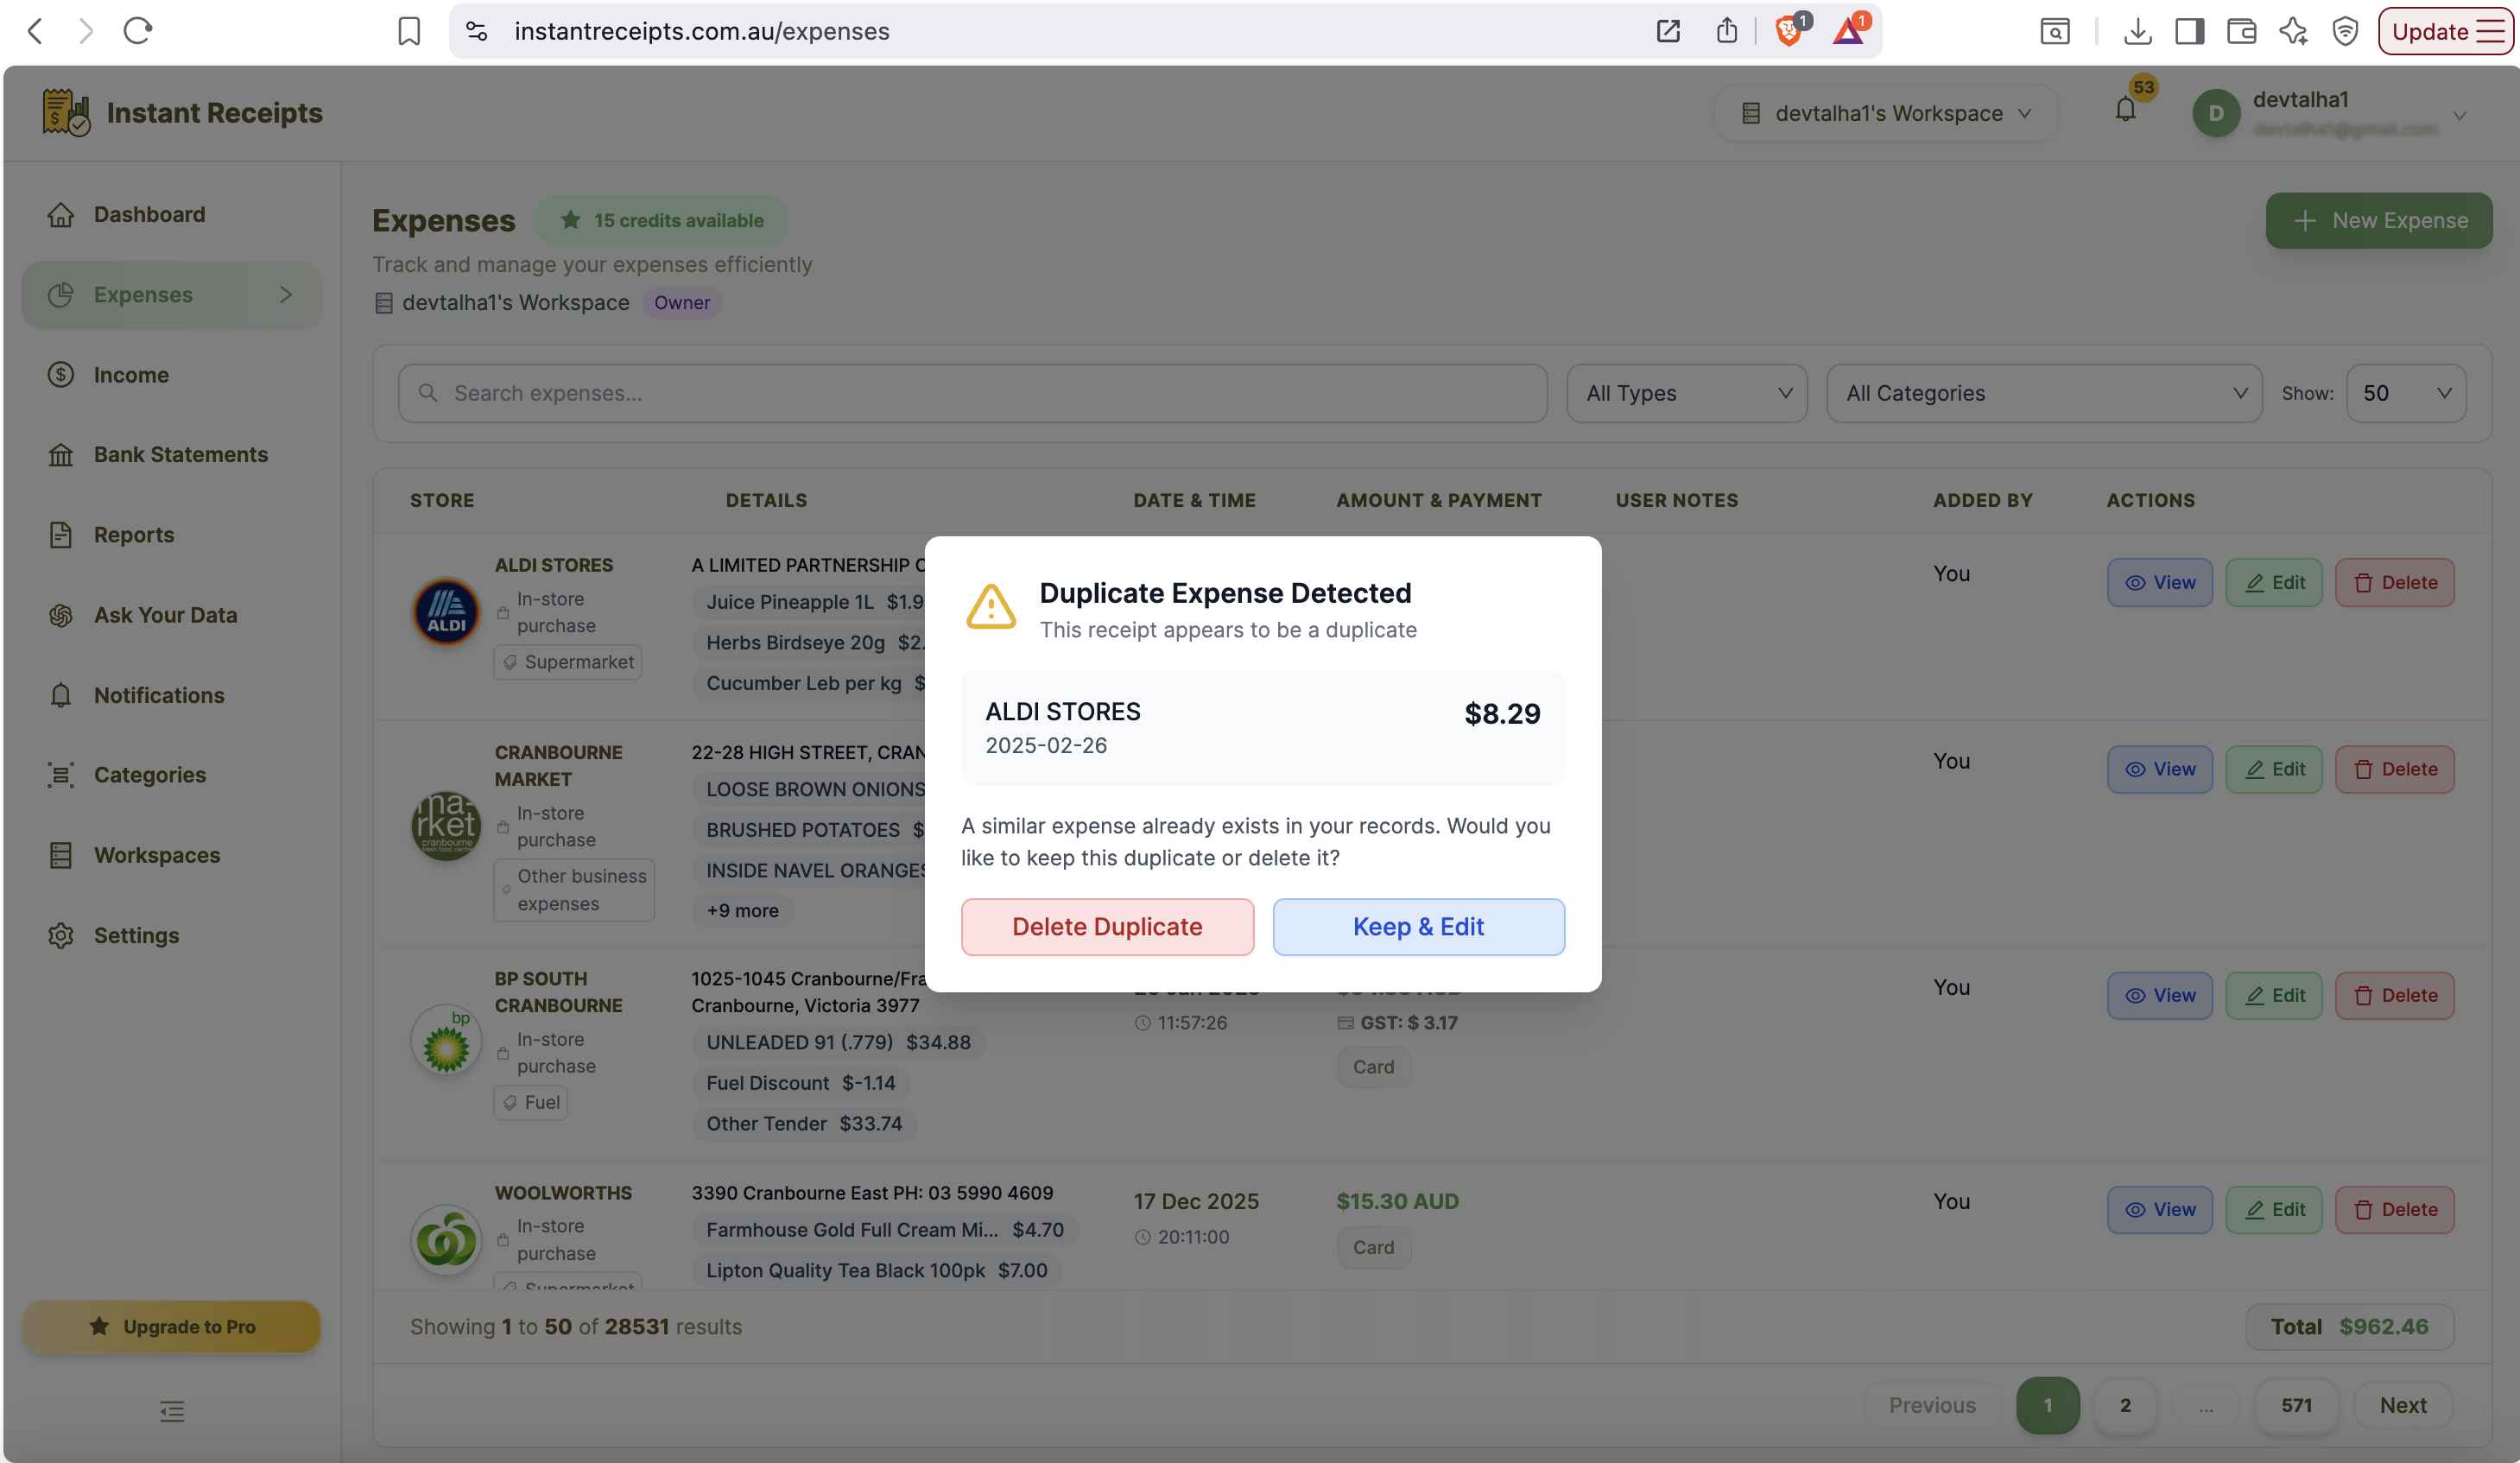
After preview, you need to click on save changes if you made any changes. After that, if there is any duplicate expense, you will be notified. Here you can keep or delete duplicate data according to your requirements.
Categorize Expenses
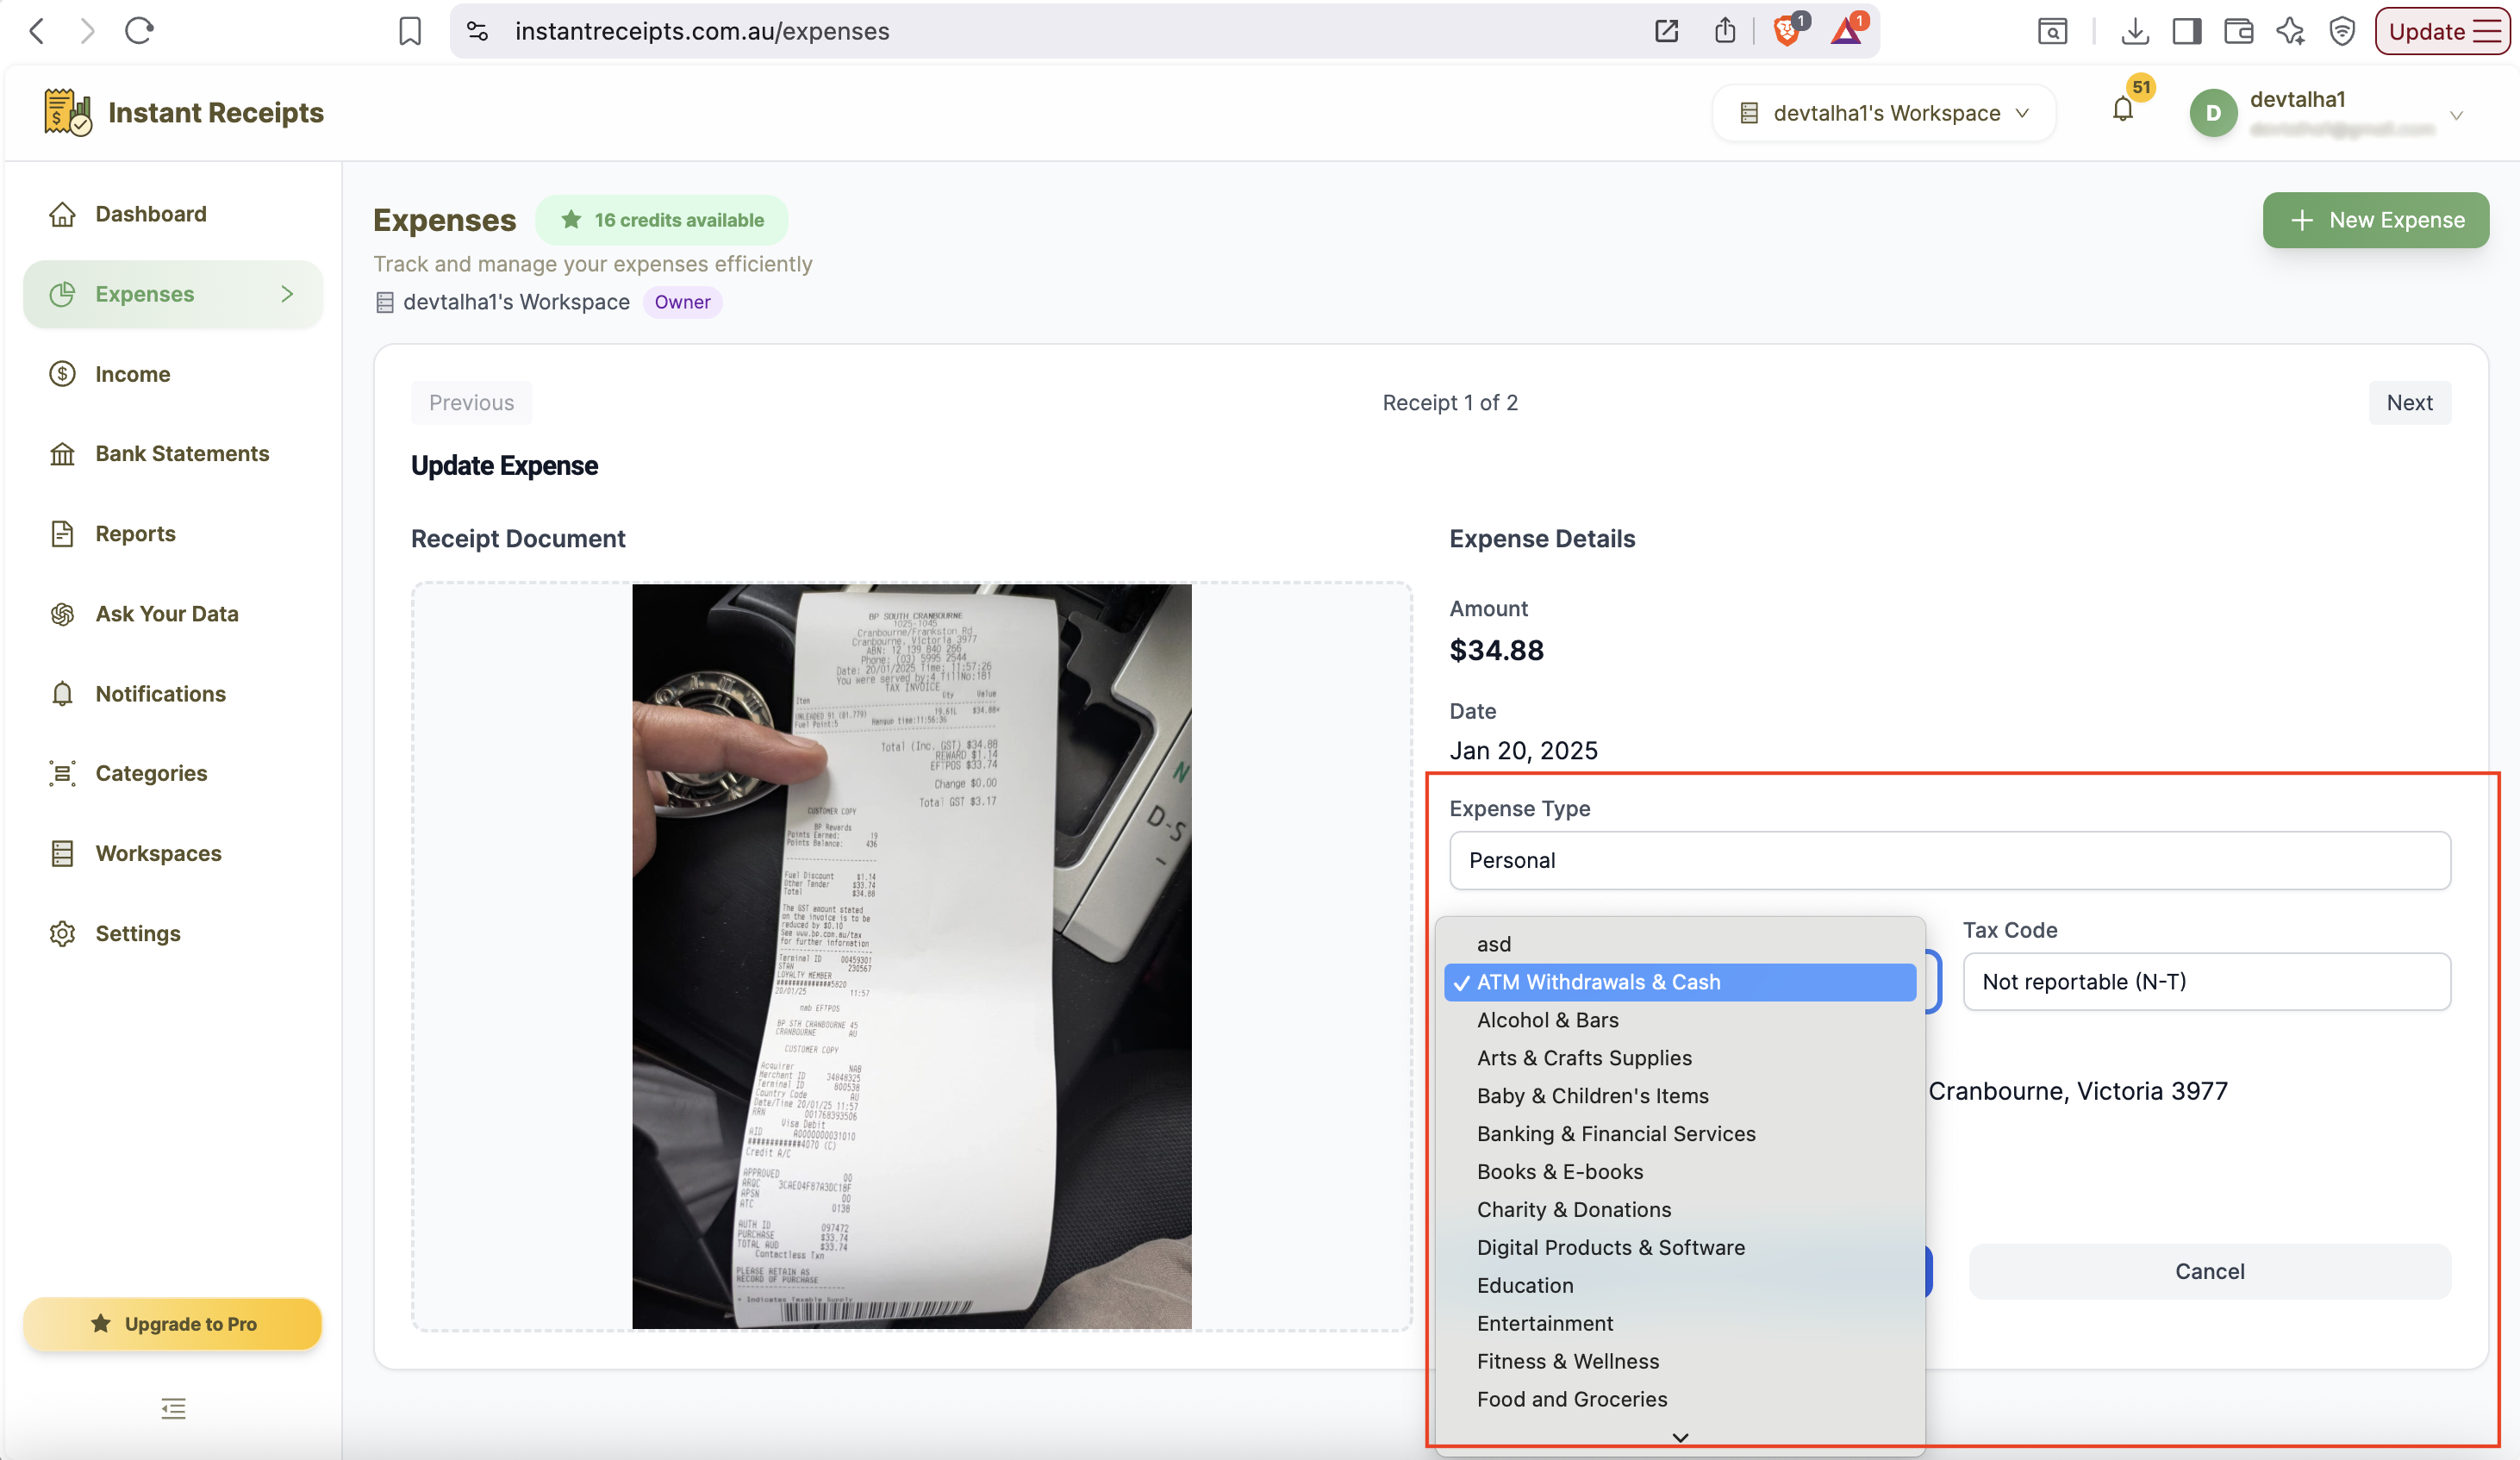
Now assign ATO-aligned categories to your imported expenses.
Complete Import
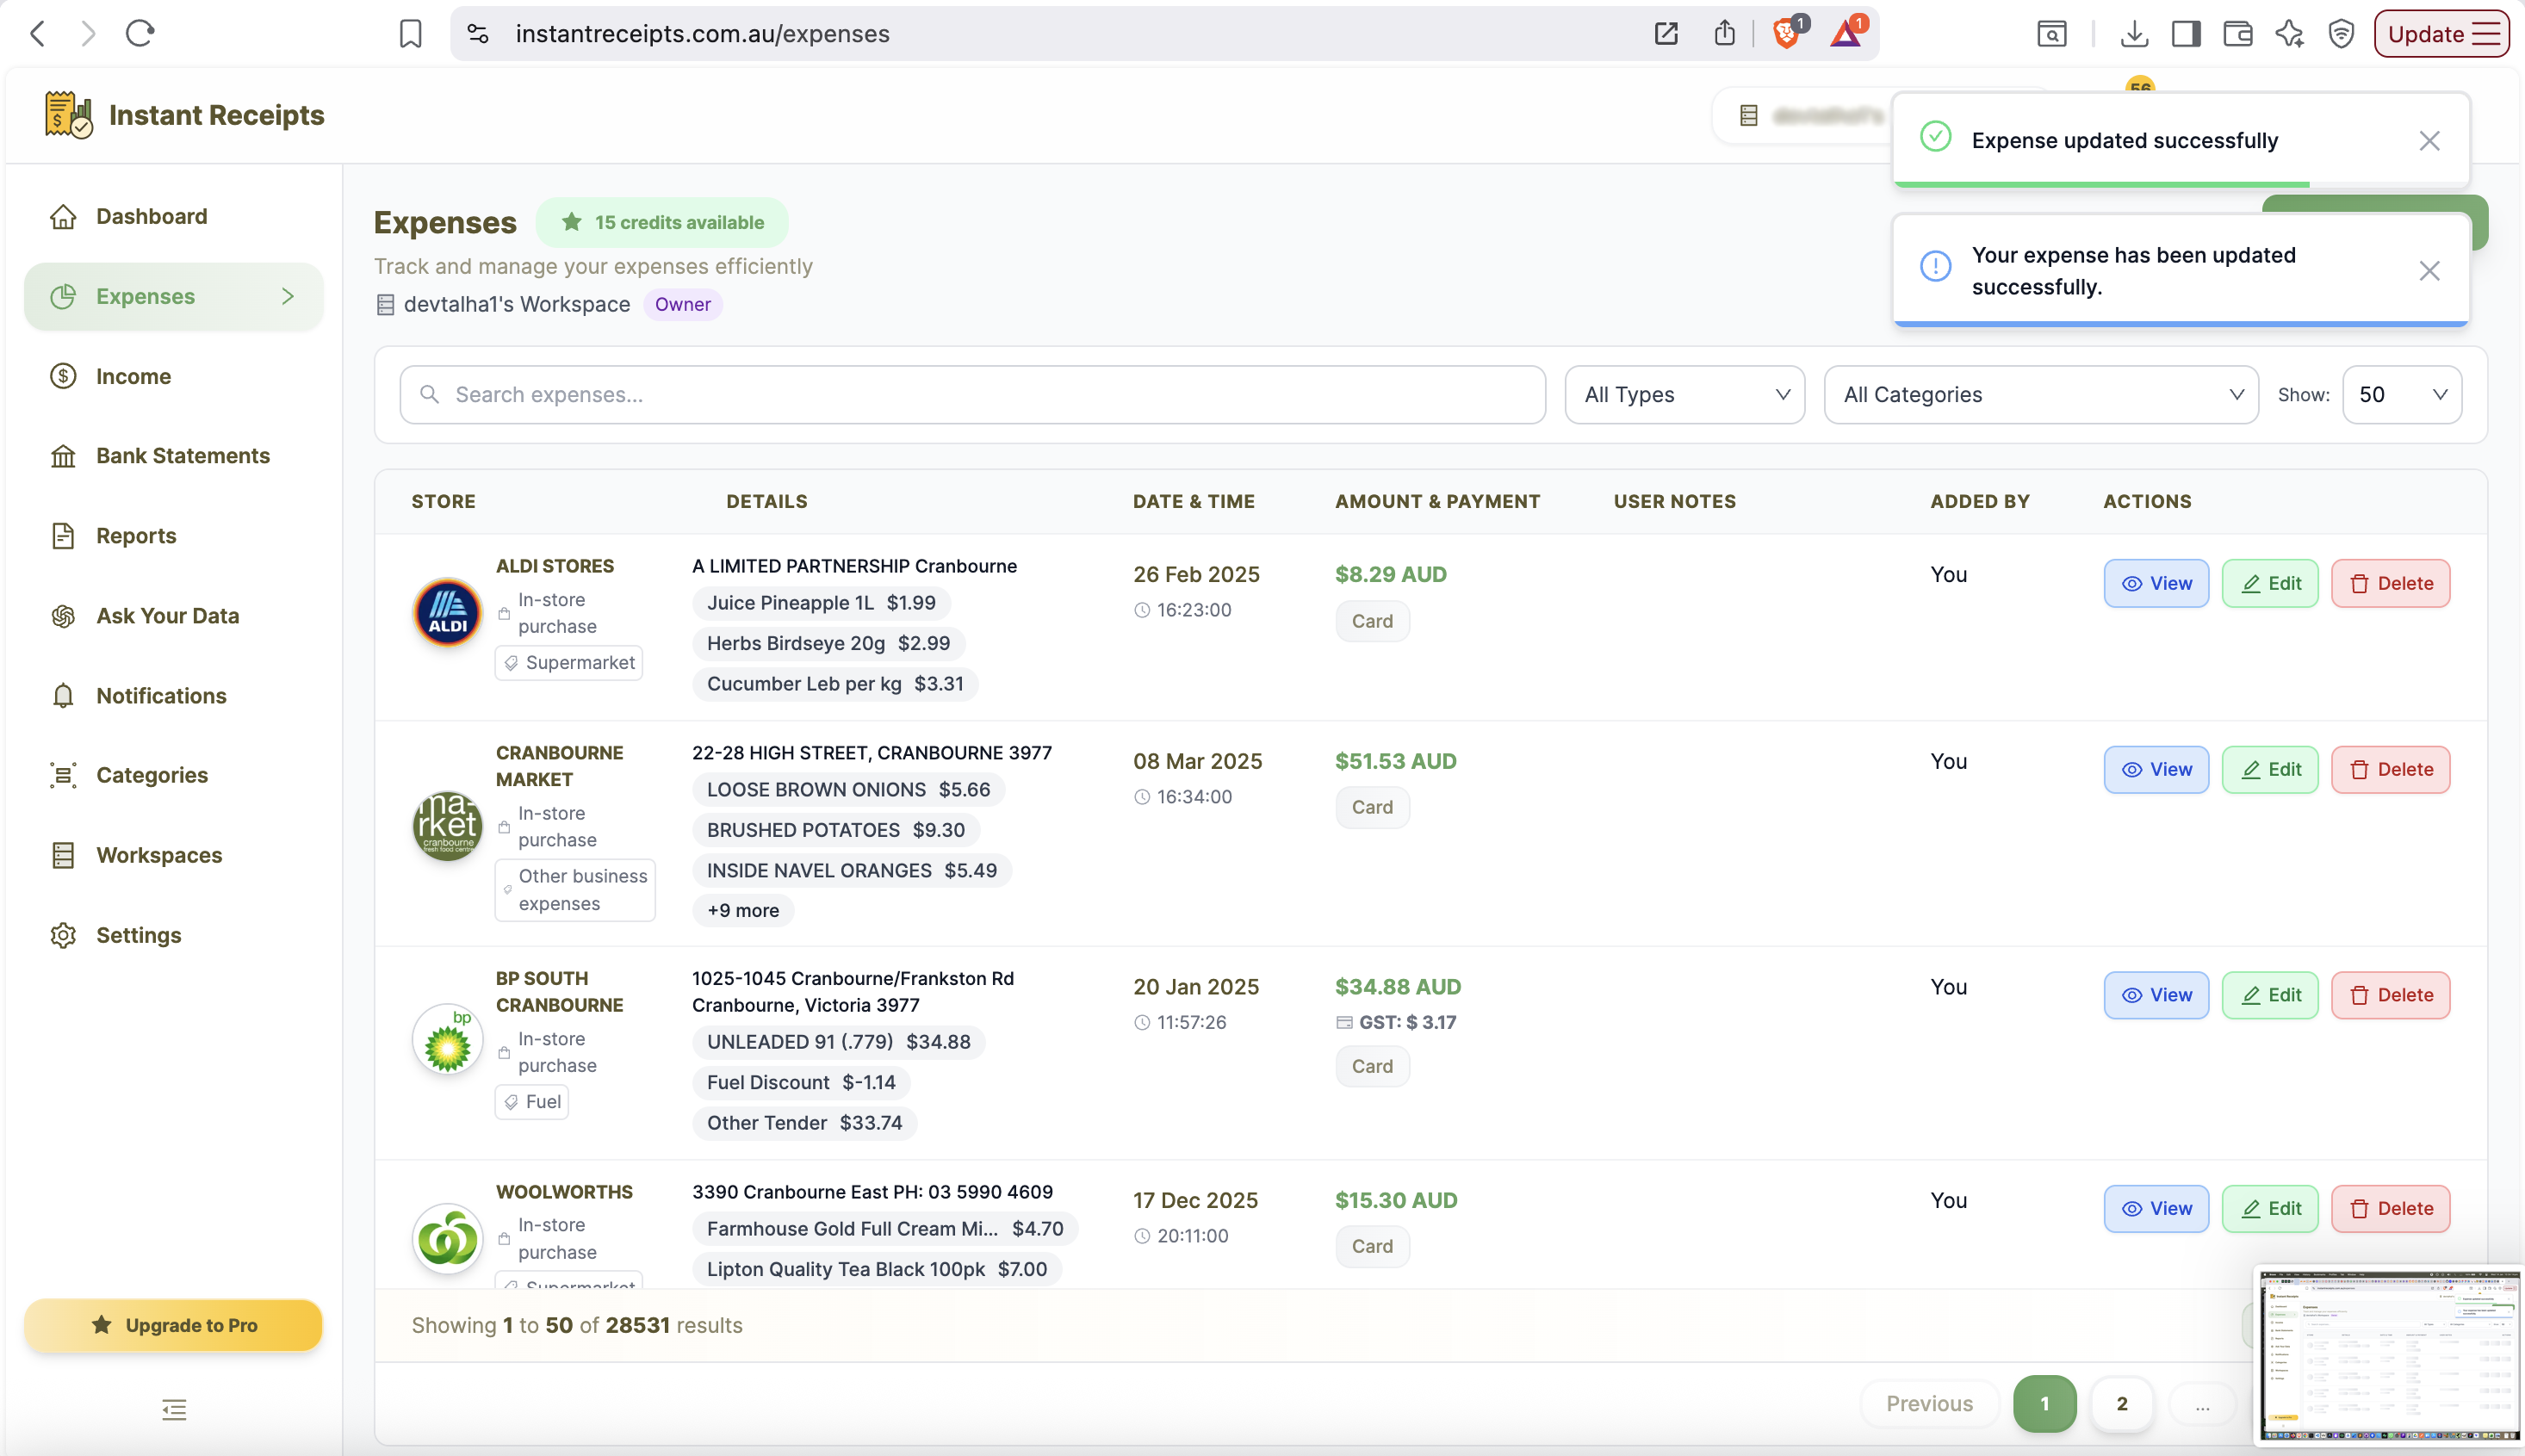
Now you are all done, you finalise the import by saving all changes. You will see the notification of “your expense has been updated” once the receipt is added successfully.
Need more details?
See How to Export Expenses for the complete workflow and all available options.