Export Expenses to Xero
Prerequisites
- ✓Before proceeding, please make sure you have uploaded expenses in the Expenses section
- ✓You must have an Xero account
- ✓You have access to the Reports page
Outcome
- Export your expenses in a format that Xero accepts, eliminating manual data entry.
- Quickly convert receipts and expenses into structured reports ready for accounting.
- Avoid mistakes caused by manual spreadsheet formatting.
Steps
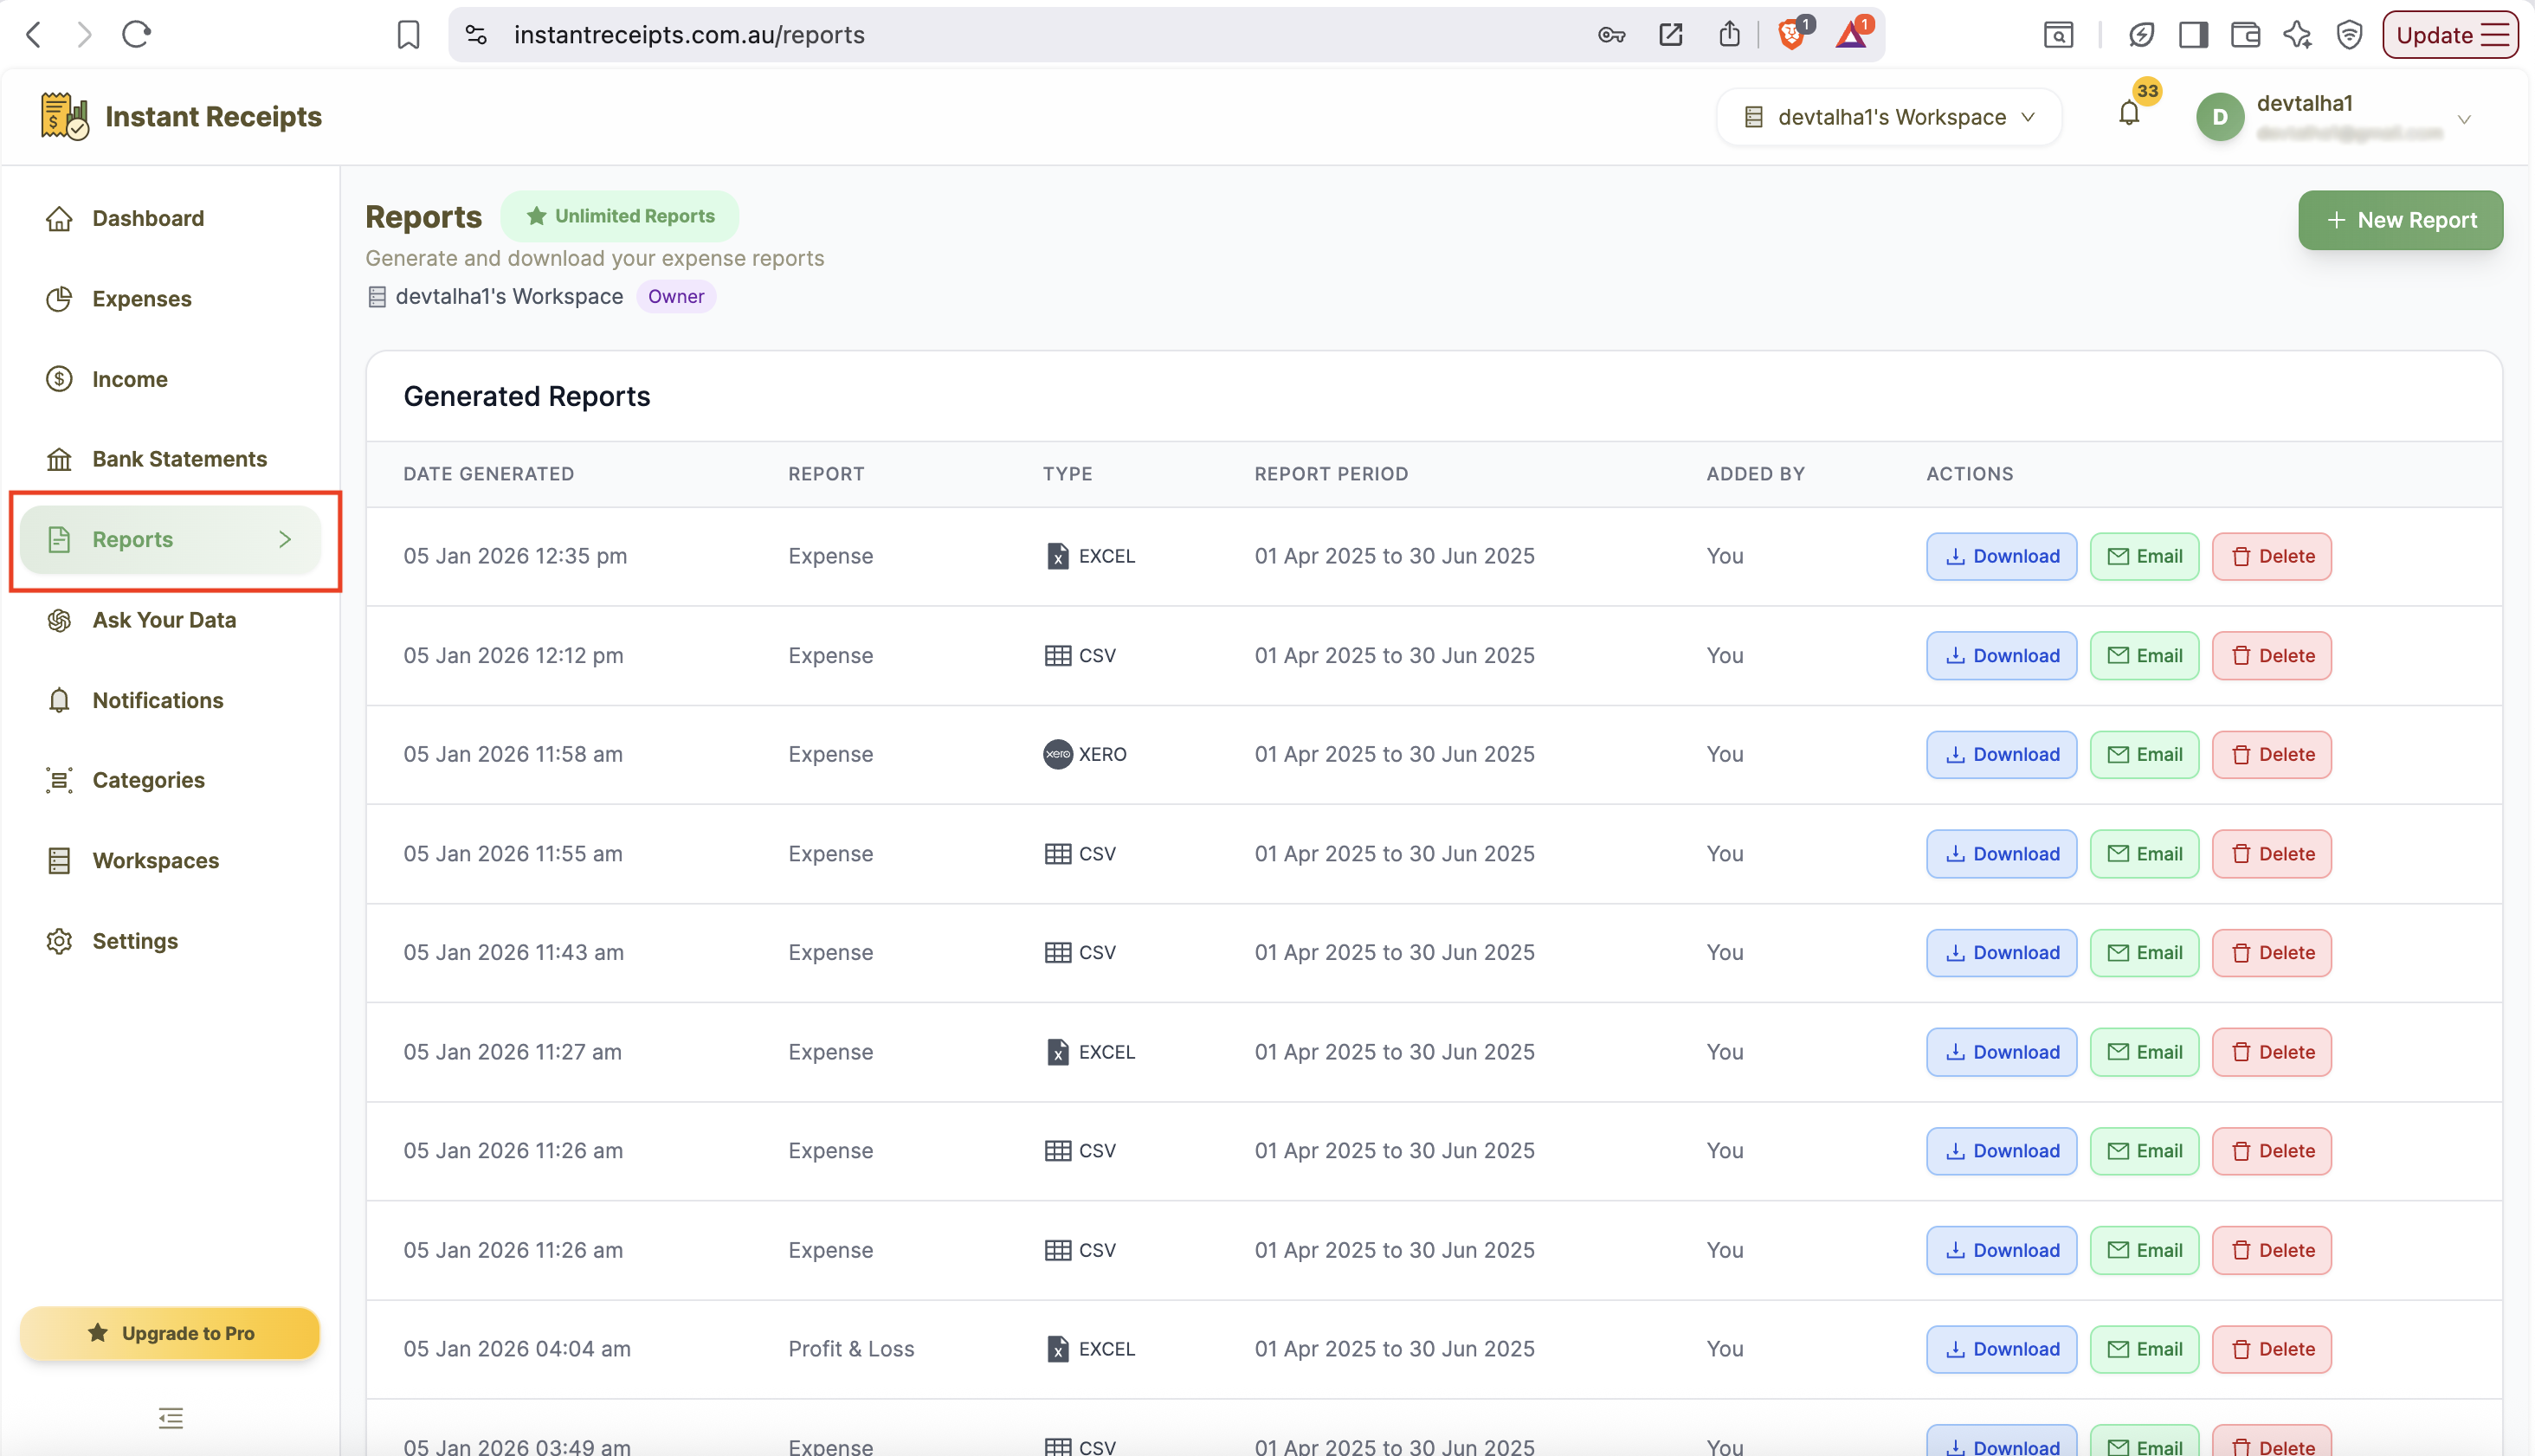
Navigate to Reports
Start by navigating to the report page. For this, go to your dashboard and click on reports. You will find this in the main navigation section. When the report page opens, you will see four tabs. These will include: Expense Reports Bank Statement Reports Income Reports Tax & Compliance.
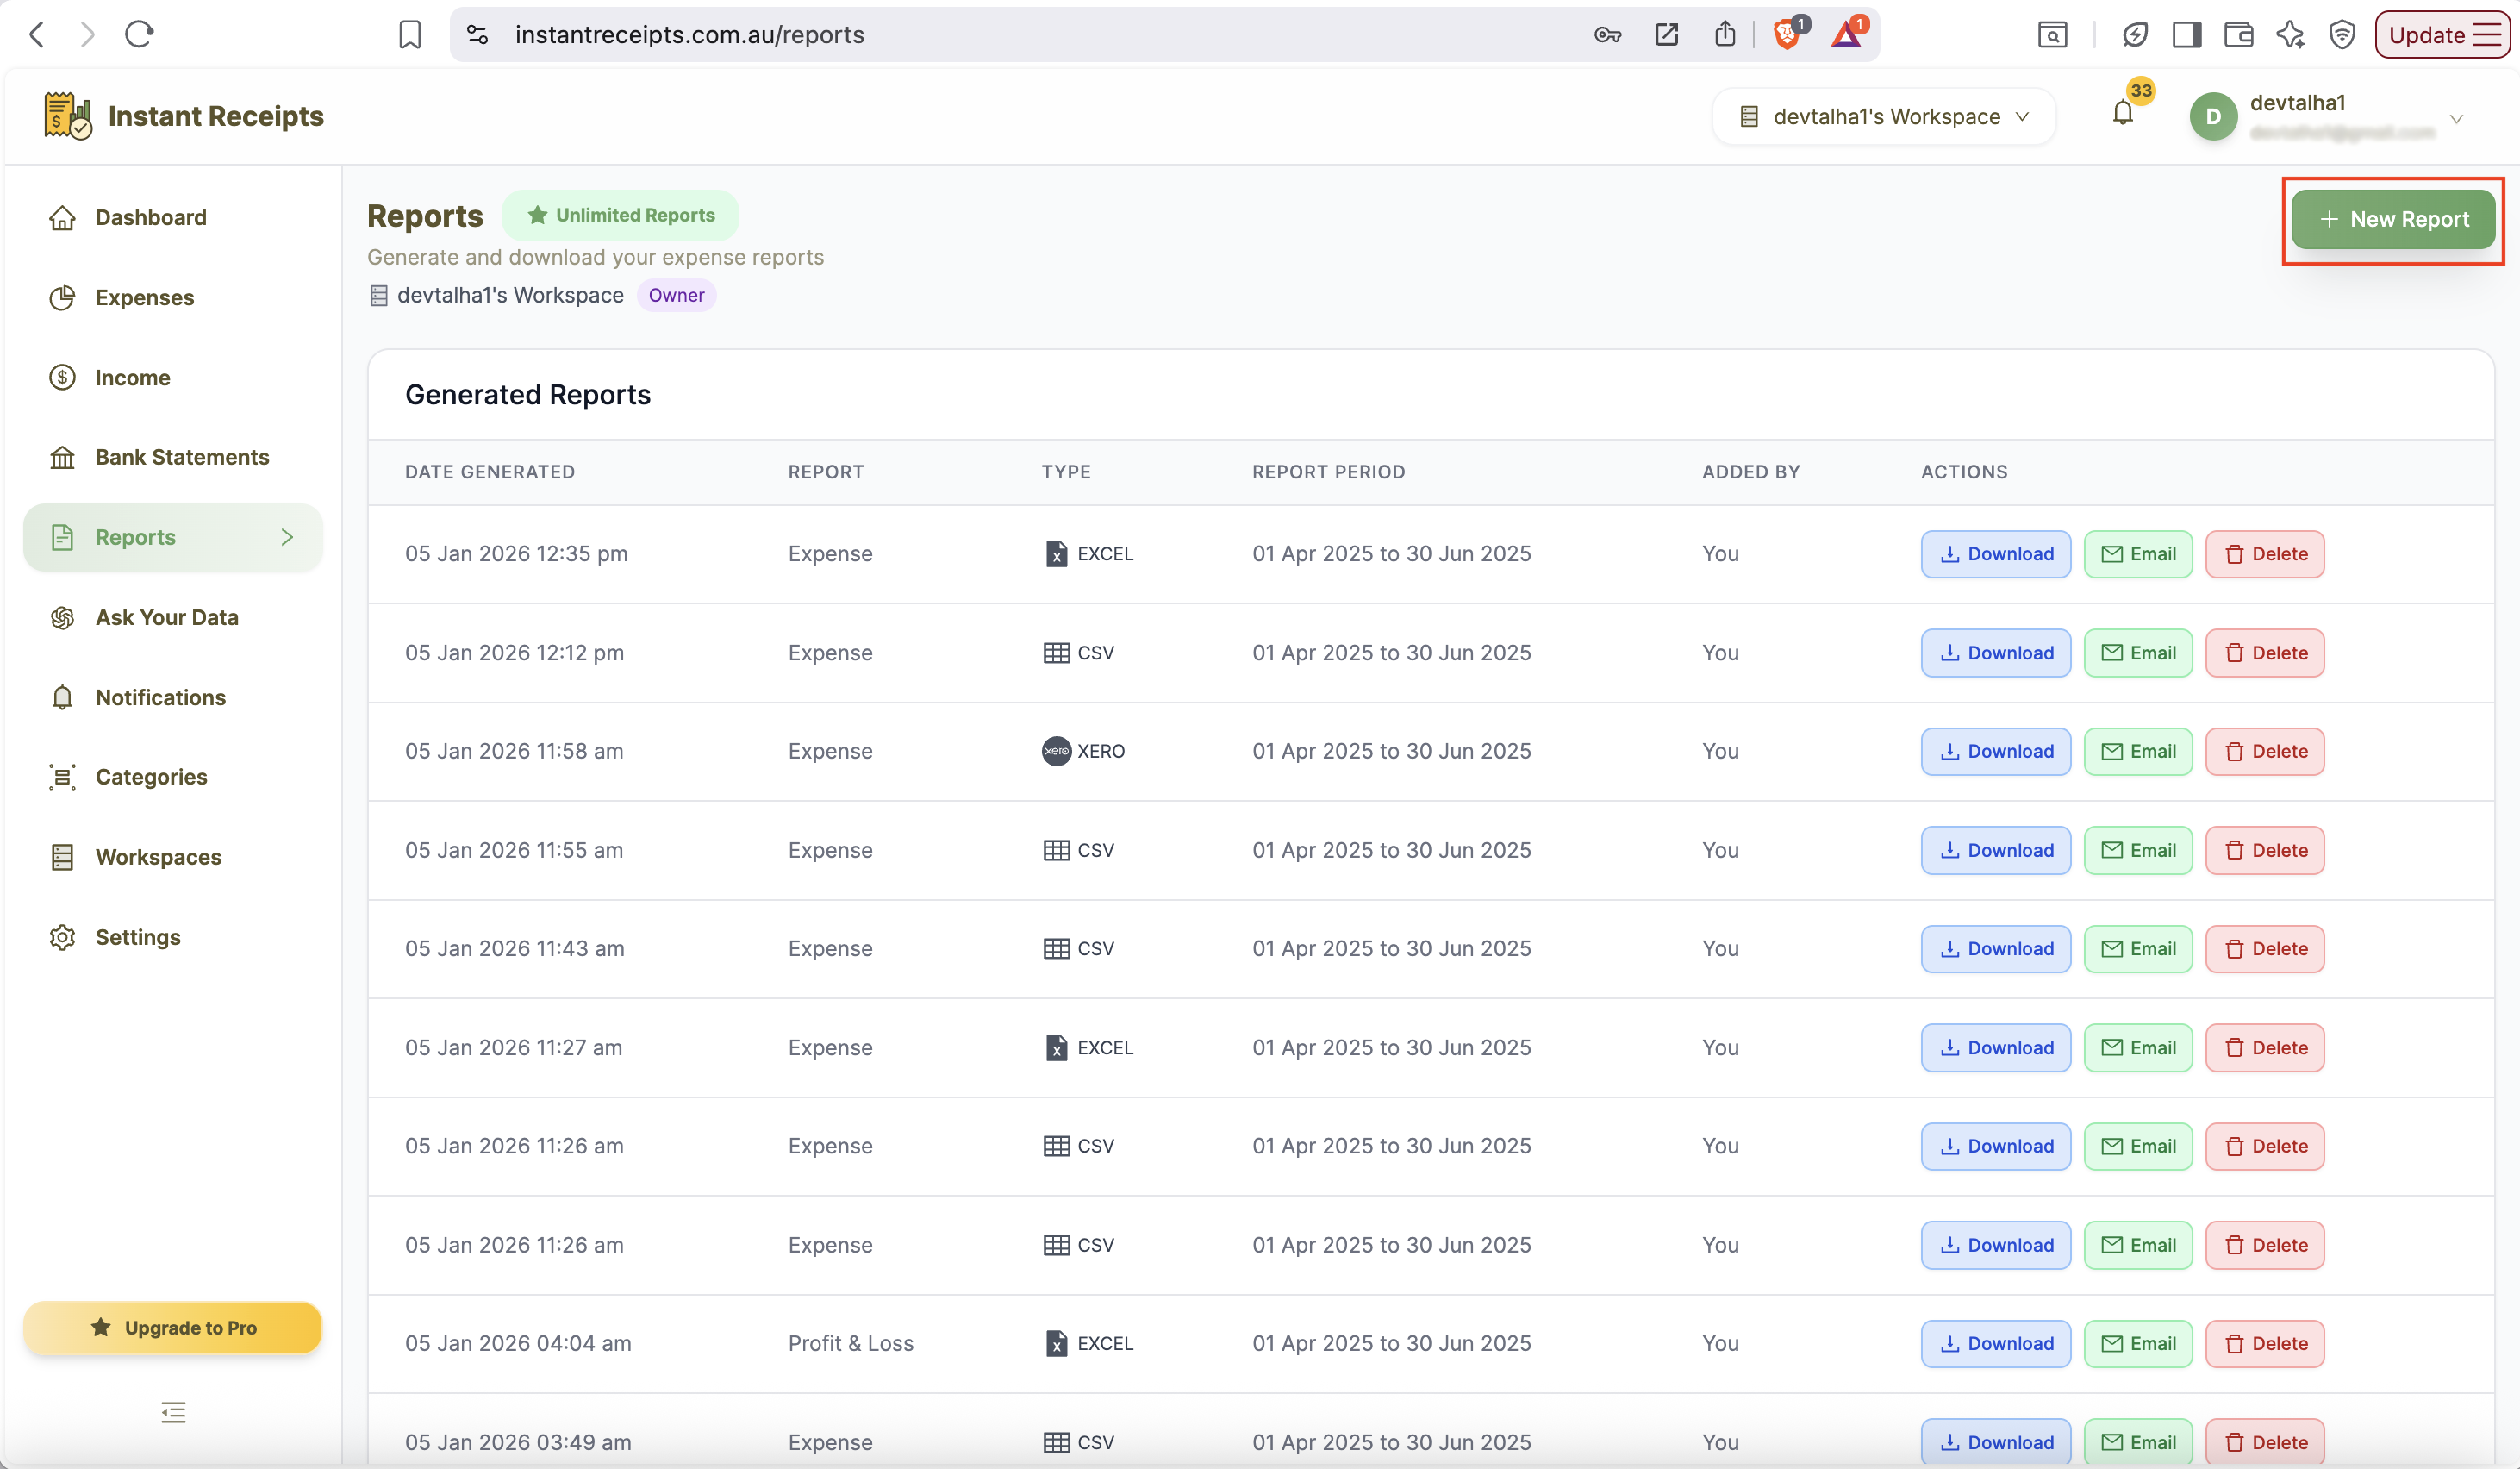
Click New Report
Now you will find a green button for new reports on the top right corner of this page. You can click on this to start creating a new report. After clicking on this button, a new report generation panel will appear. It will show all available options for customisation of your export.
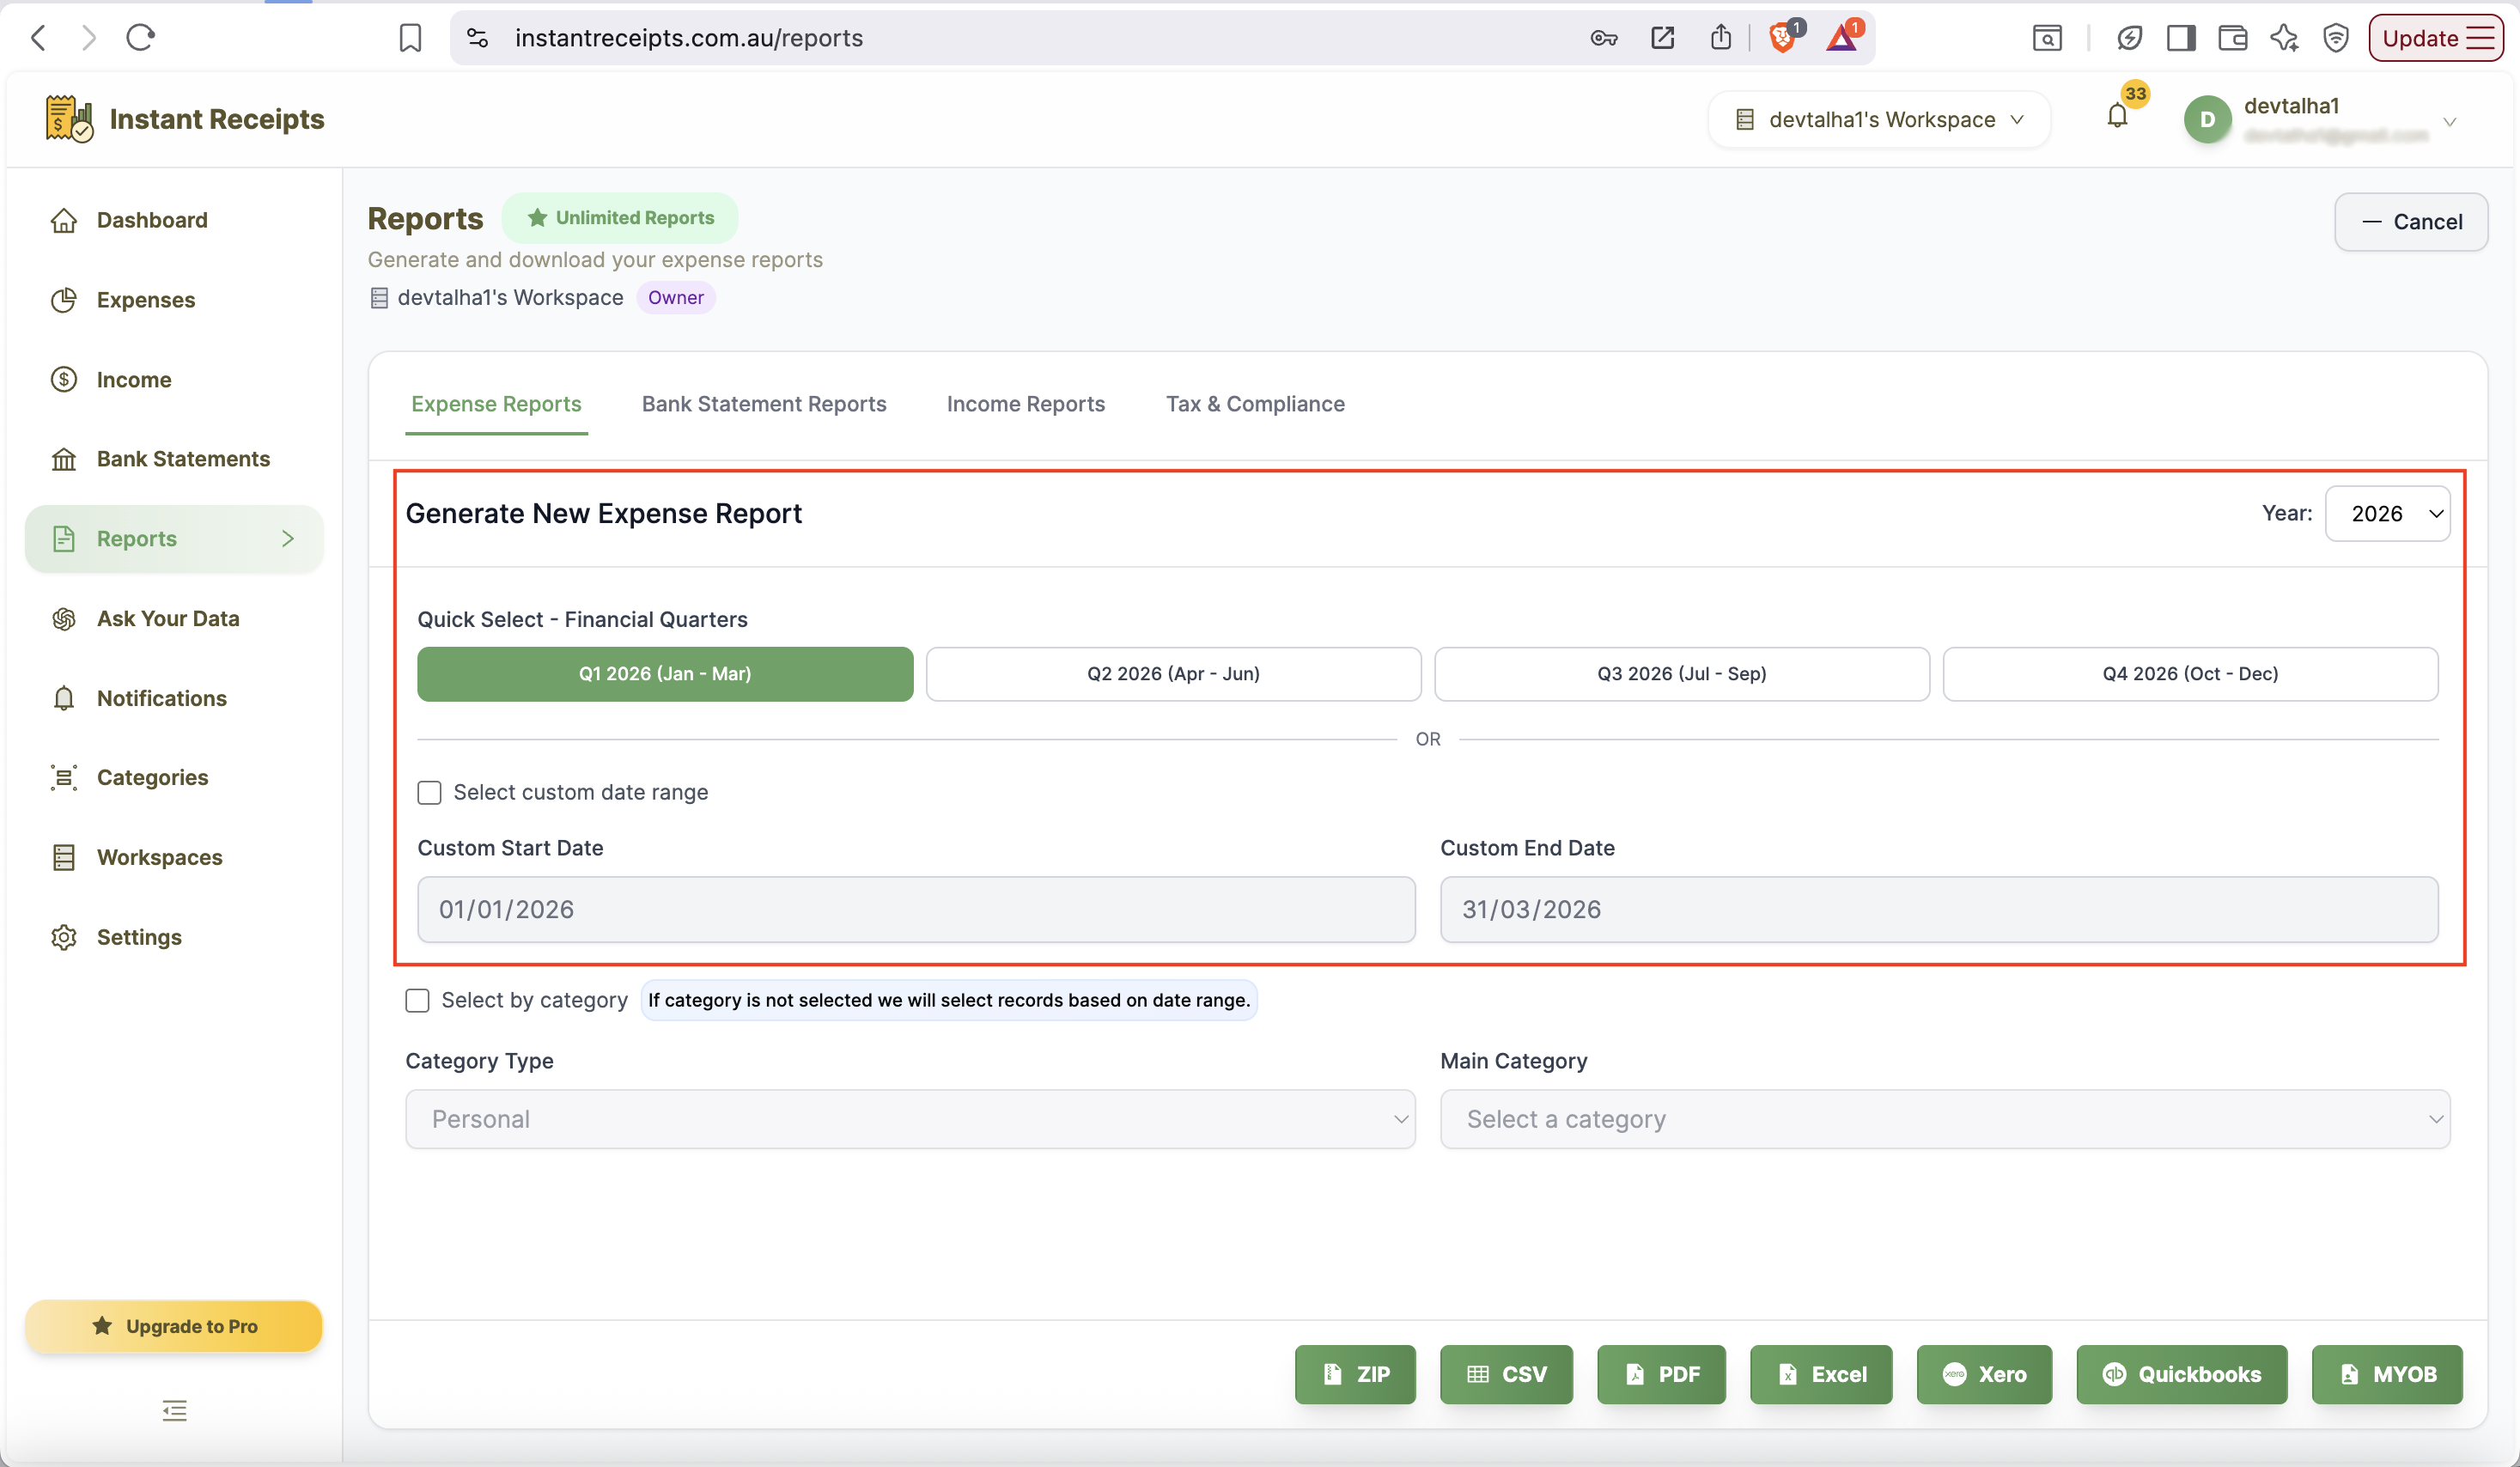
Select Your Date Range
From this new panel, you can select the date range for which you need to export your expenses. There are two ways for this: the first one is Quick Select financial quarters (Q1-Q4). Secondly, you can enter a custom date range manually. If you don't select either, all existing expense records will be included.
Filter by Category (Optional)
Another incredible feature that you can find here is that you can apply a filter. You can select your expense type from the category section, either personal or business. When you select the specific date range and category on those expenses in that duration and category will export.
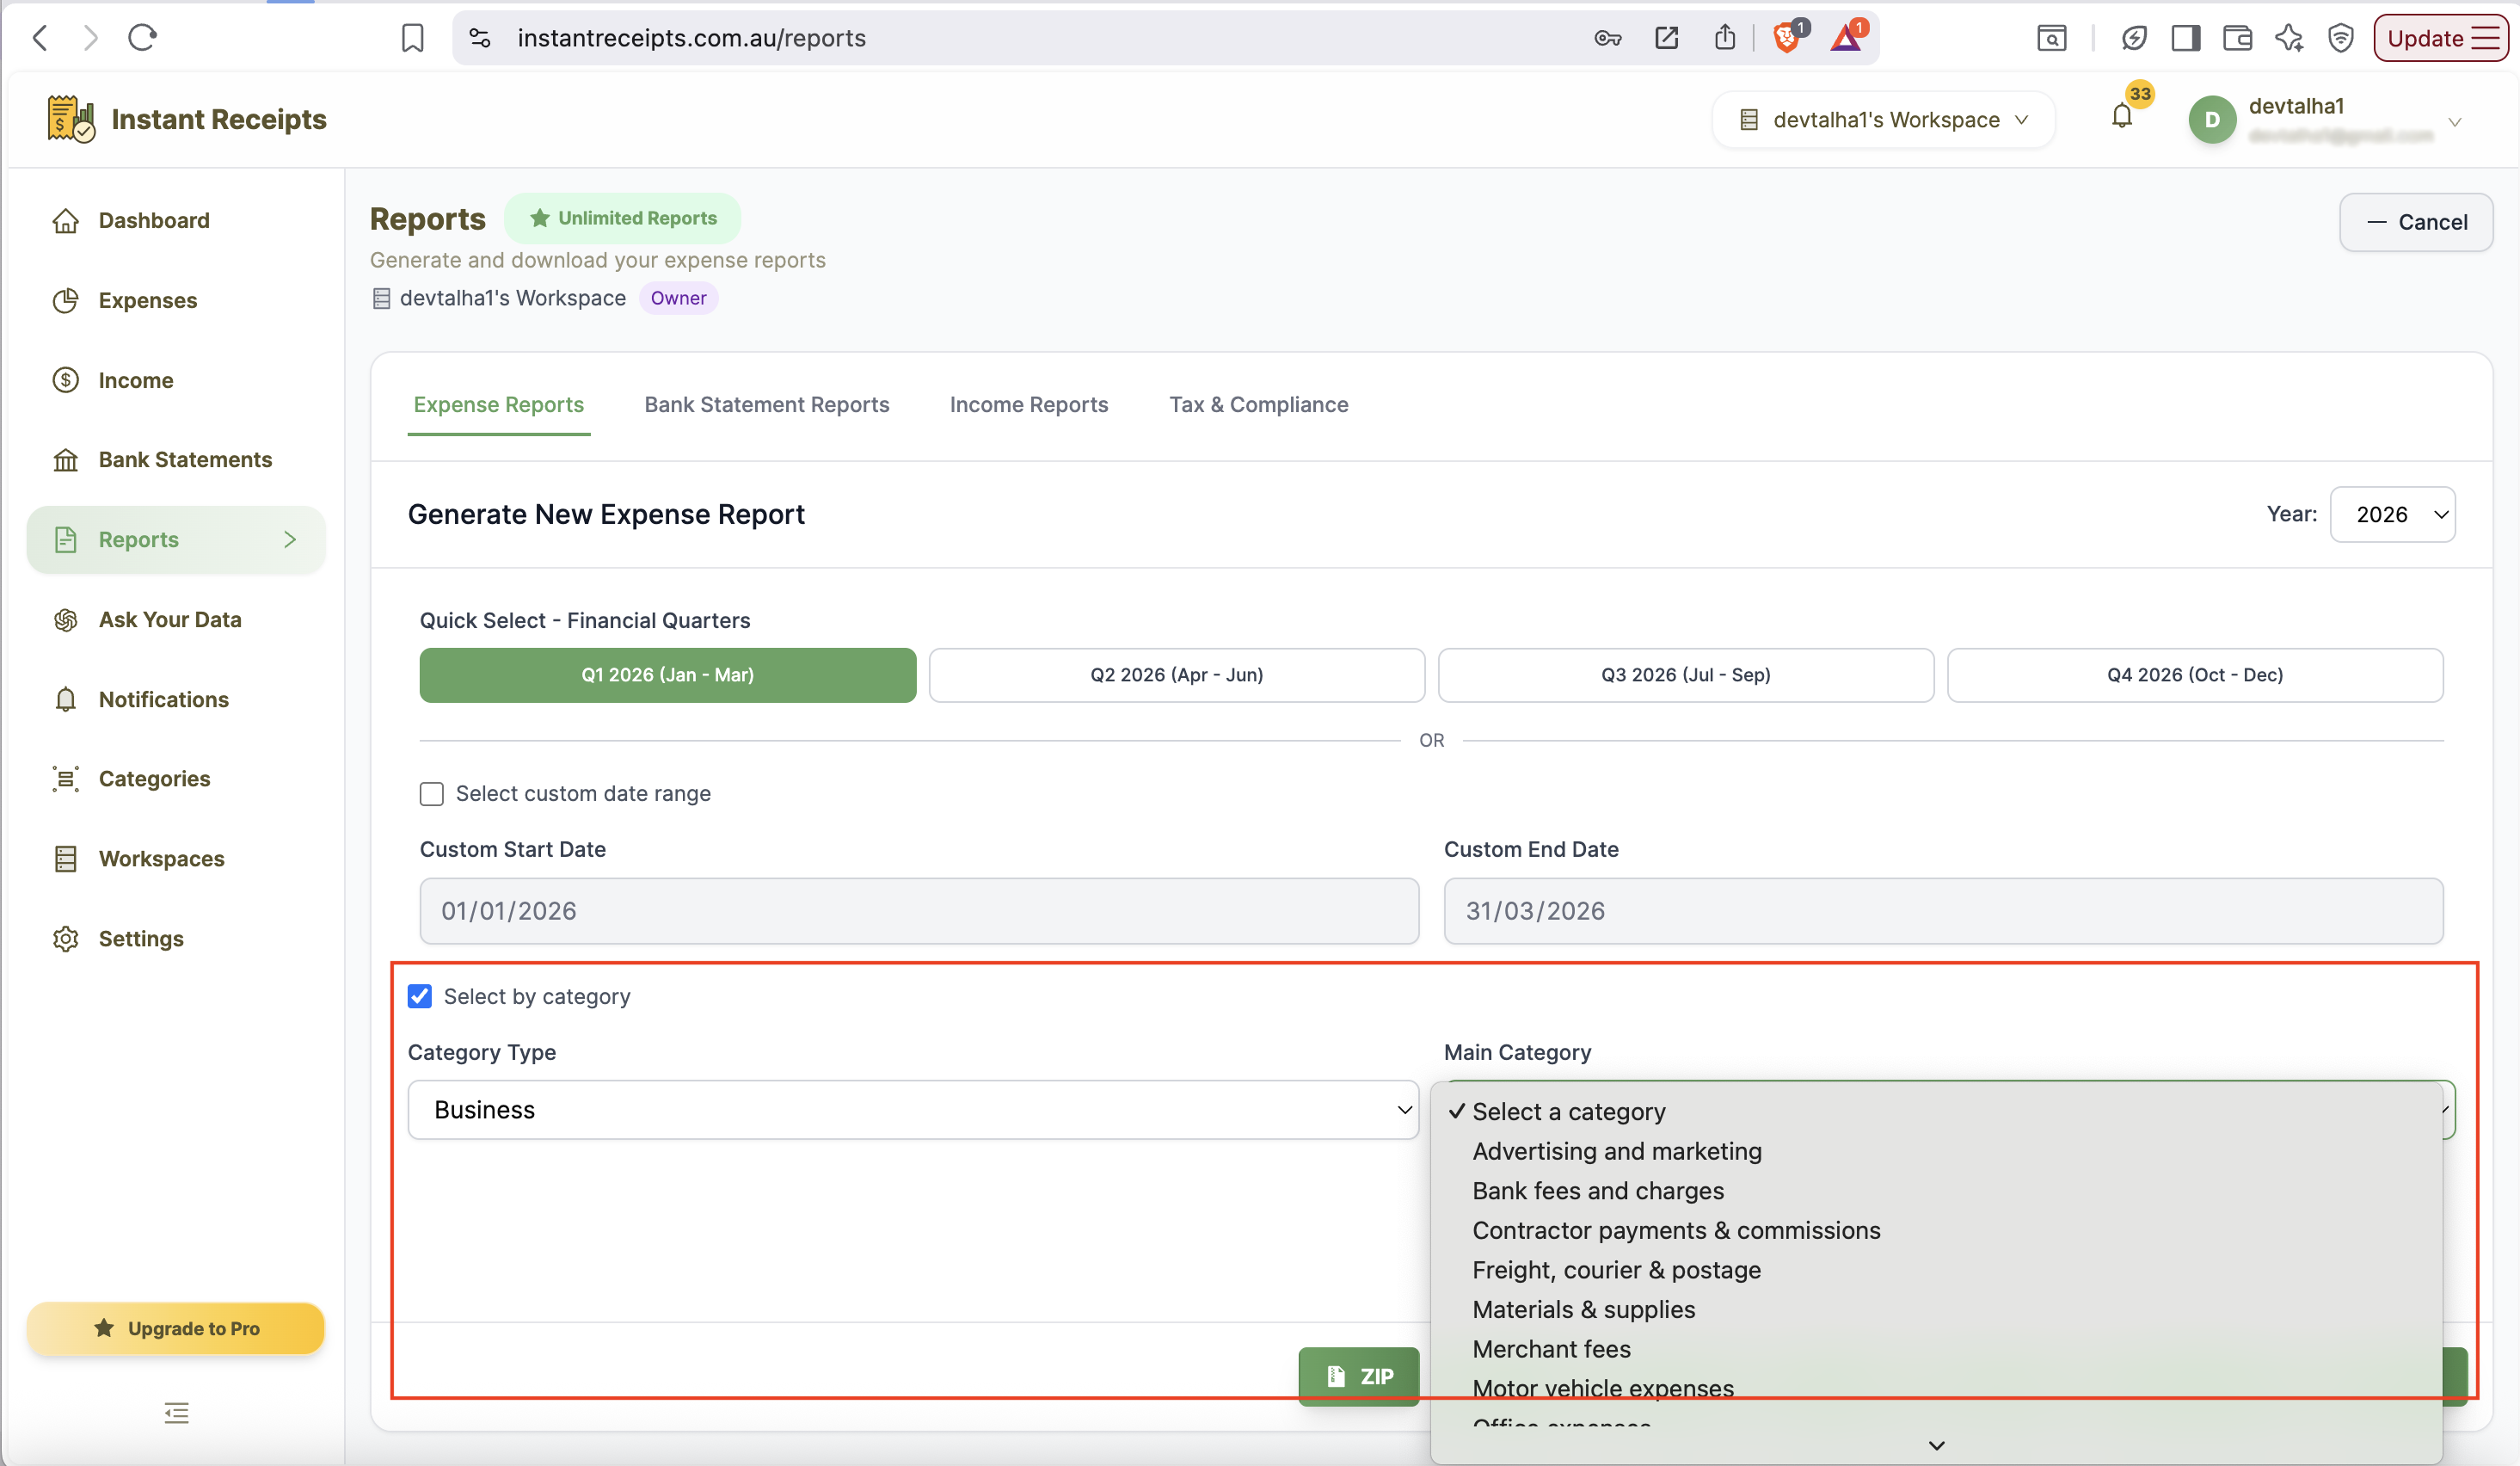
Click Xero Button
Once you are done with the category and date range of required data in the expense report, you can locate and click the Xero export button at the bottom of the report generation panel.
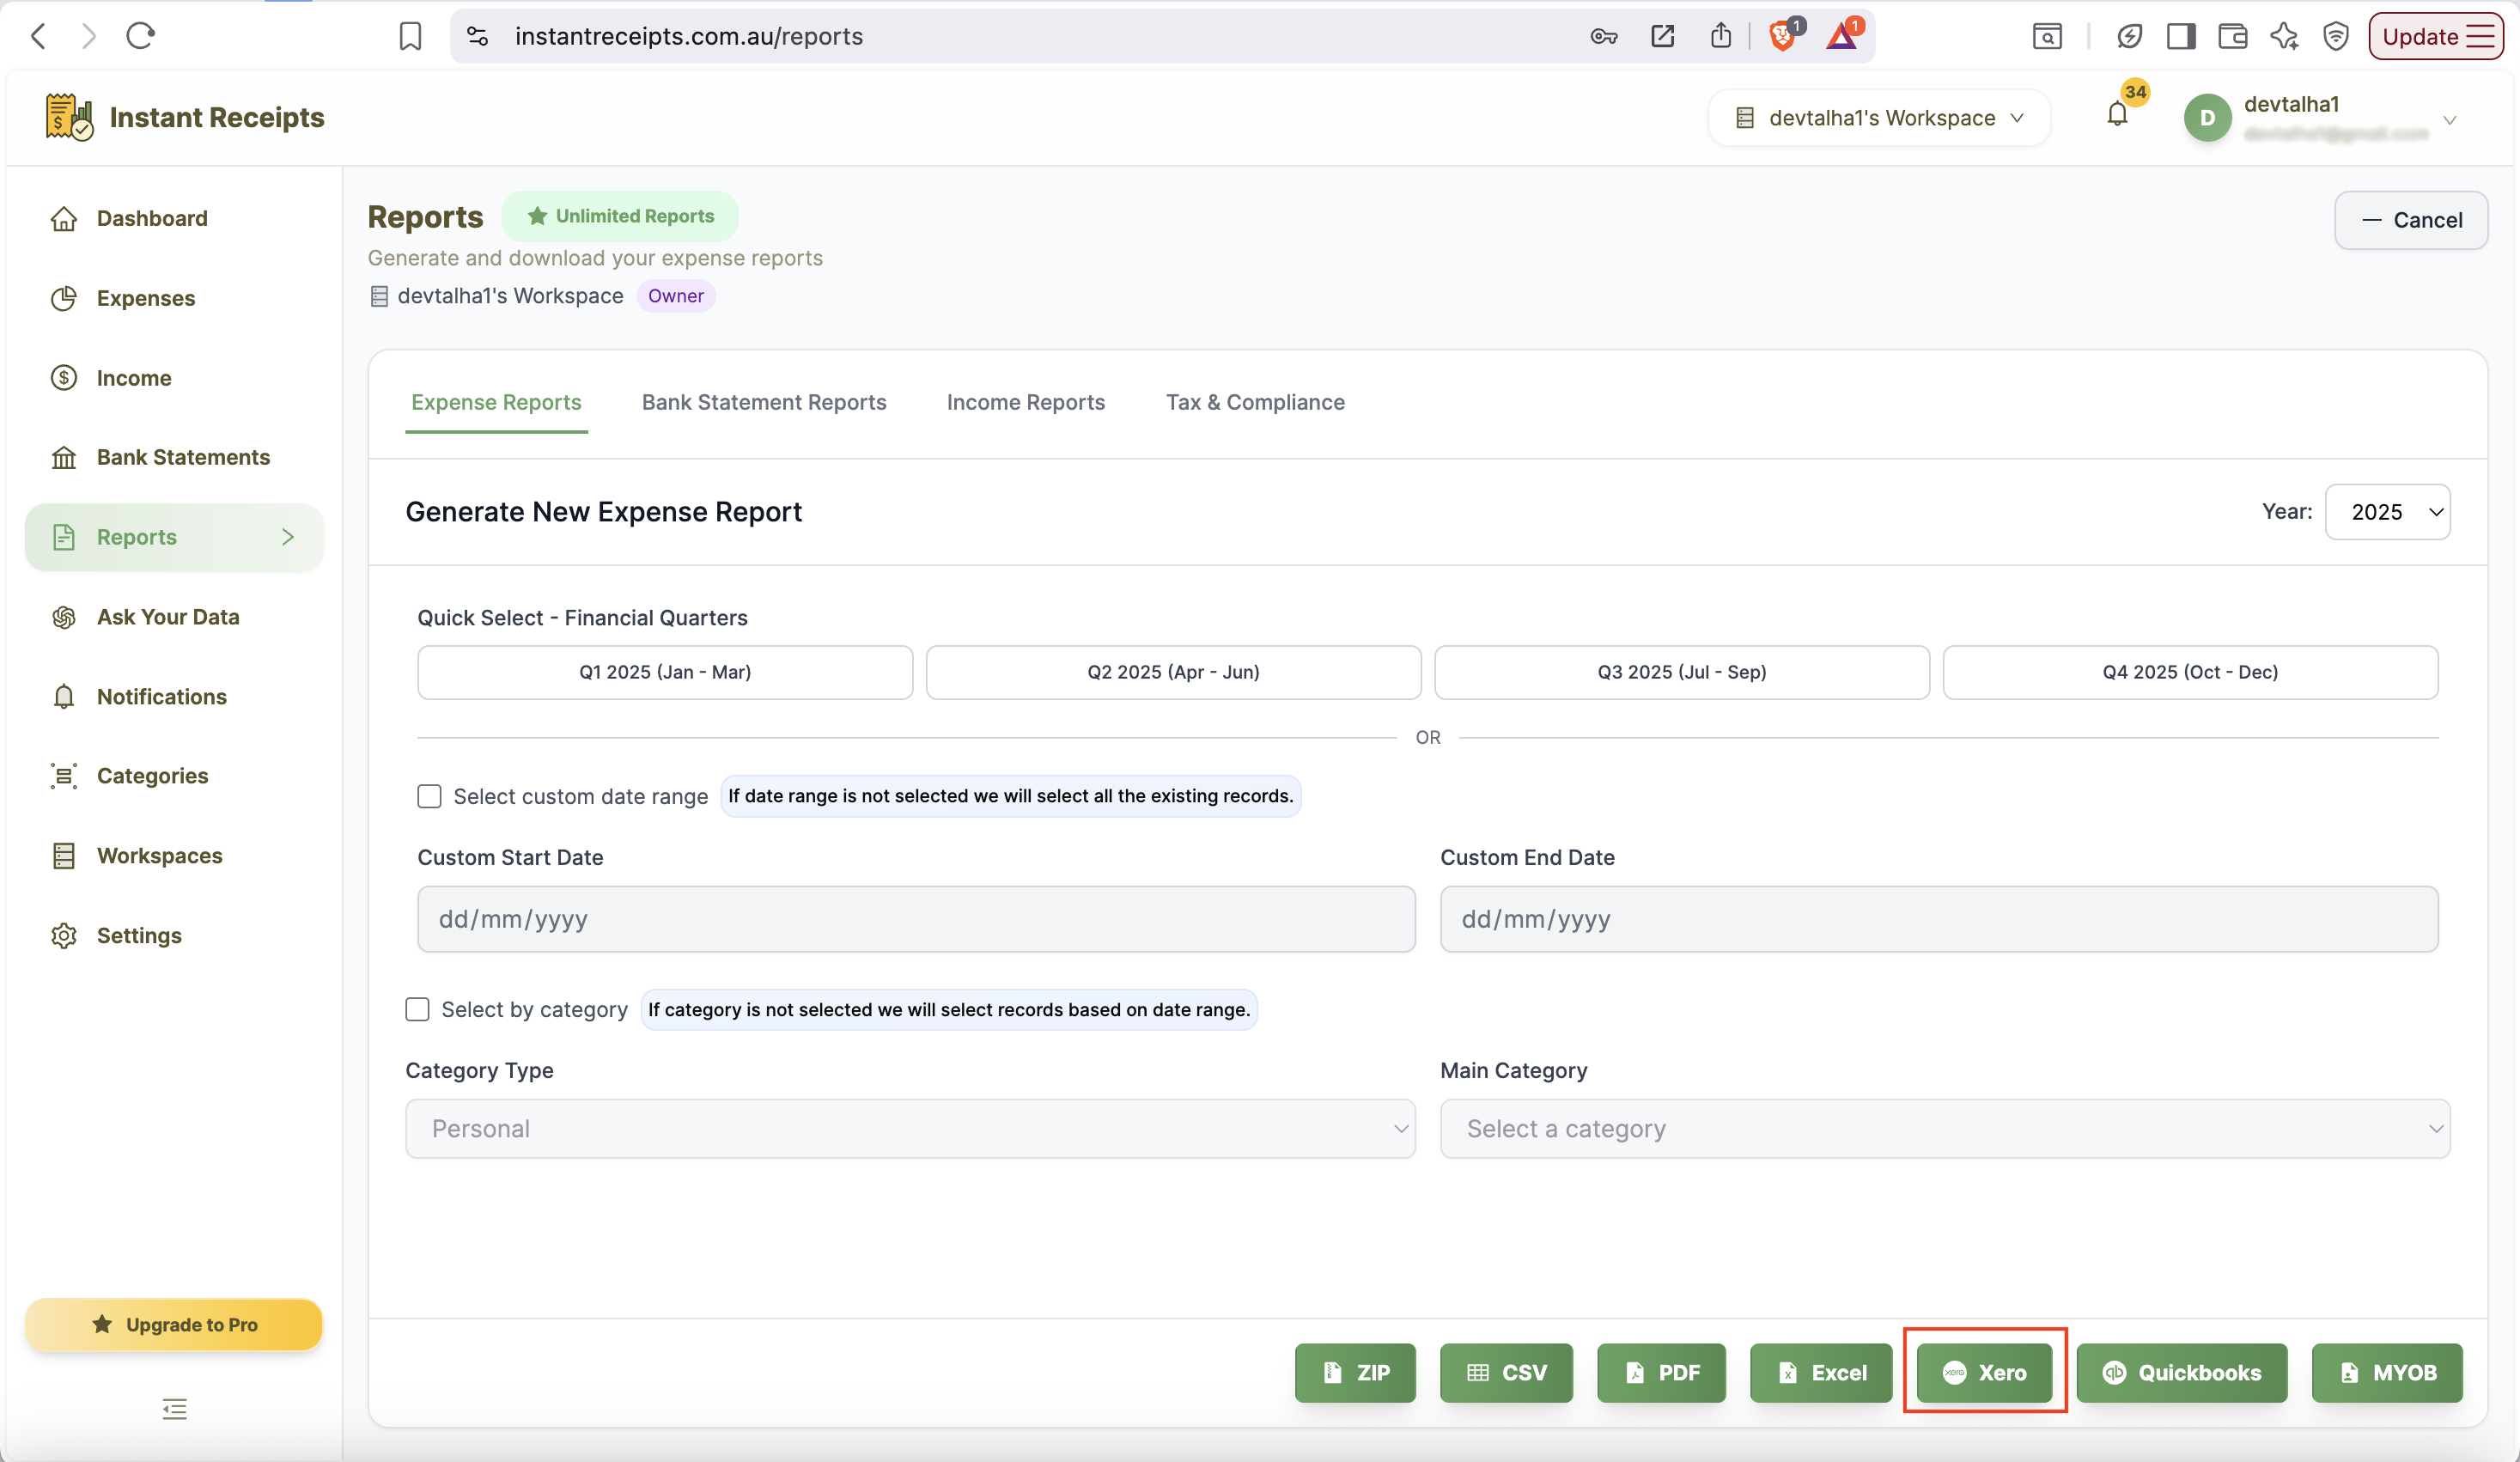
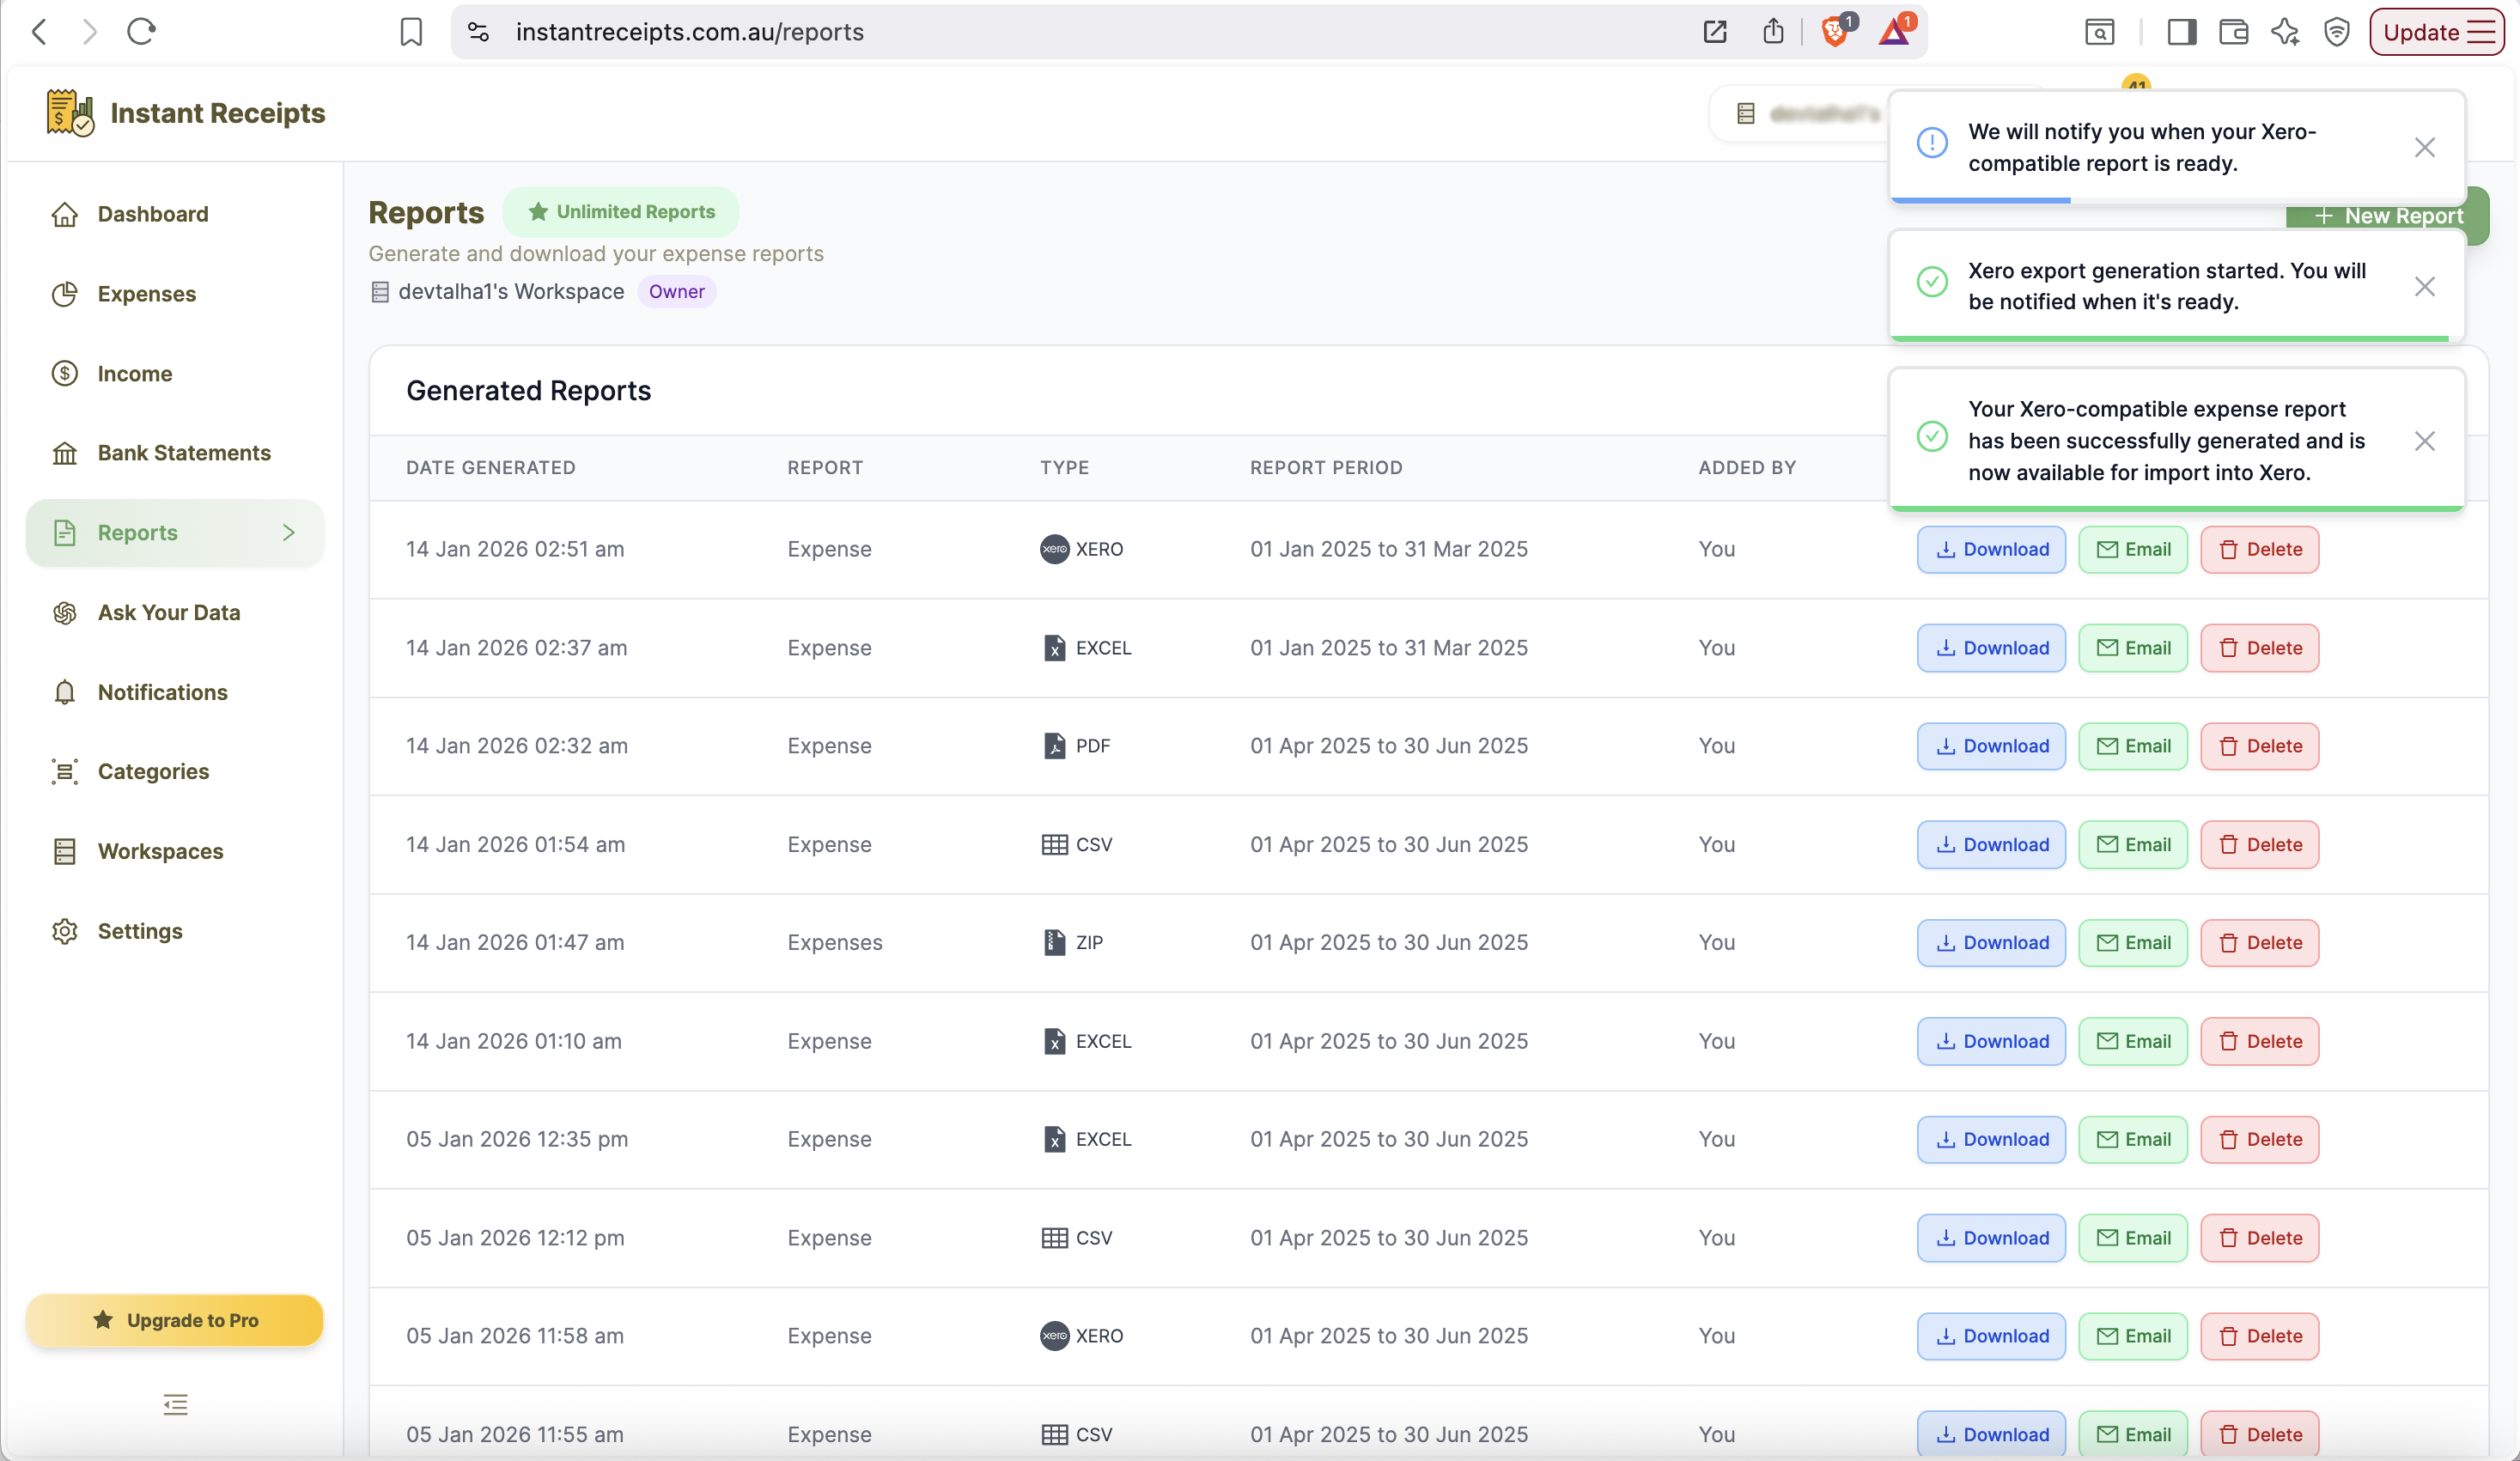
Import into Xero
Now you can download the file and import it directly into your Xero account.
Login to Xero and Access Import
Now go to Xero.com and access your account by logging in. After you log in, go to the bills import section on your dashboard. Important Note: This guide shows how to import CSV files into Xero. Screenshots are used for educational purposes only. We are not affiliated with or endorsed by Xero Limited. Xero is a registered trademark of Xero Limited.
This guide shows how to import CSV files into Xero. Screenshots are used for educational purposes only. We are not affiliated with or endorsed by Xero Limited. Xero is a registered trademark of Xero Limited.
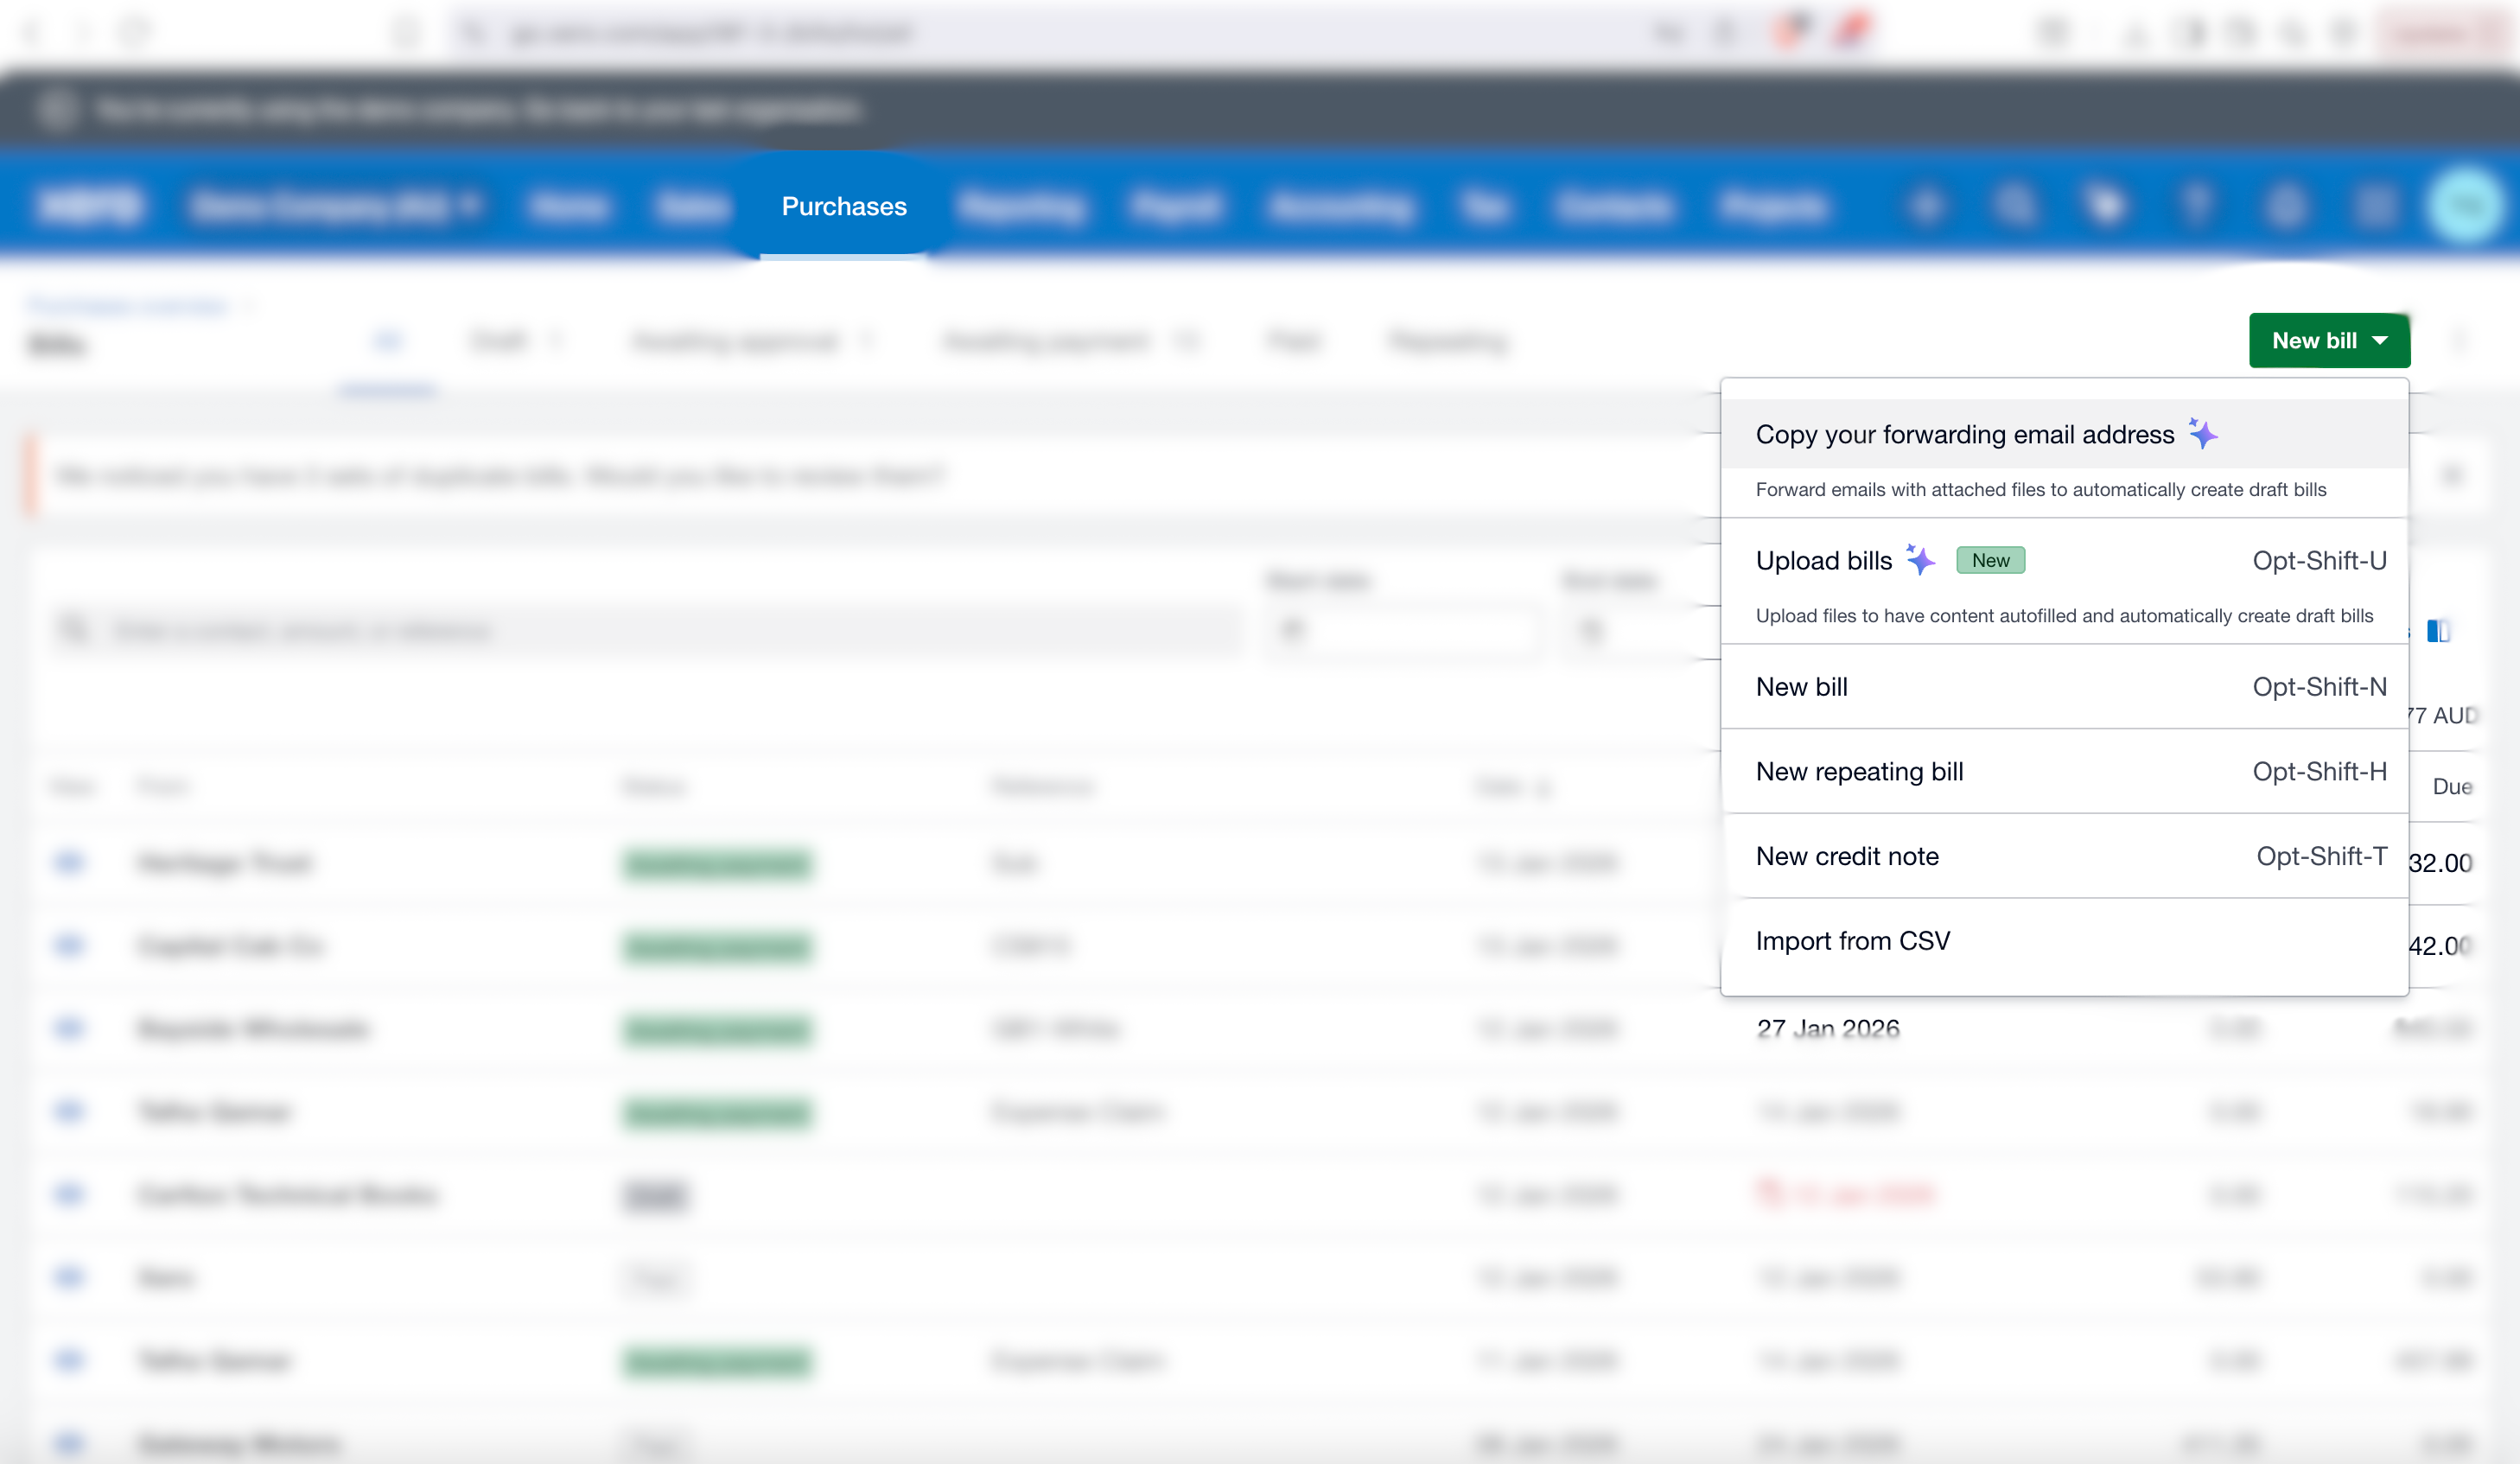
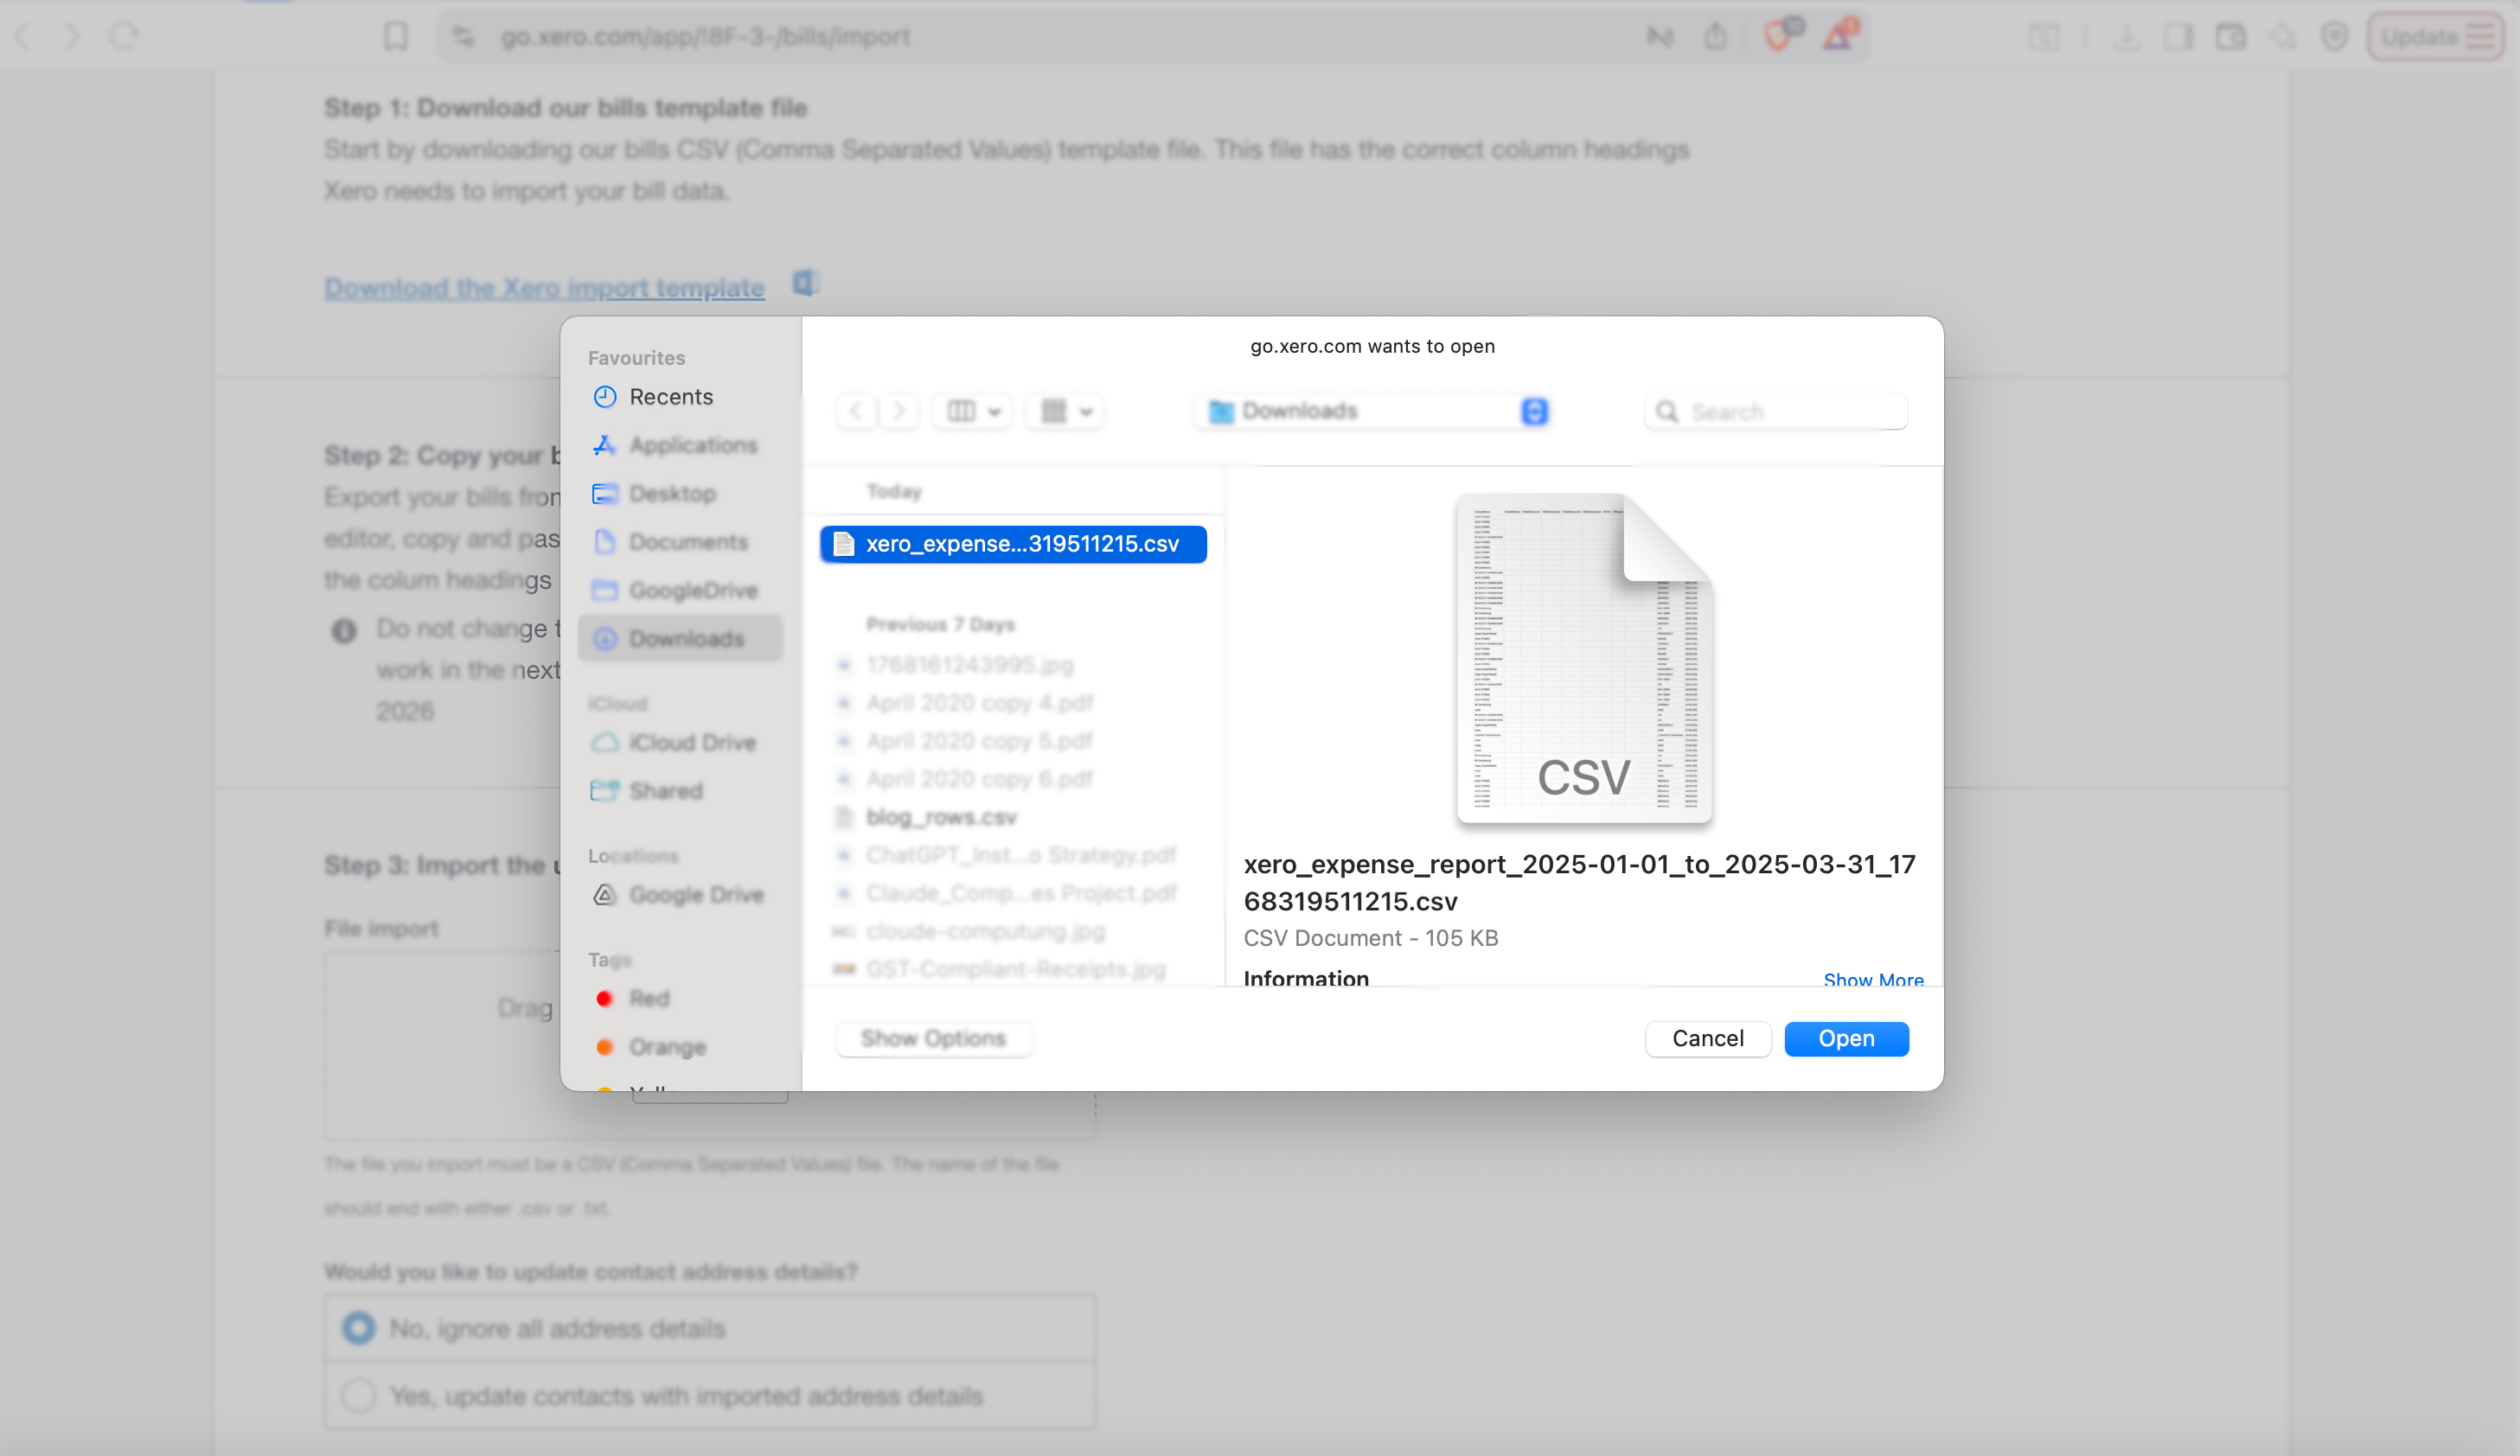
Select Your CSV File
In the import section, upload the CSV file of your expense report that you exported from InstantReceipt.
Complete the Import
Once you have selected the file, you can review it and finalise the import of your expenses into Xero.
Verify Expenses in Xero
After you have imported the file into Xero, you can check that all your expenses have been imported into your Xero account. You can do this by reviewing your expenses section in Xero.
Troubleshooting
Import fails in Xero.
If you see the notification "import fail in Xero", you need to check that your expense categories match your Xero chart of accounts. If the format is not recognised or you are unable to import the expenses, please contact Xero's support team and address the issue.
Amounts are incorrect after import.
If the expense amounts appear to be incorrect after you imported your data, you may have set different currency settings in Xero than Instant Receipt. To resolve this, please verify that your currency settings match between Instant Receipts and Xero.
Some expenses did not import.
If not all of your expenses were imported into Xero, check the import log in Xero for errors. Some expenses may have missing required fields.
Need more details?
See How to Import Expenses for the complete workflow and all available options.