


How to Migrate from Expensify to Instant Receipts
Prerequisites
- ✓You are on a Pro or yearly plan
- ✓An Expensify CSV export (and a receipts ZIP if you want the receipts attached)
- ✓Enough scan credits (1 per photo, 1 per PDF page)
Outcome
- Bring your Expensify expenses and receipts across without retyping
- Check every receipt against your Expensify data before it is added
- Undo the whole import if something looks wrong
Steps
Export your expenses as a CSV
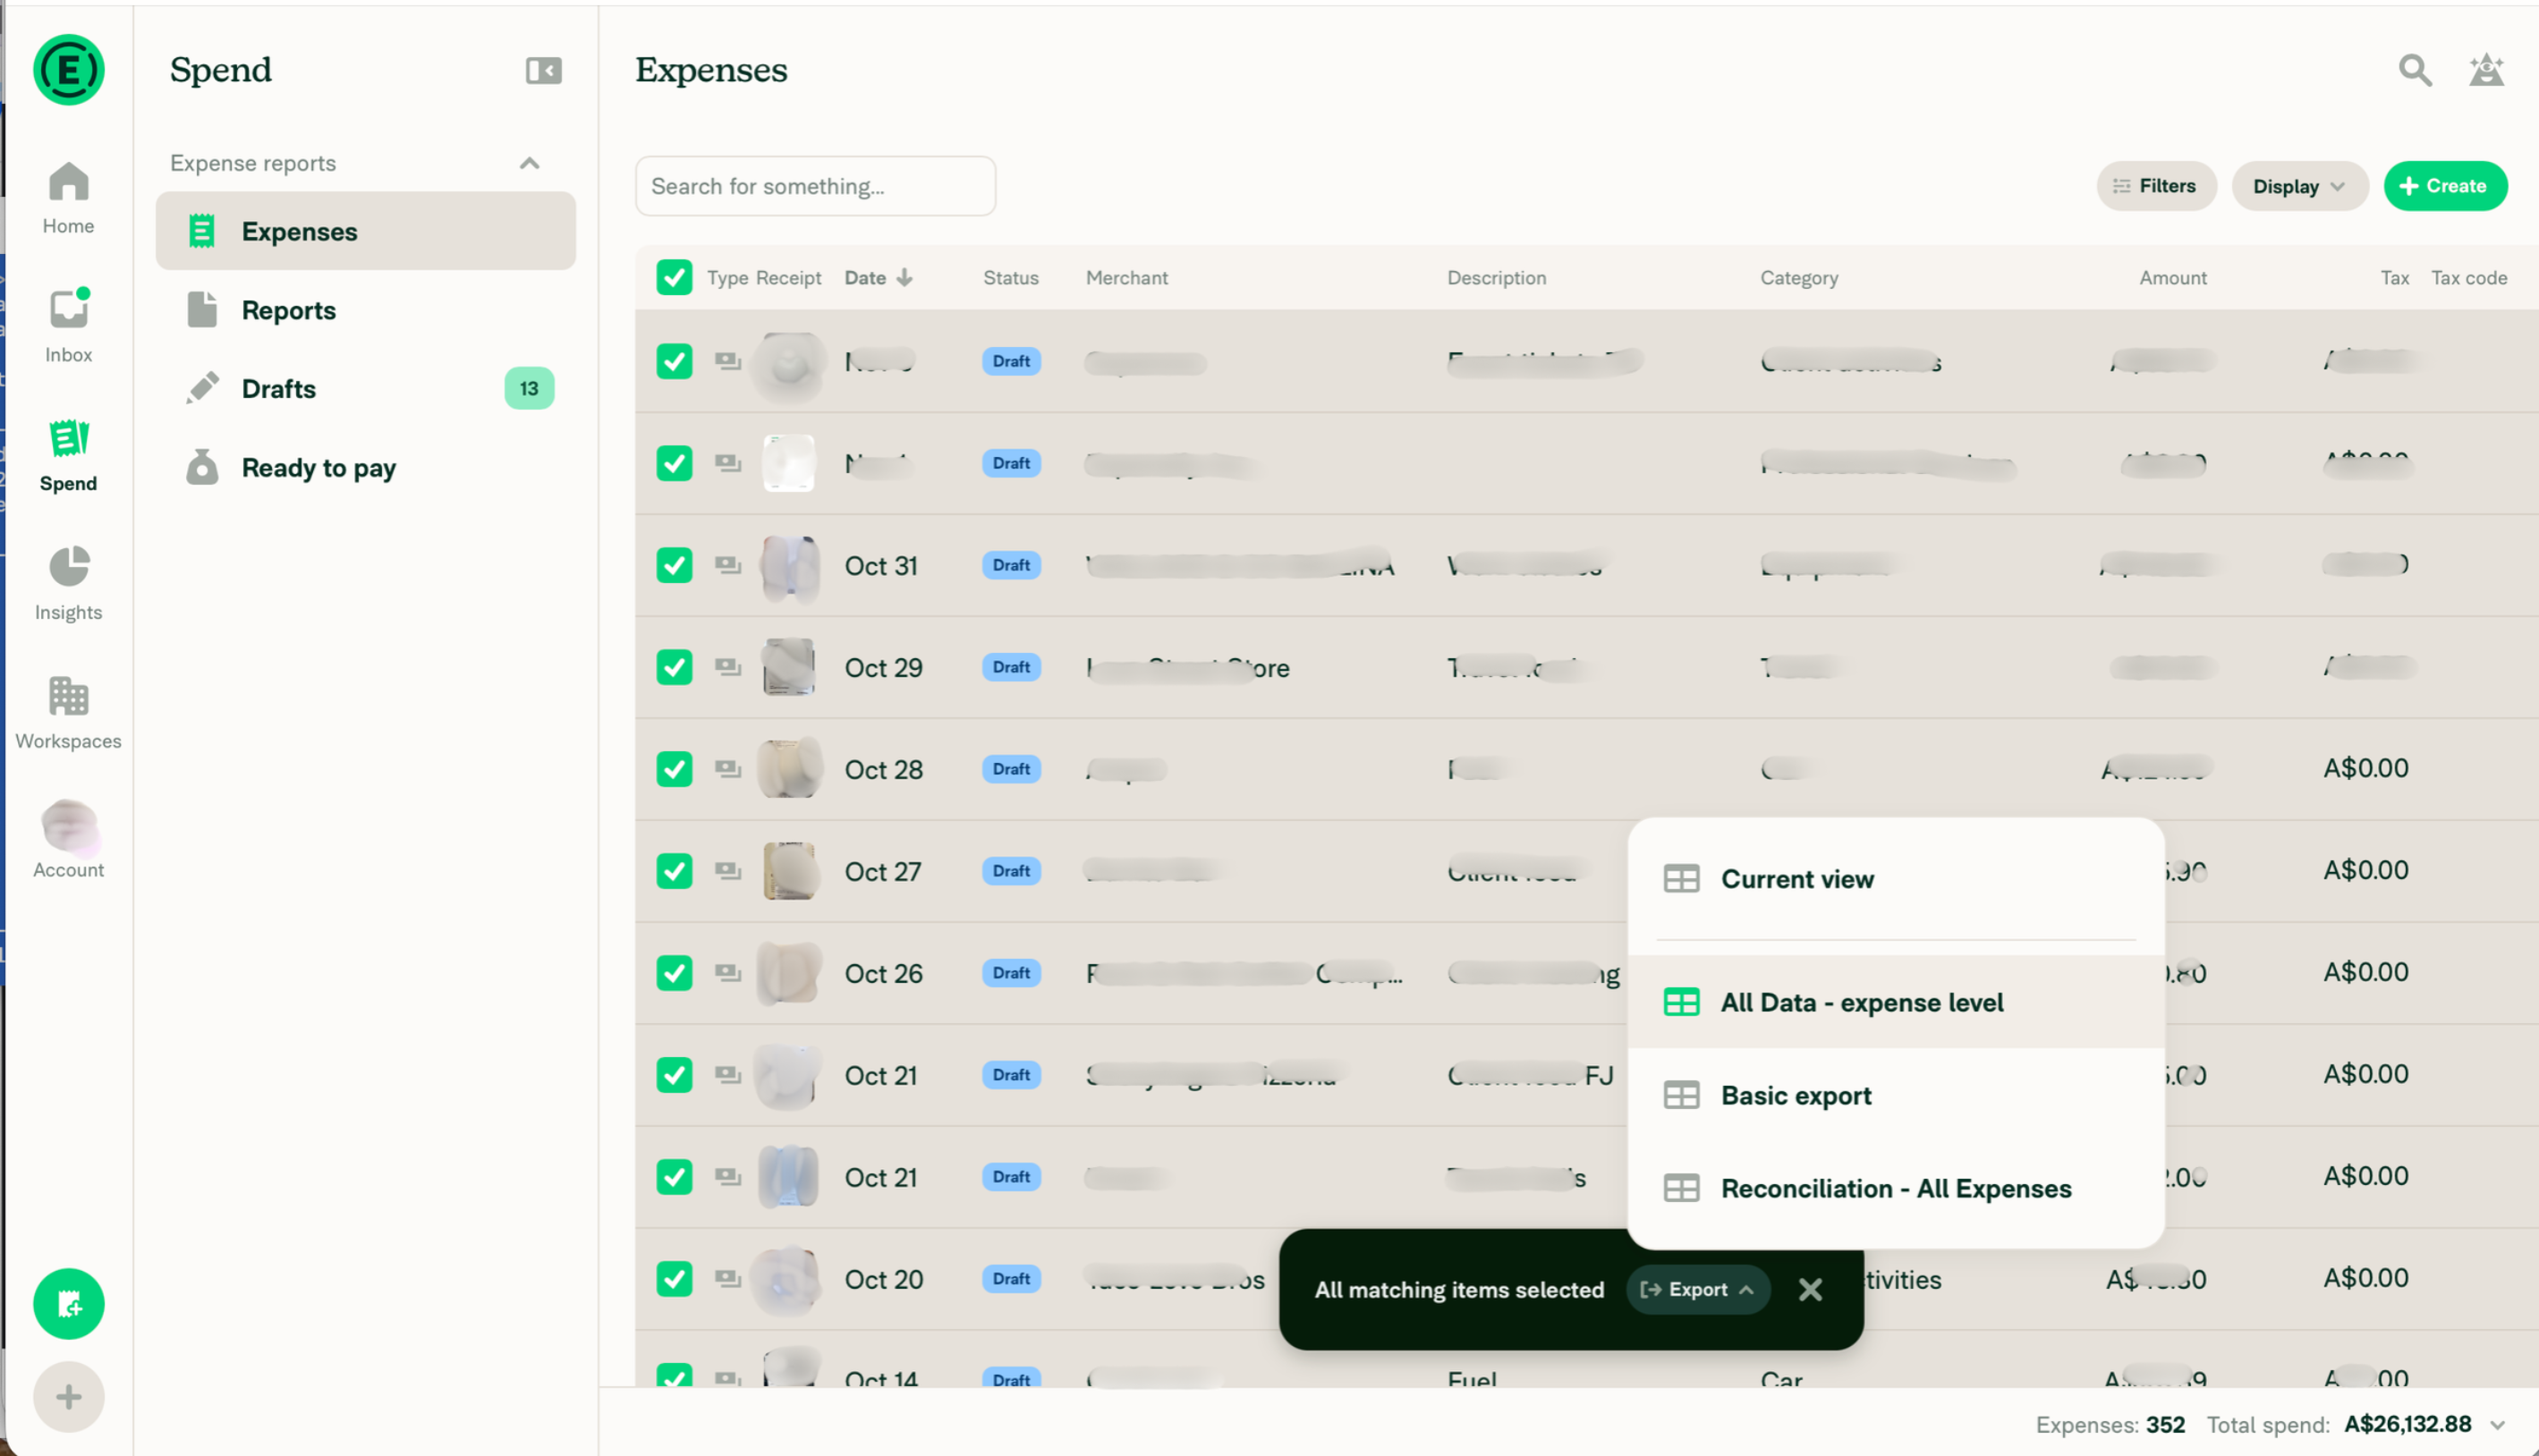
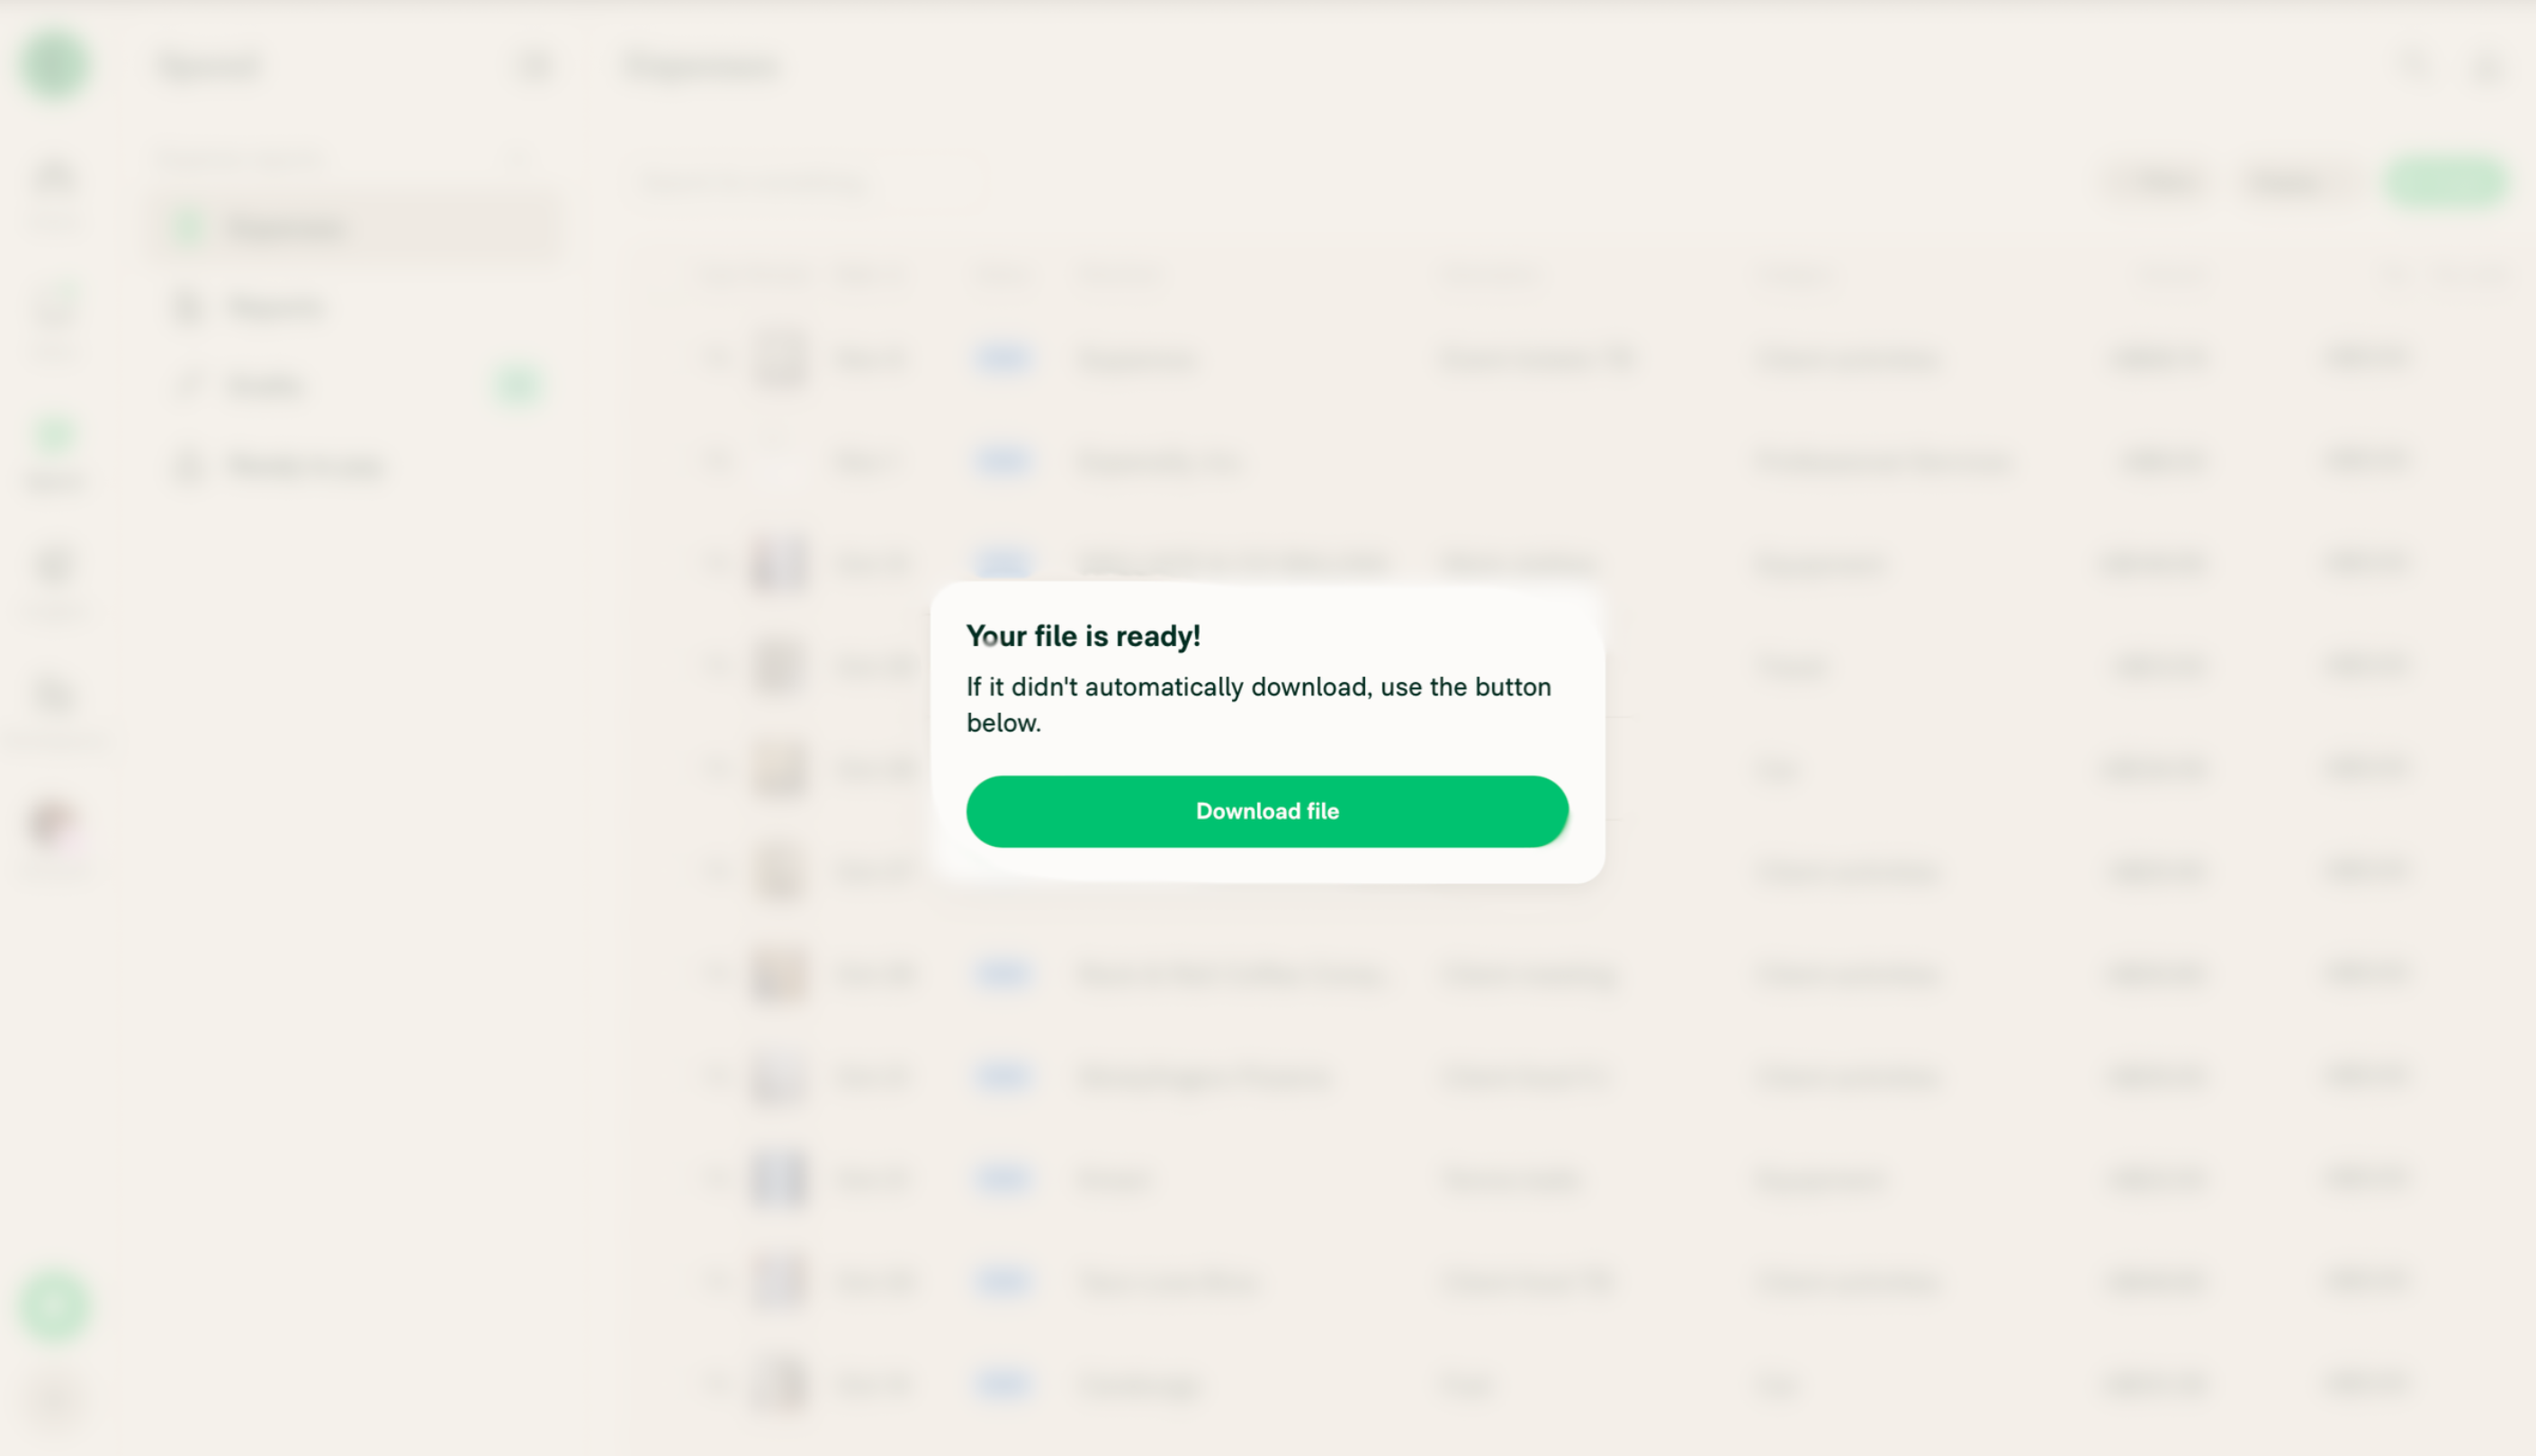
Log in to Expensify and go to Spend > Expenses. Tick the checkbox at the top of the list to select all your expenses, click Export and choose All Data – Expense Level. When Your file is ready appears, click Download file to save the CSV.
Download your receipts as a ZIP
Go to Spend > Reports, select all your reports and choose Download receipts to save the receipts as a ZIP. The ZIP is optional. Without it, the expenses are imported without their receipts.
Open Migration
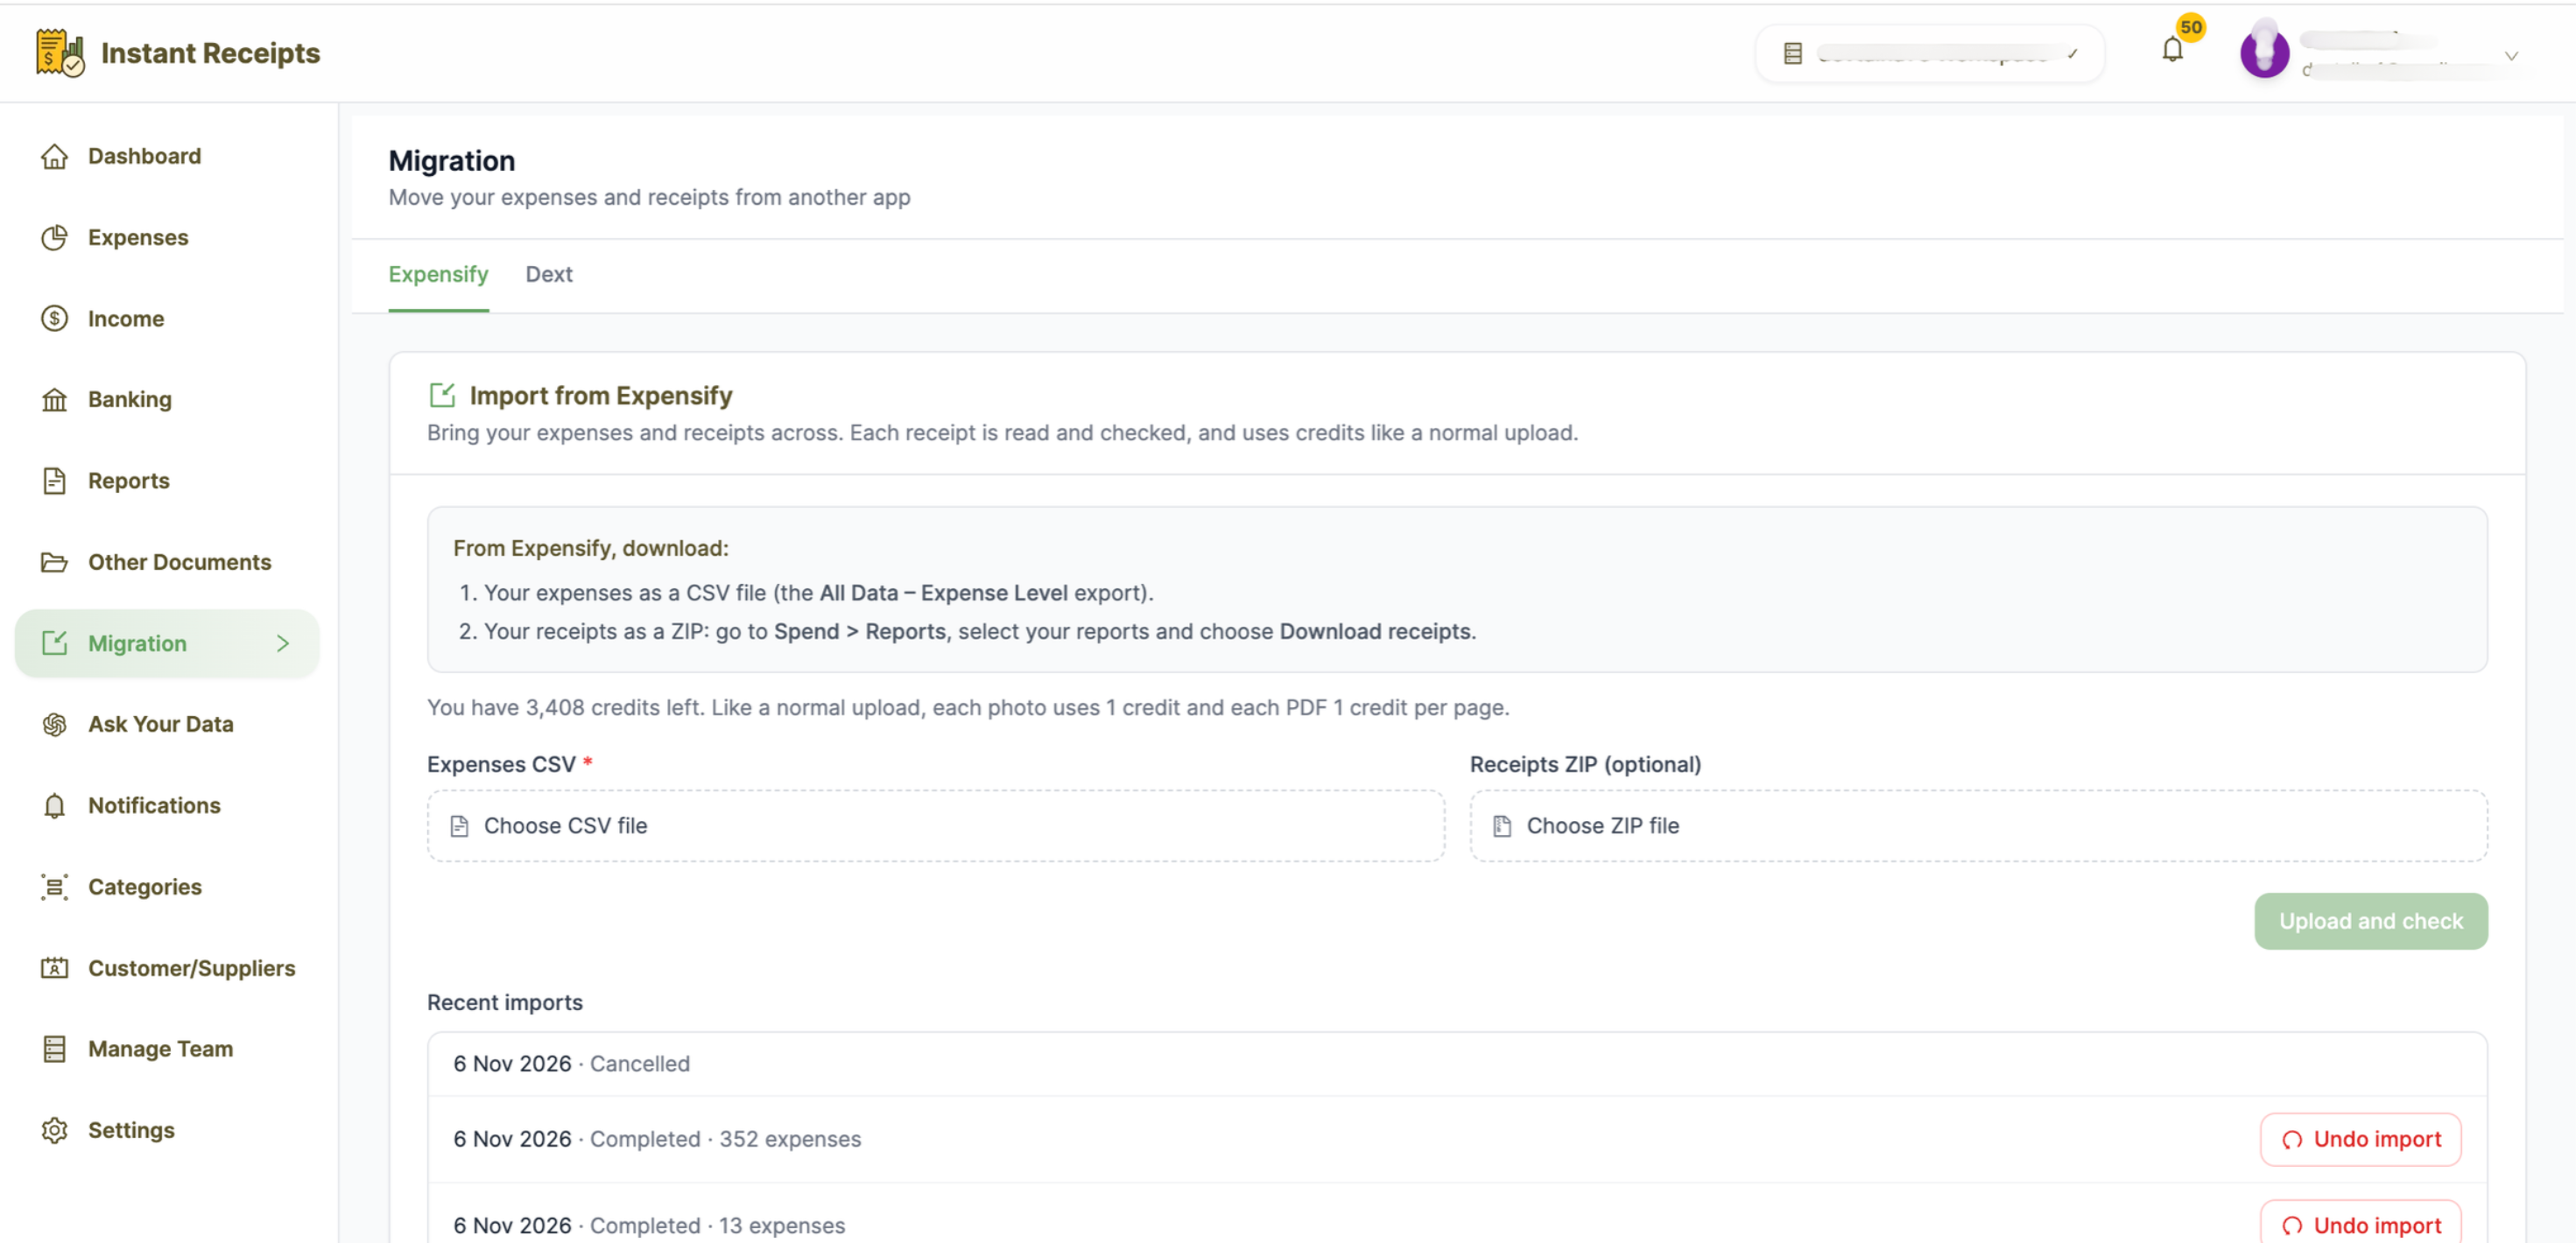
In Instant Receipts, click Migration in the left sidebar and stay on the Expensify tab.
Upload your two files
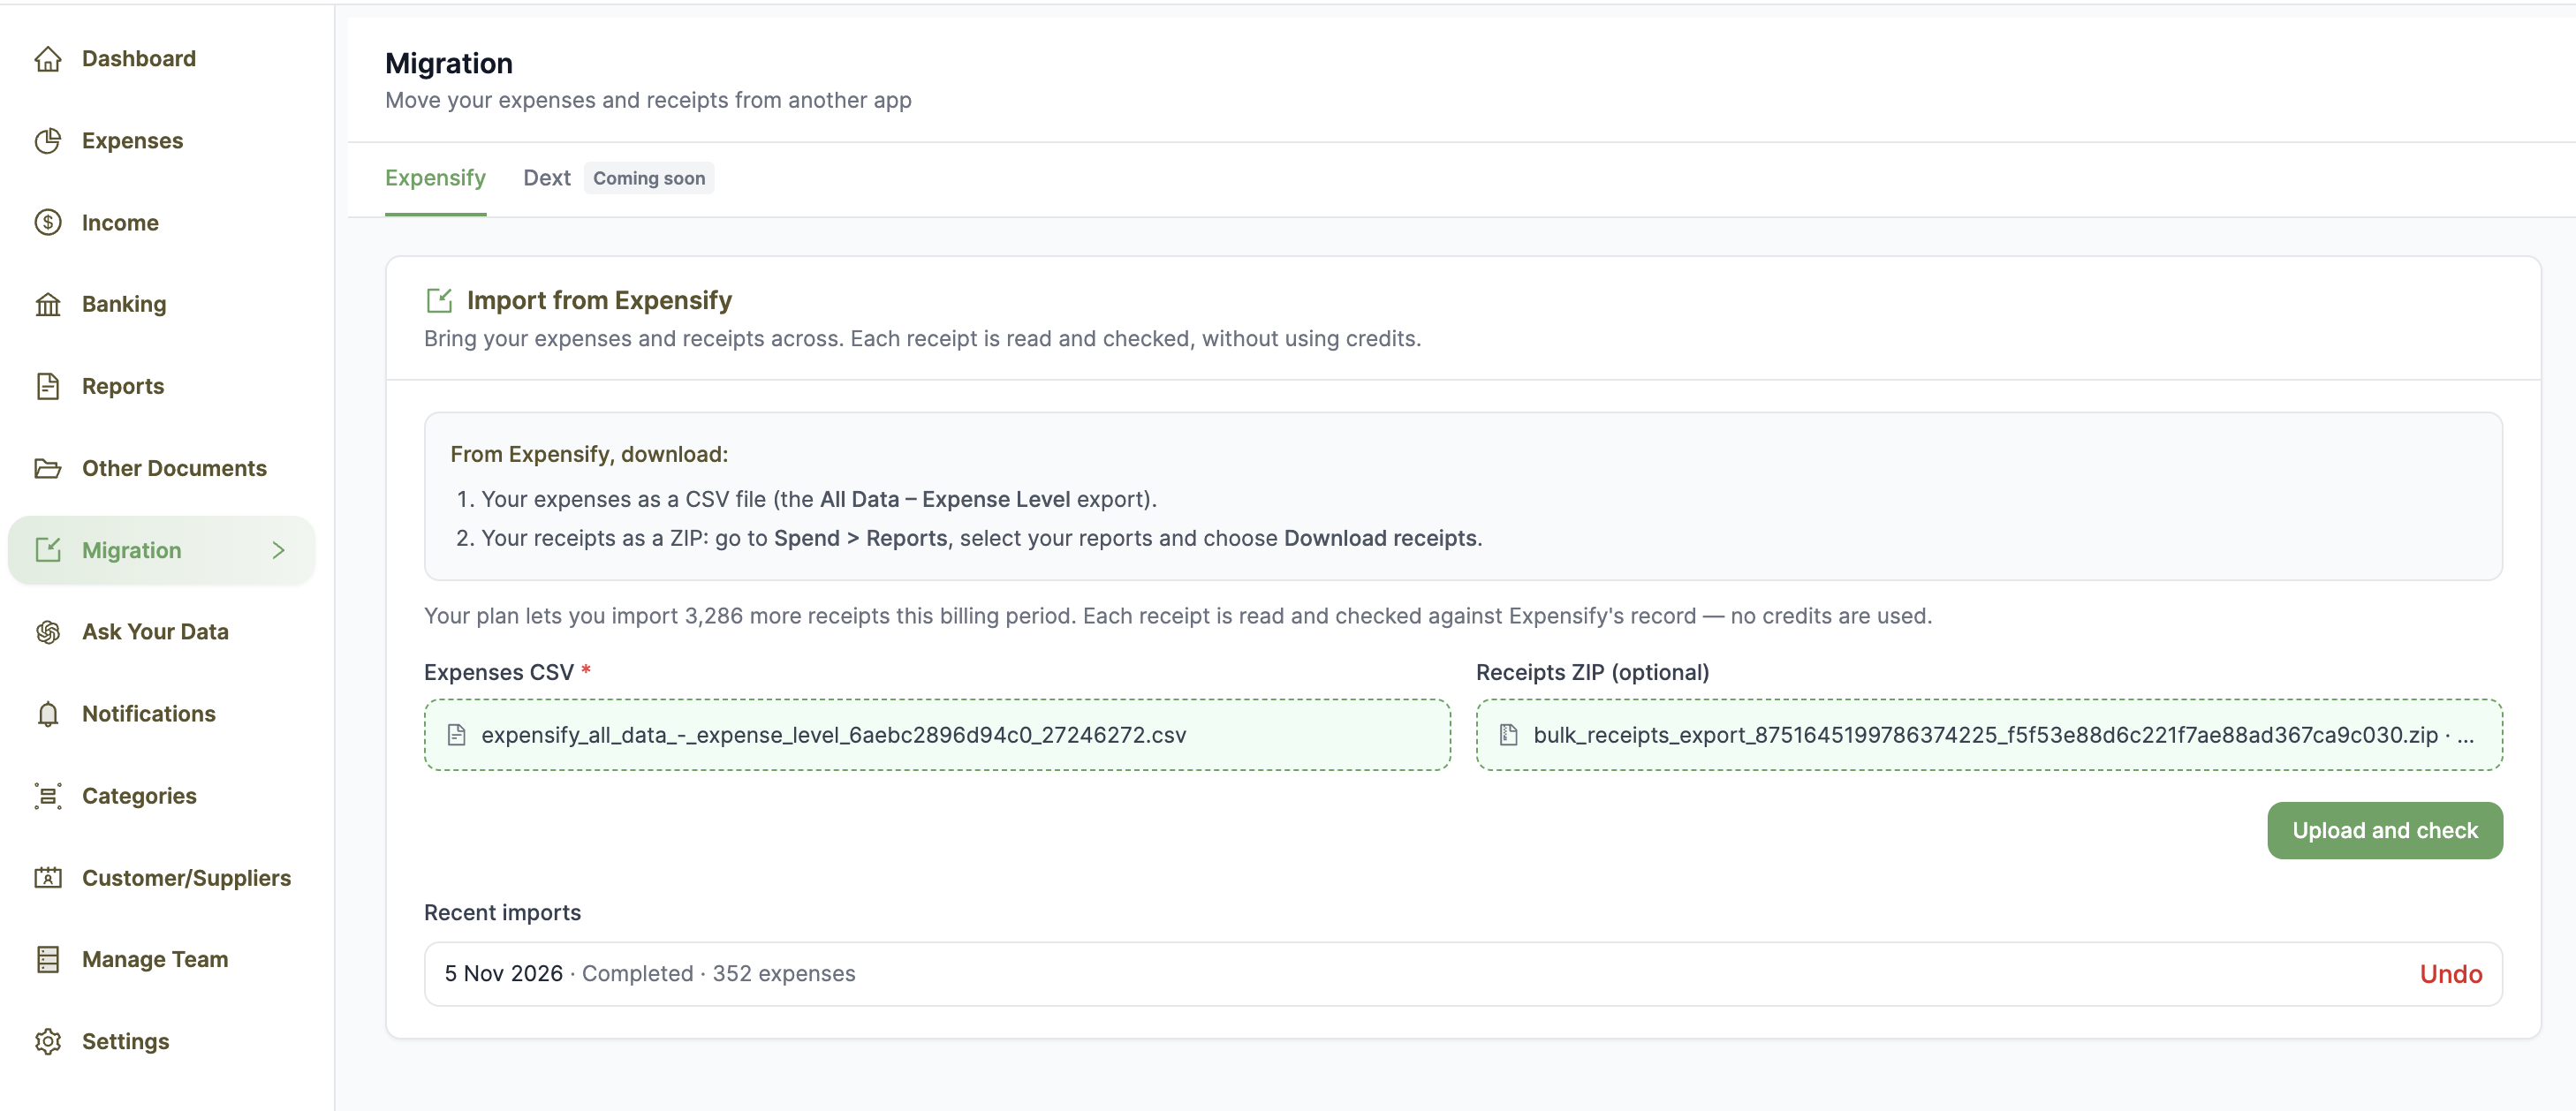
Choose the CSV, and the receipts ZIP if you have one, then click Upload and check. Stay on the page until the upload finishes. Each photo uses 1 credit and each PDF page uses 1 credit.
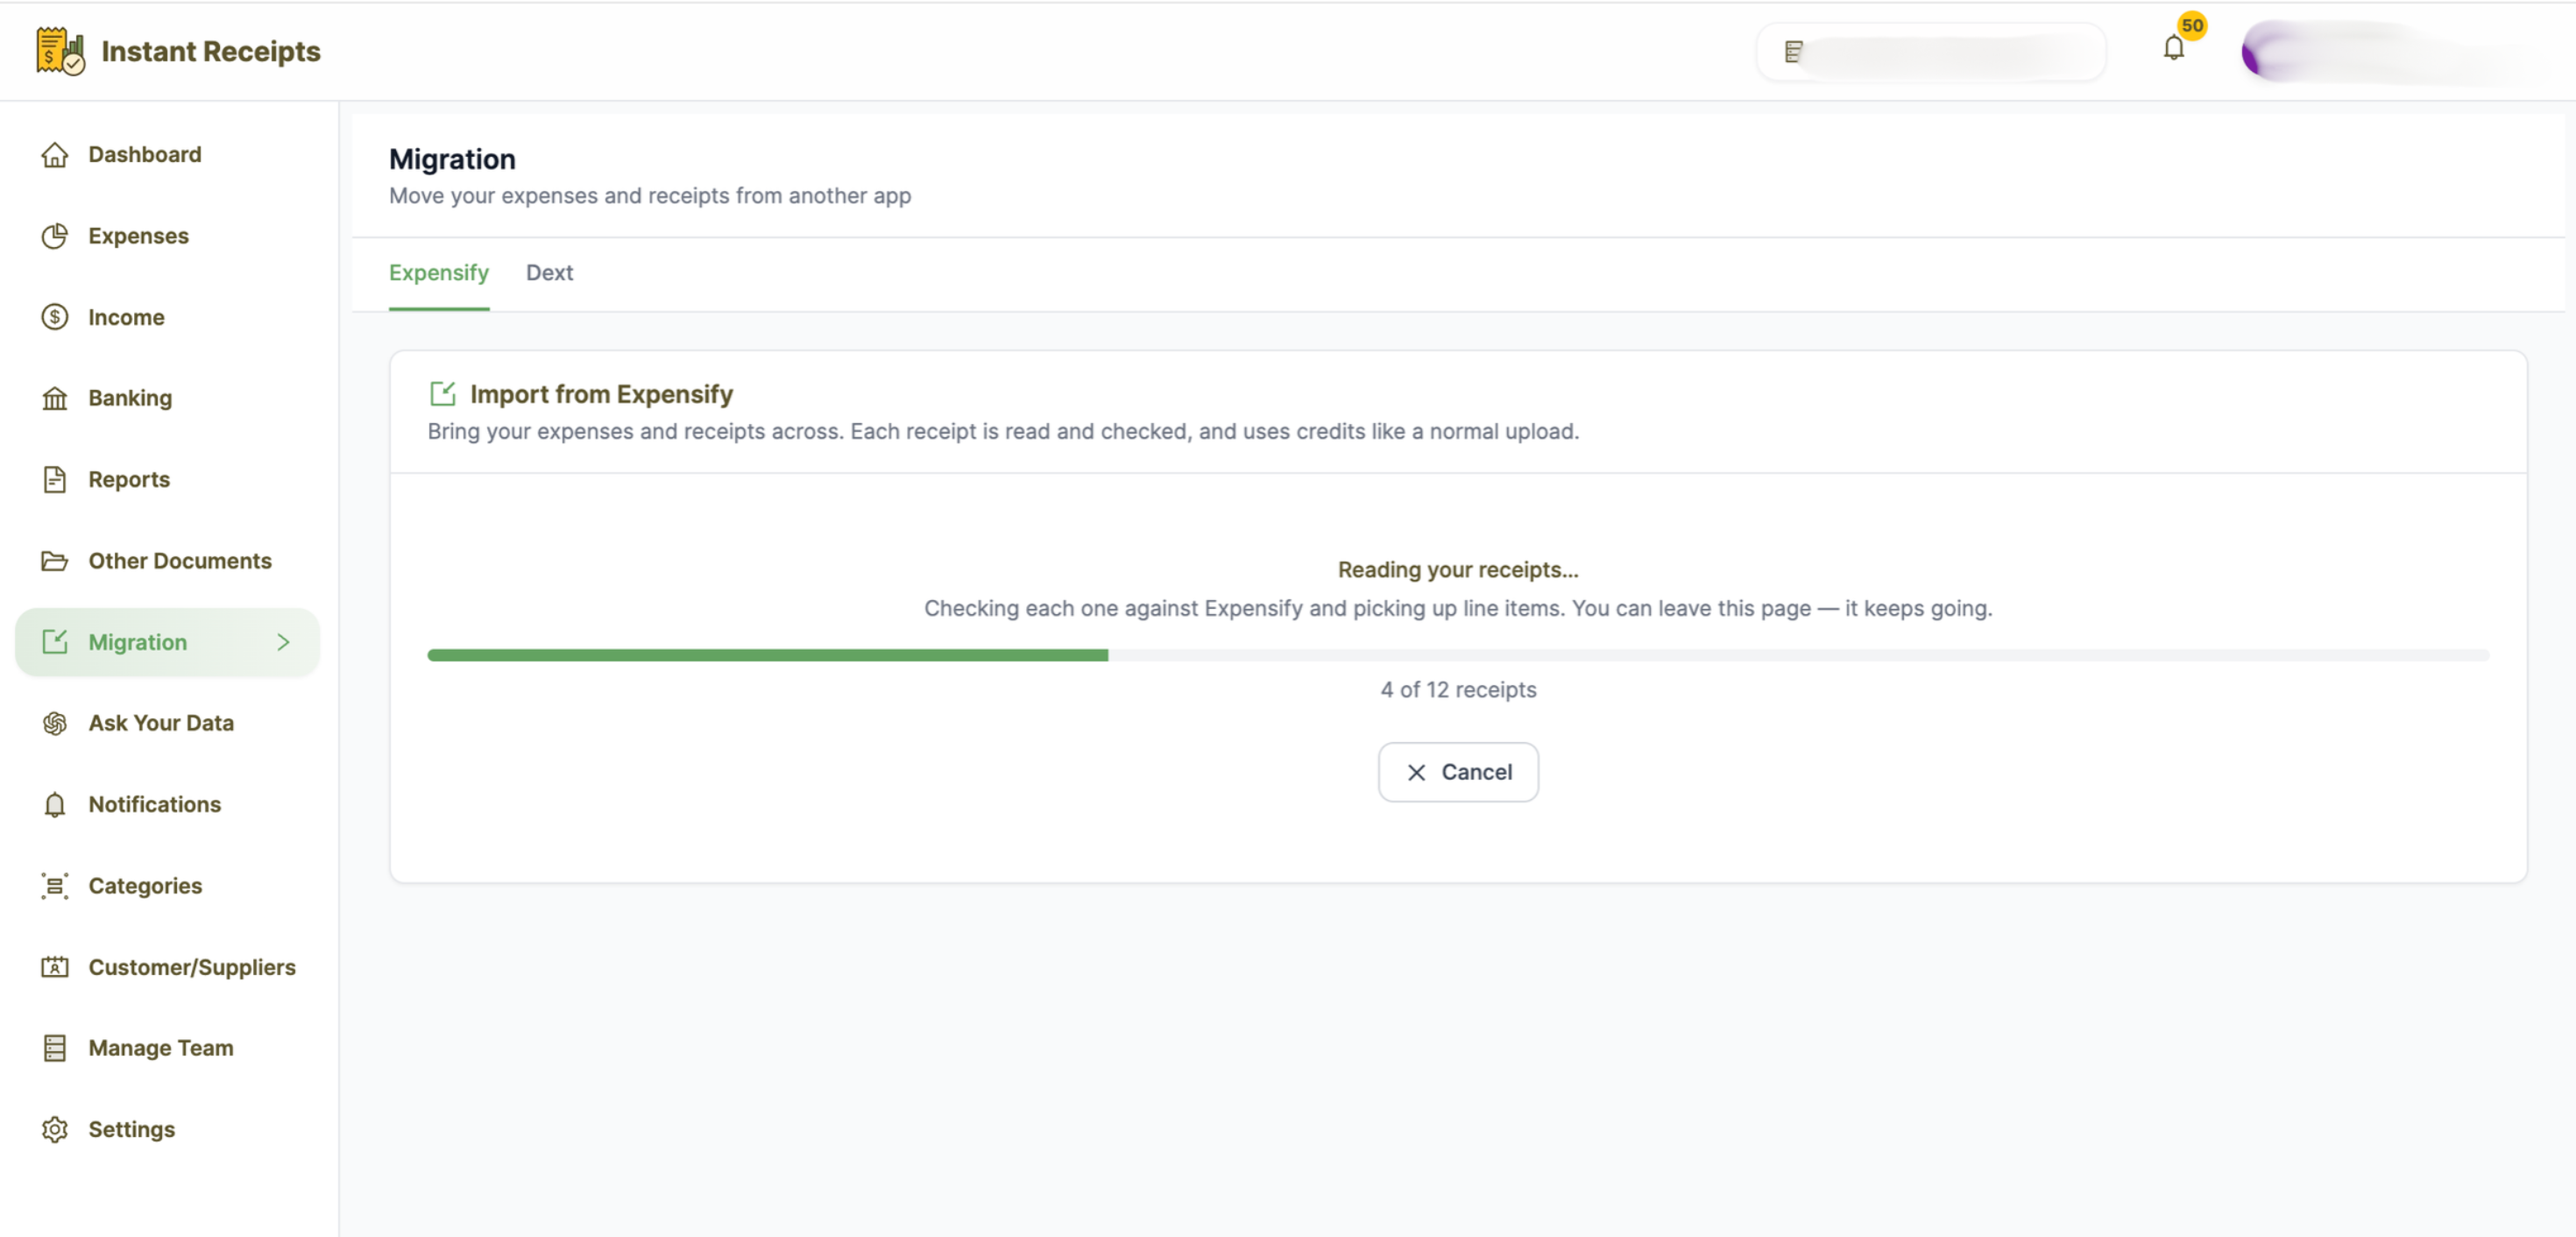
We read and match your receipts
We read each receipt image and match it to its row in your CSV, picking up line items as we go. You can leave the page while it runs and come back later.
Review the summary
Check the number of expenses, the total and how many receipts matched. Receipts with a different amount or date from the CSV are listed so you can look at them. Expensify's amount, date and category are kept. Expenses already in Instant Receipts are skipped, unless you tick Import them anyway as copies.
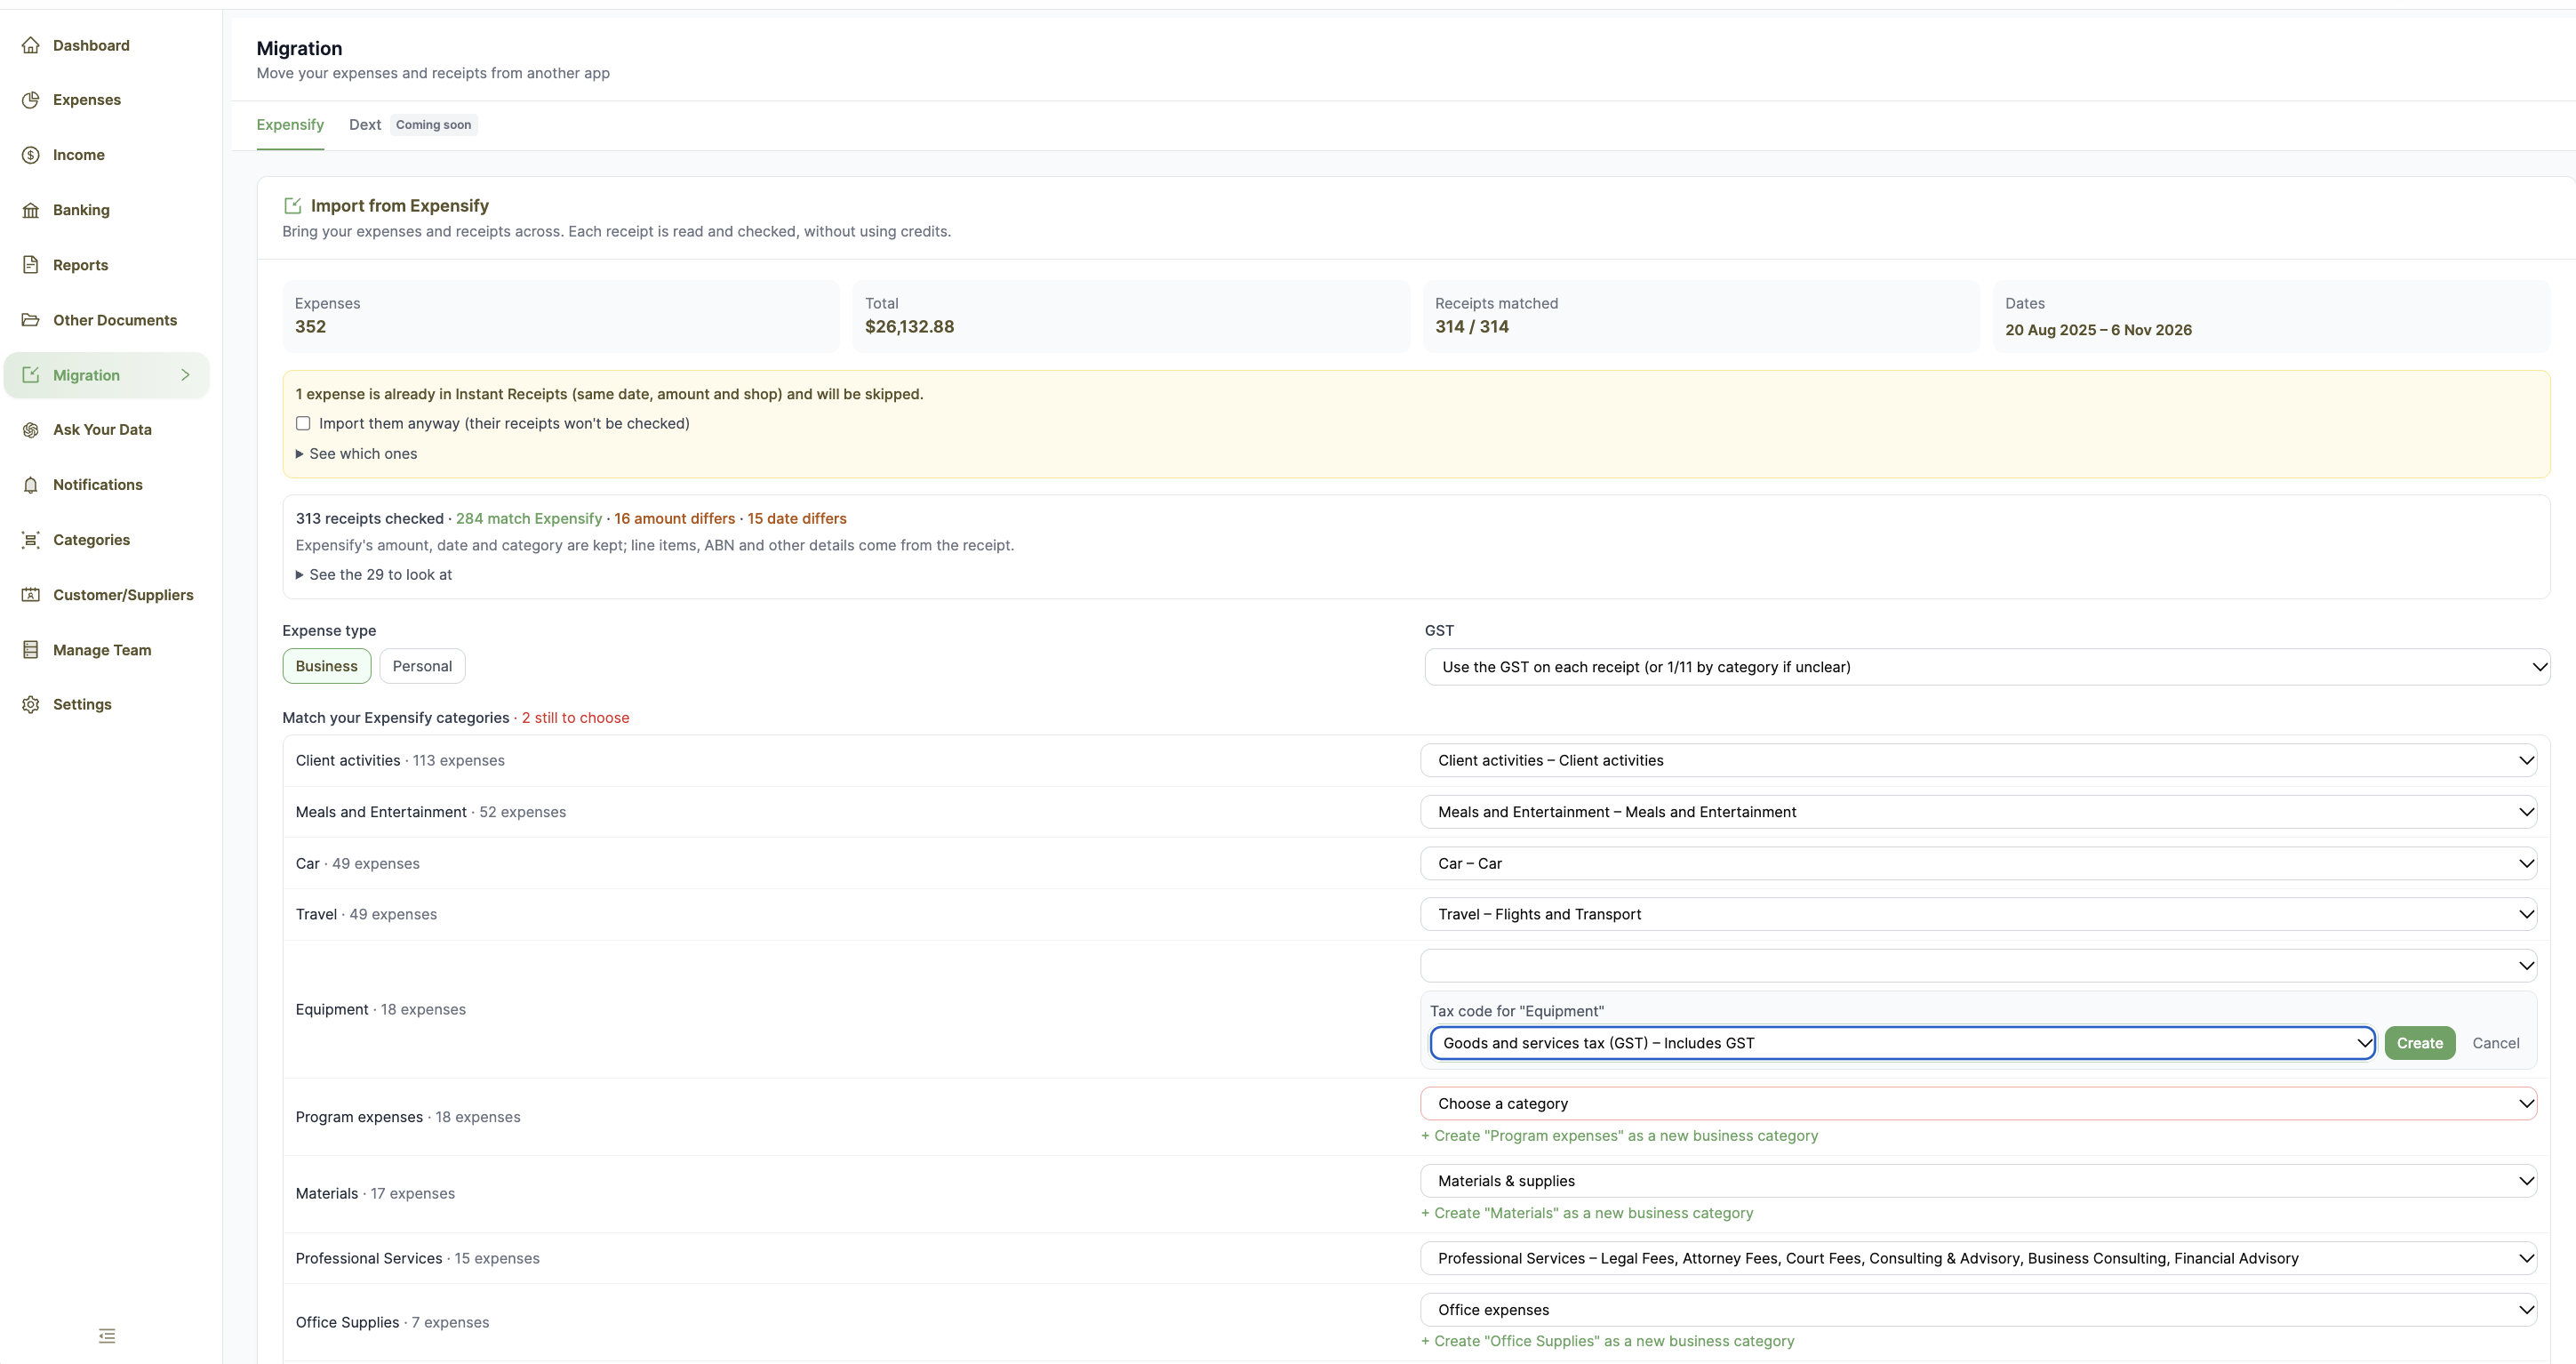
Choose the type, GST and categories
Pick business or personal, choose how GST is worked out, and match each Expensify category to one of your Instant Receipts categories. You can only import once every category is matched.
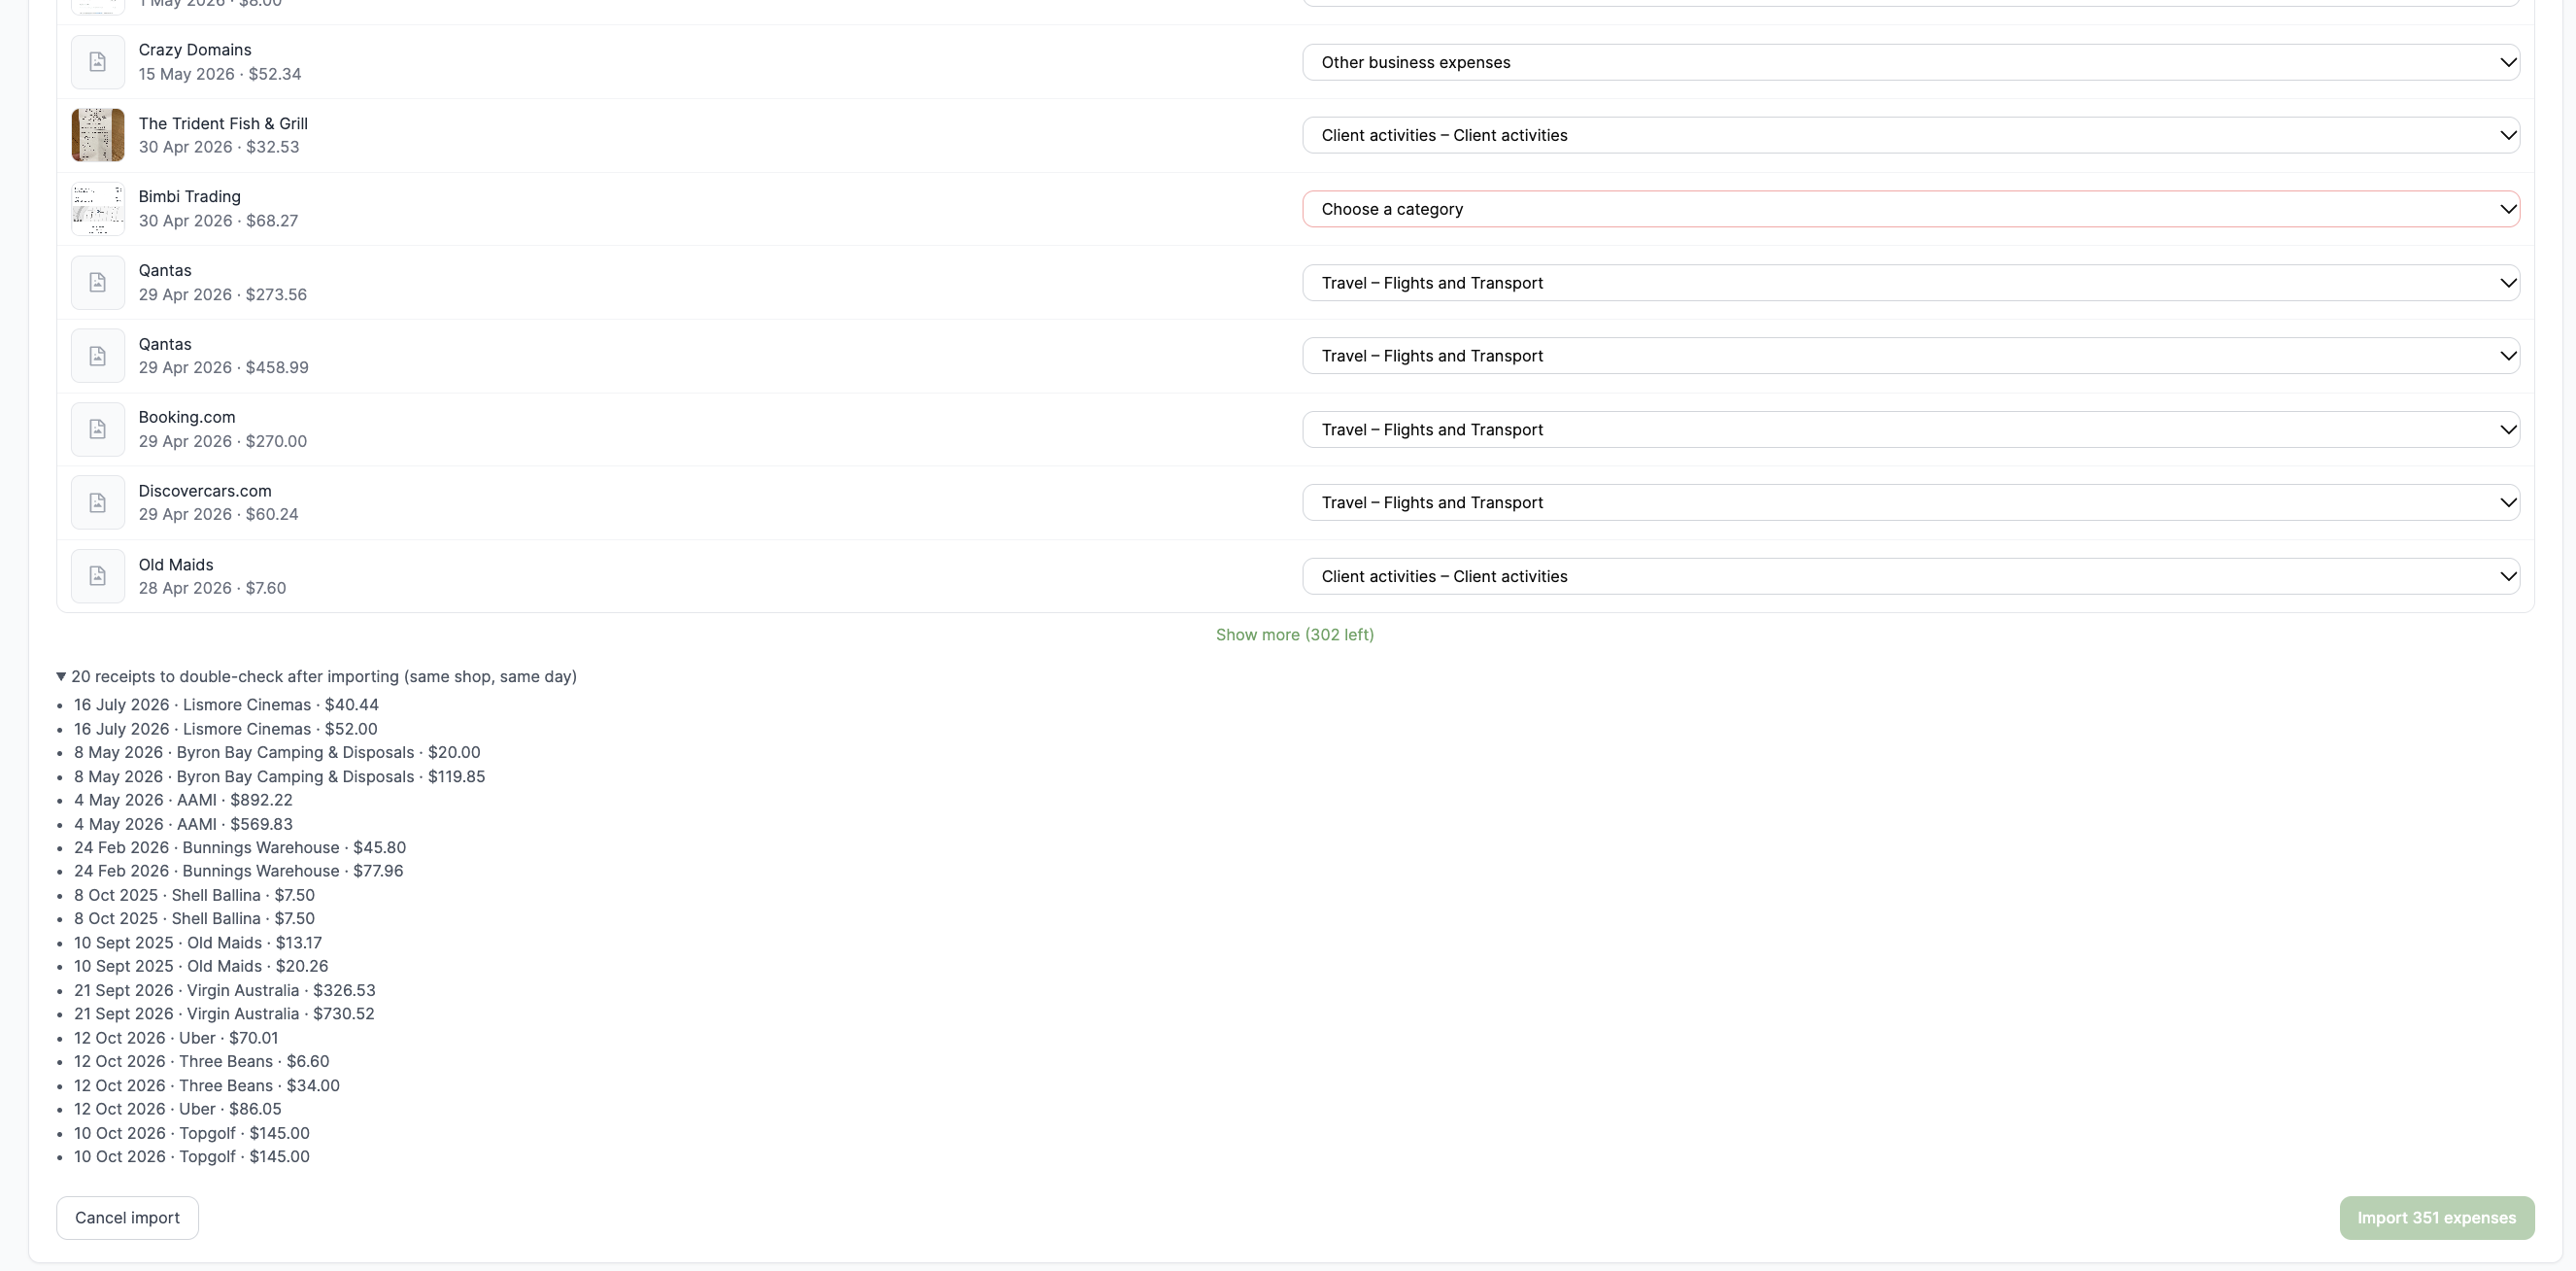
Import your expenses
Click Import at the bottom of the page. It adds your expenses and attaches their receipts.
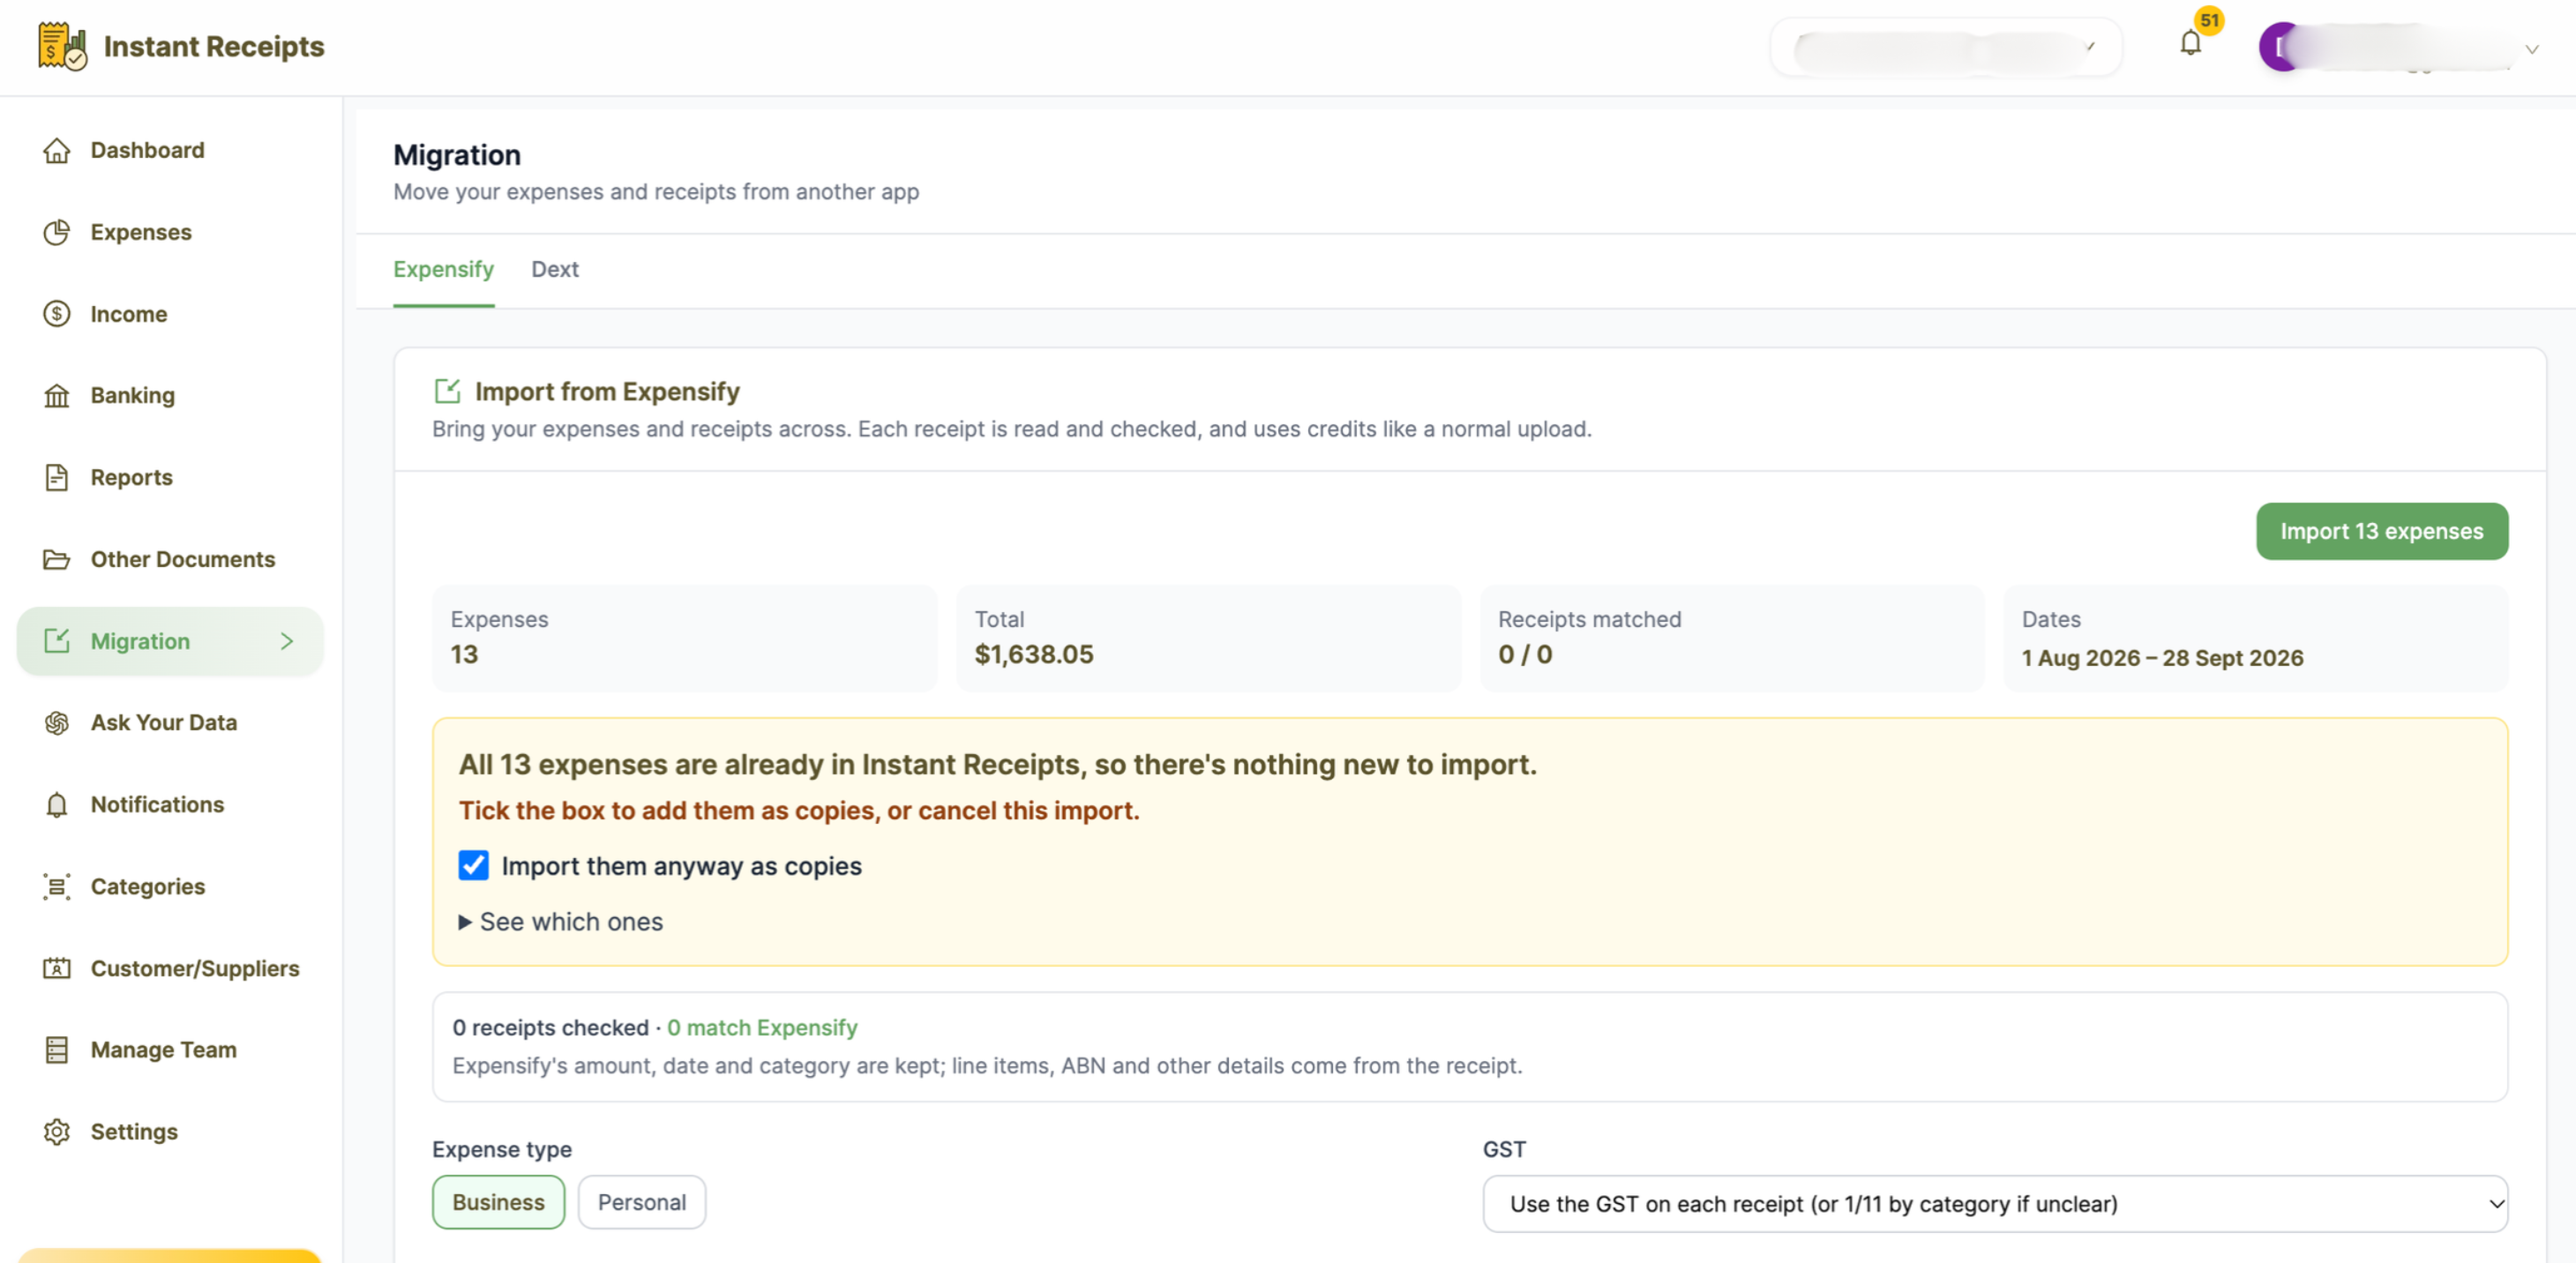
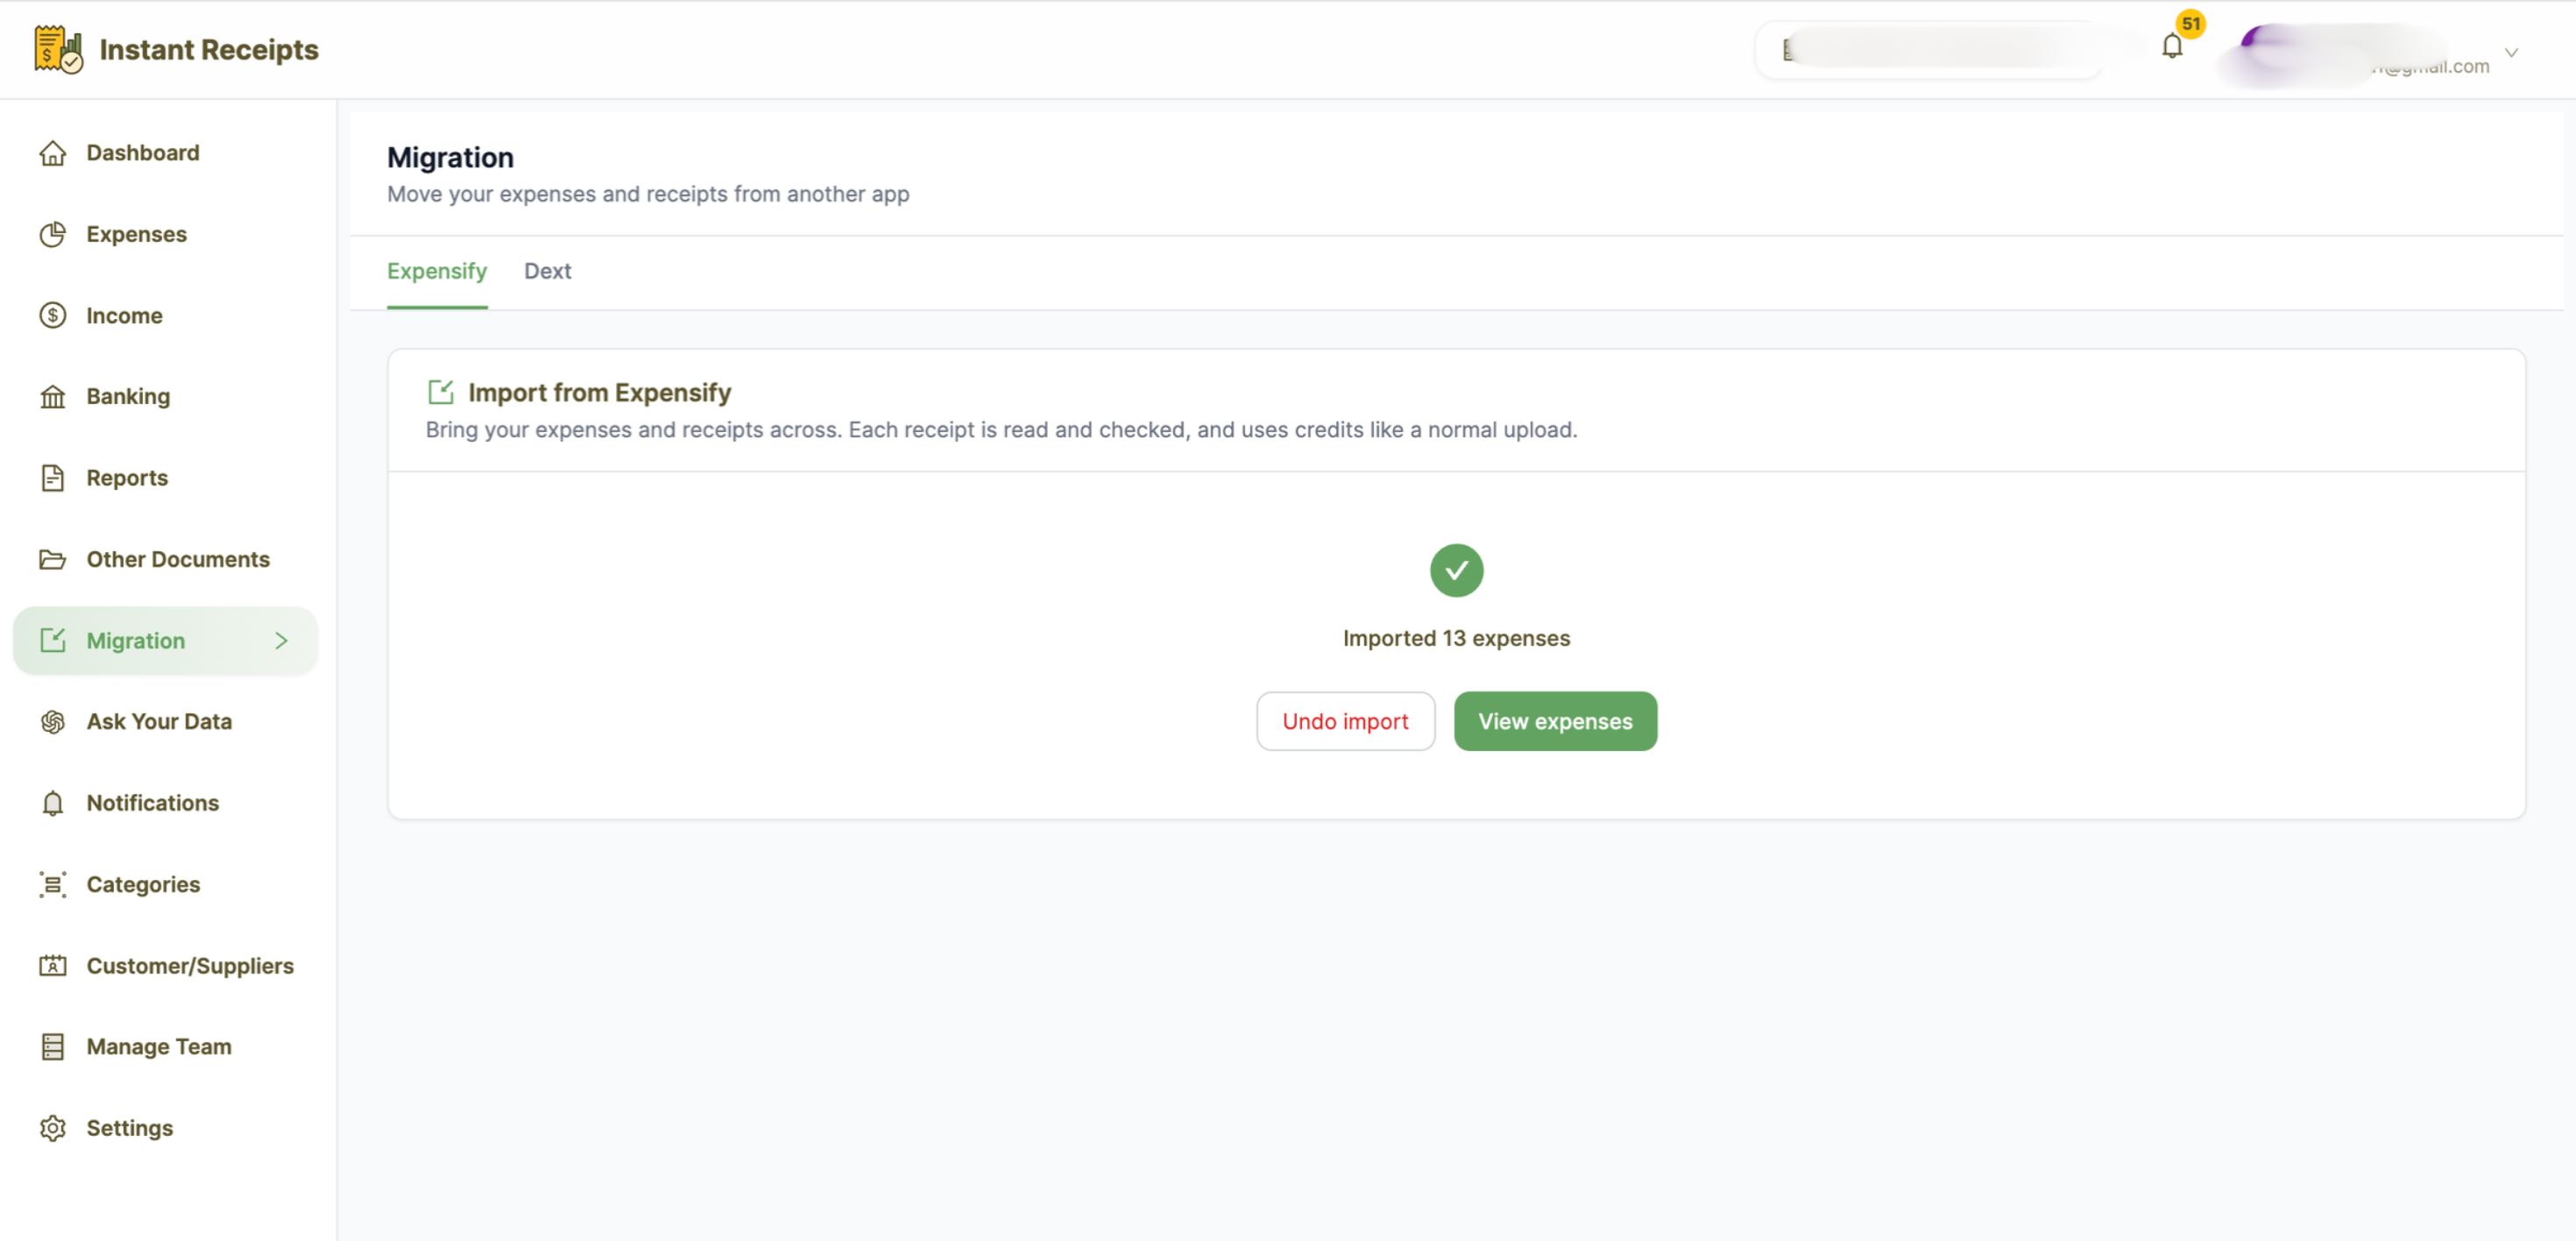
View your expenses or undo the import
When it finishes you'll see how many expenses were imported. Click View expenses to check them. If something is wrong, click Undo import to revert the migration. Undo import is on the same Migration page.
Troubleshooting
The page says importing from Expensify is available on Pro and yearly plans.
Click See plans to upgrade, then come back to Migration.
The button says Upgrade for more credits.
Your ZIP has more receipts than you have scan credits. Import fewer reports at a time, or upgrade.
Some files in the ZIP will be skipped.
Only JPG, PNG, WebP and PDF receipts are read. Open the list to see which files were skipped.