


Export Expenses to QuickBooks (Direct Sync)
Prerequisites
- ✓You are on a yearly plan
- ✓You are the workspace owner
- ✓You have a QuickBooks Online account
- ✓You have uploaded expenses in the Expenses section
Outcome
- Send expenses to QuickBooks without exporting a file
- Attach the receipt to every bill
- Create bills to pay, or bills that are already paid
Steps
Open Connections
Go to Settings > Connections and find the QuickBooks card. Only the workspace owner can connect QuickBooks, and direct QuickBooks sync is included with yearly plans.
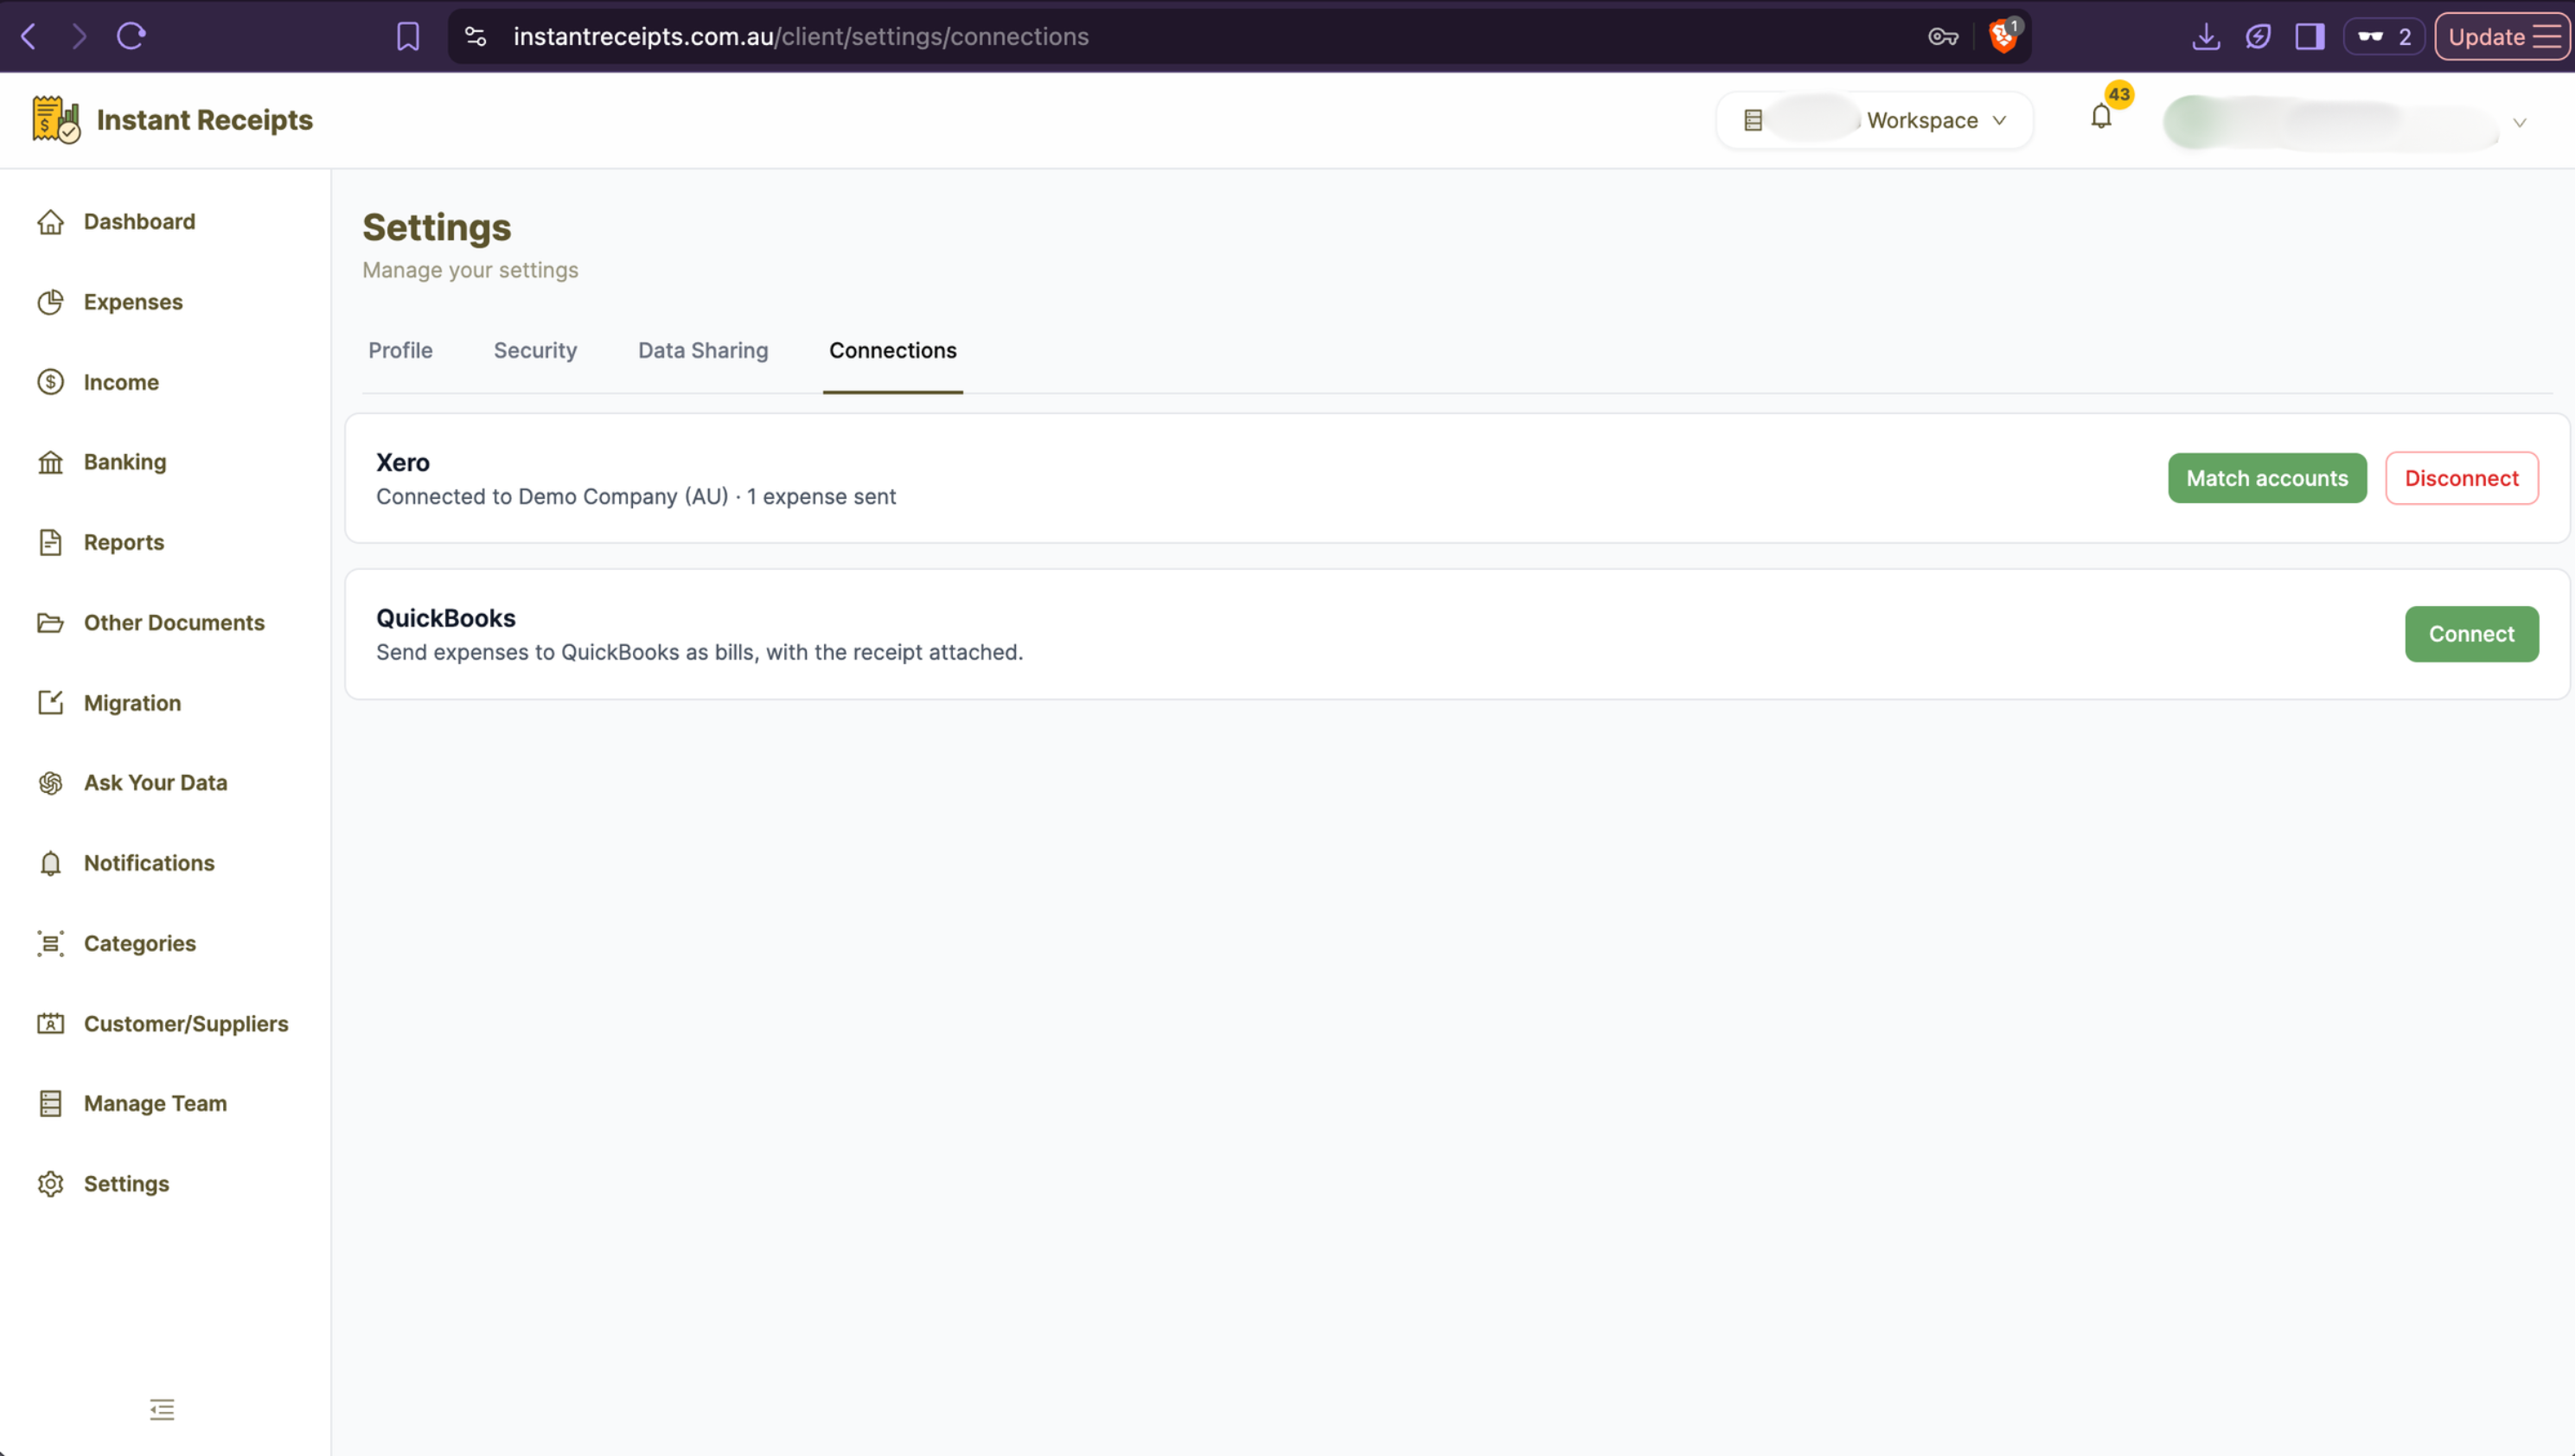
Connect QuickBooks
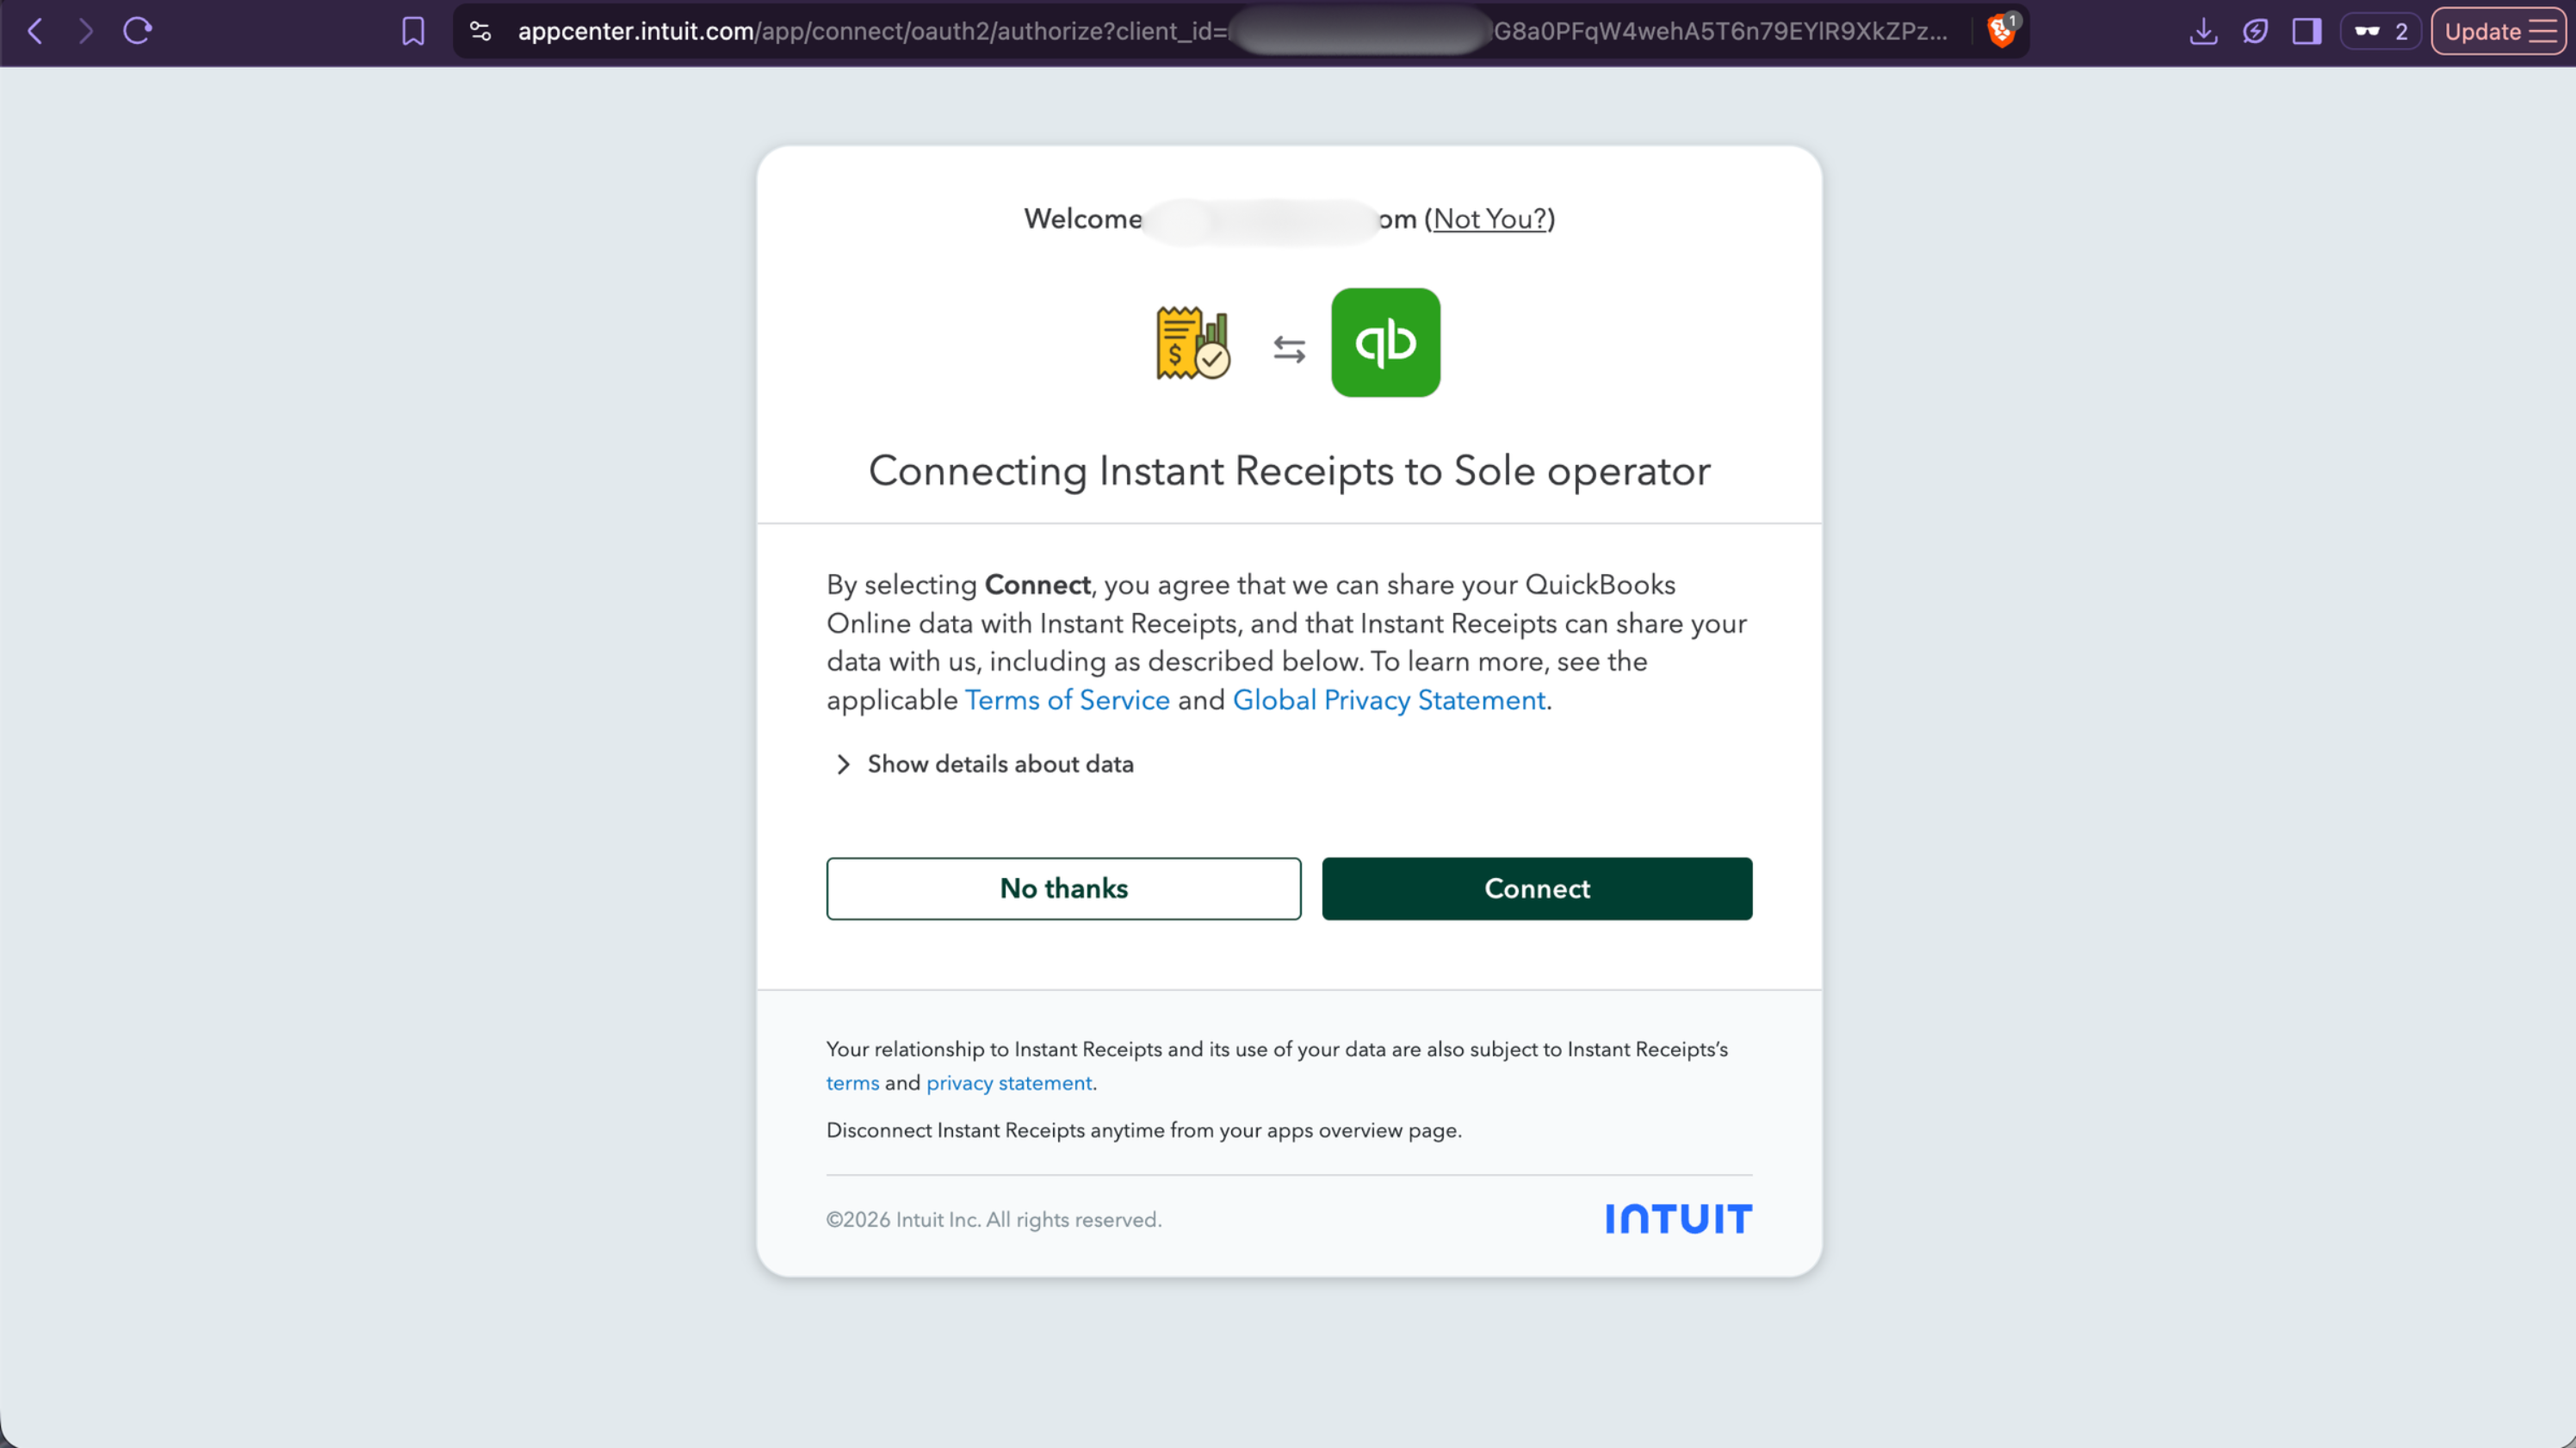
Click Connect. QuickBooks opens, so log in, choose your company and allow access. You come back to Instant Receipts, where the card shows which QuickBooks company you are connected to.
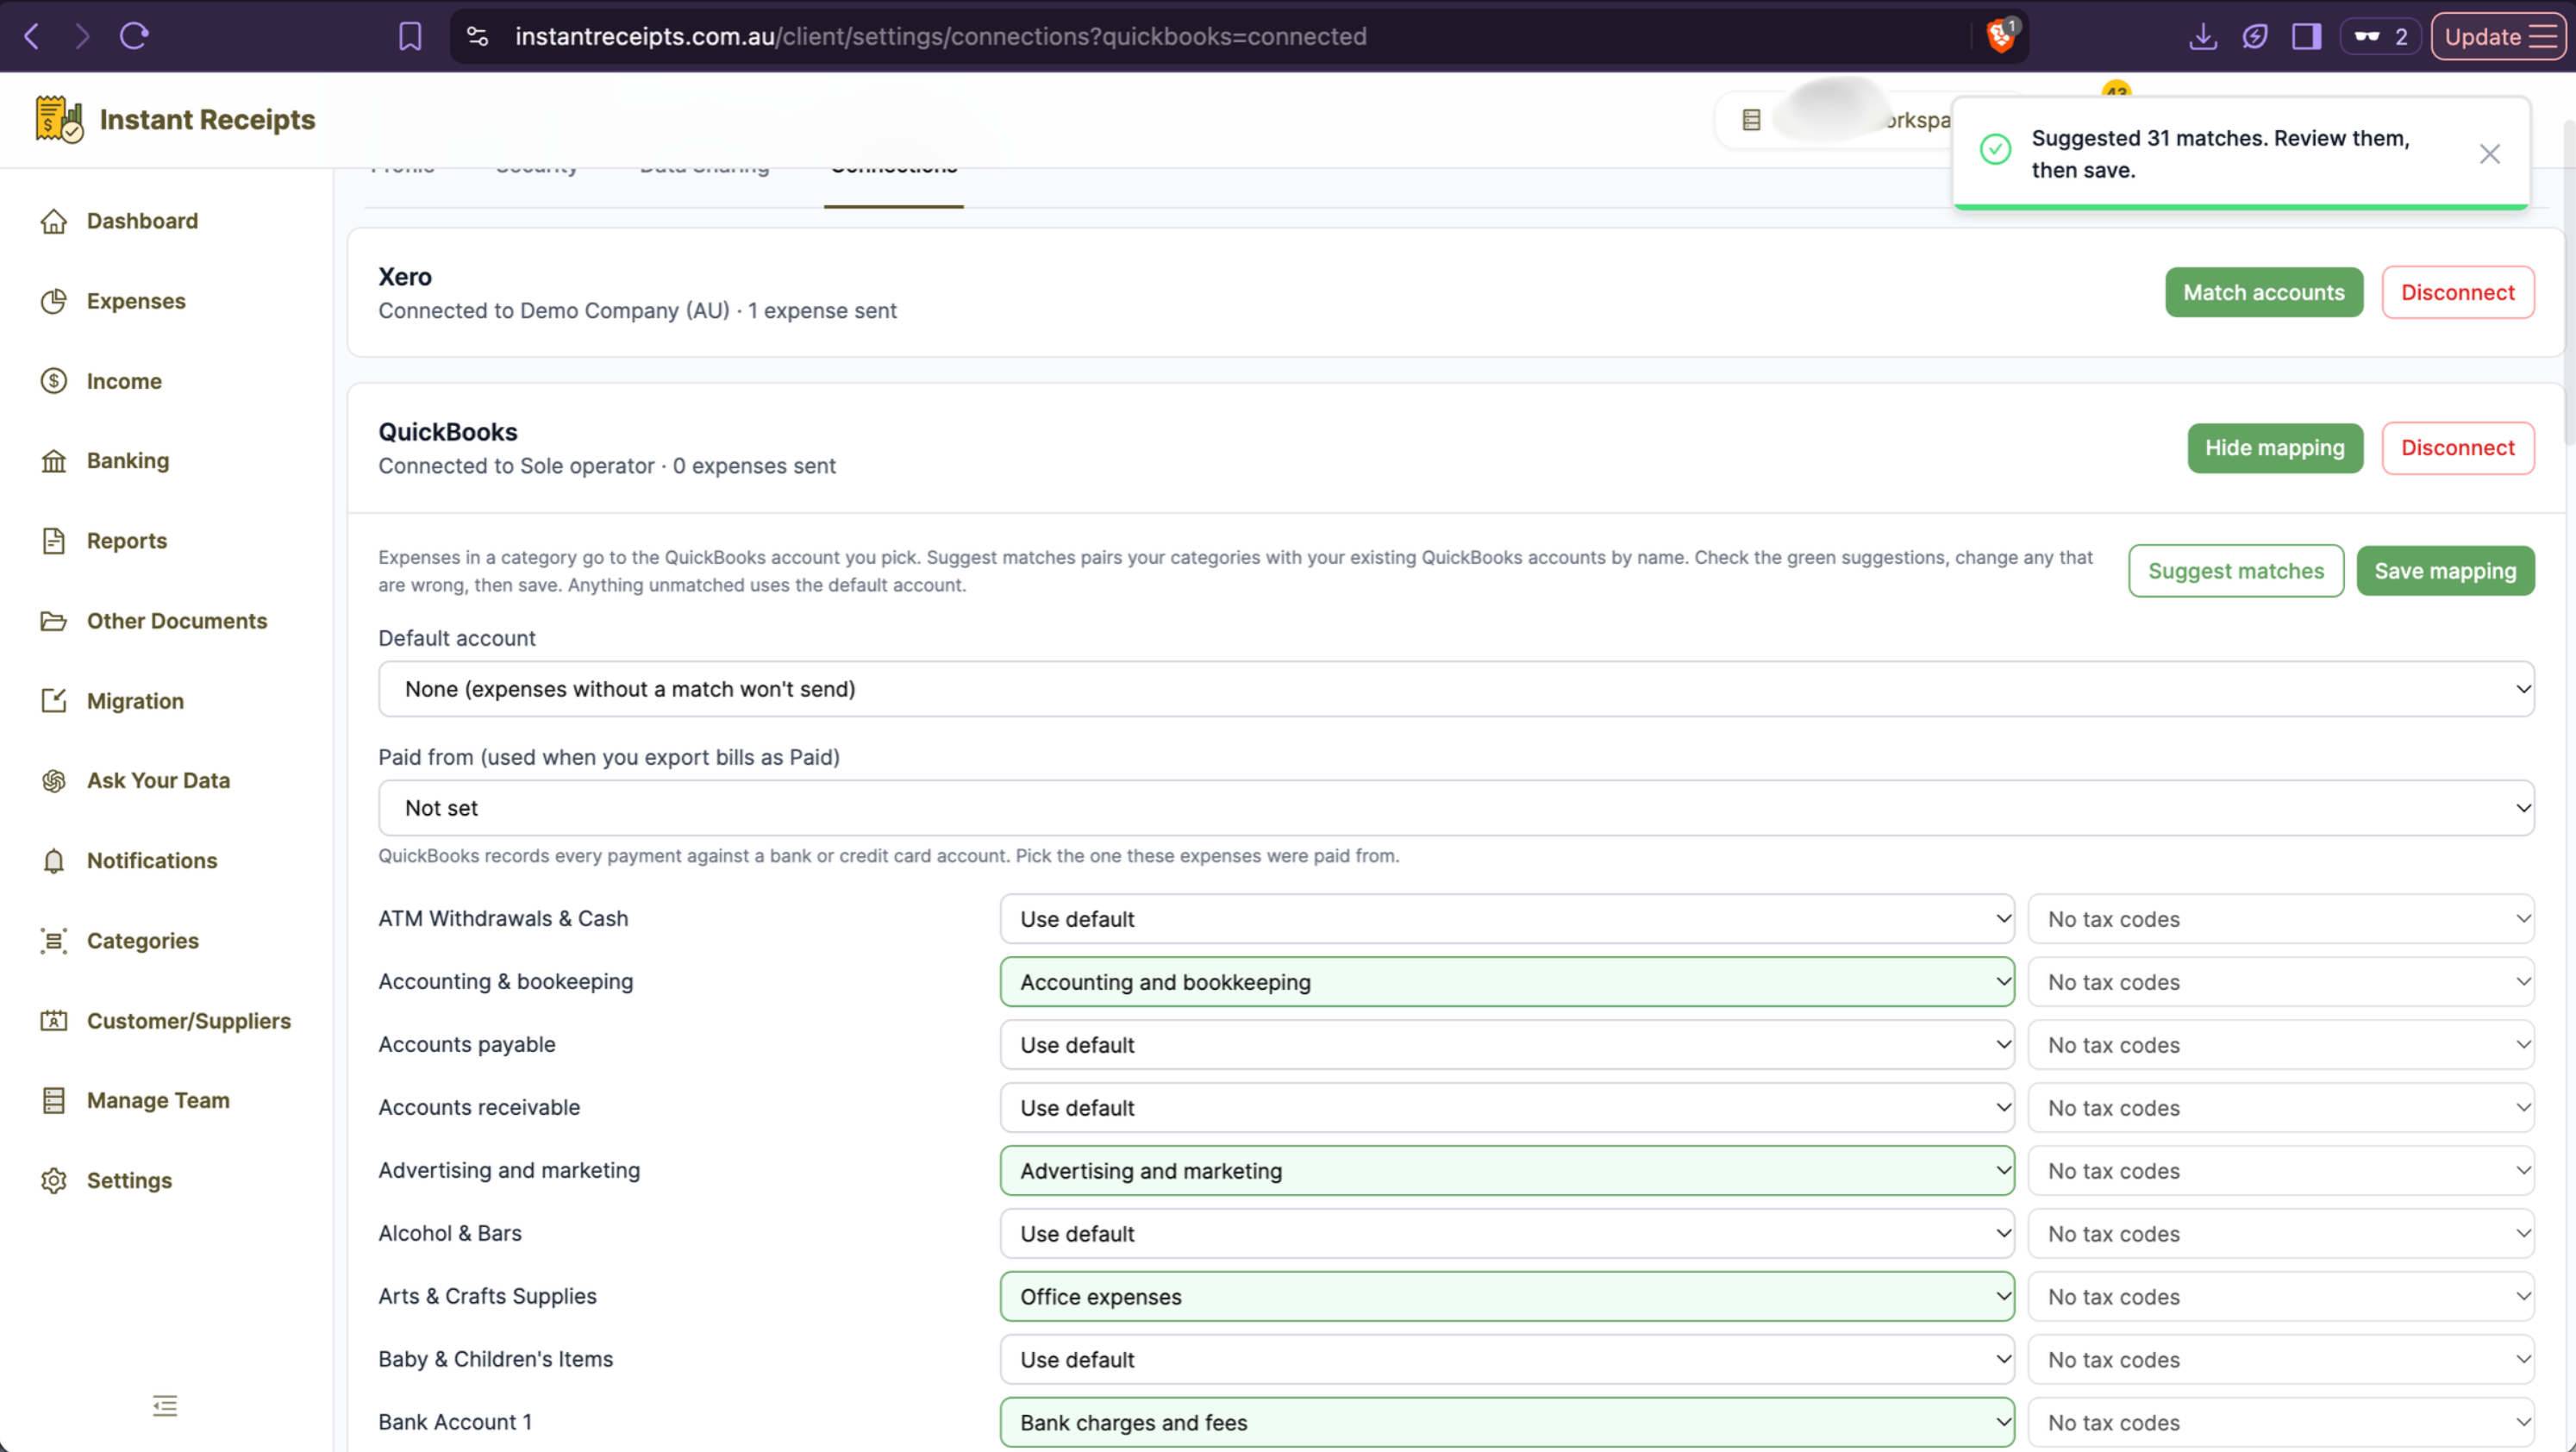
Match your categories to QuickBooks accounts
Click Match accounts, then press Suggest matches. Instant Receipts automatically matches your categories to your QuickBooks accounts by name. Check the green suggestions, change any that are wrong, choose a tax code if you don't want the automatic one, then click Save mapping.
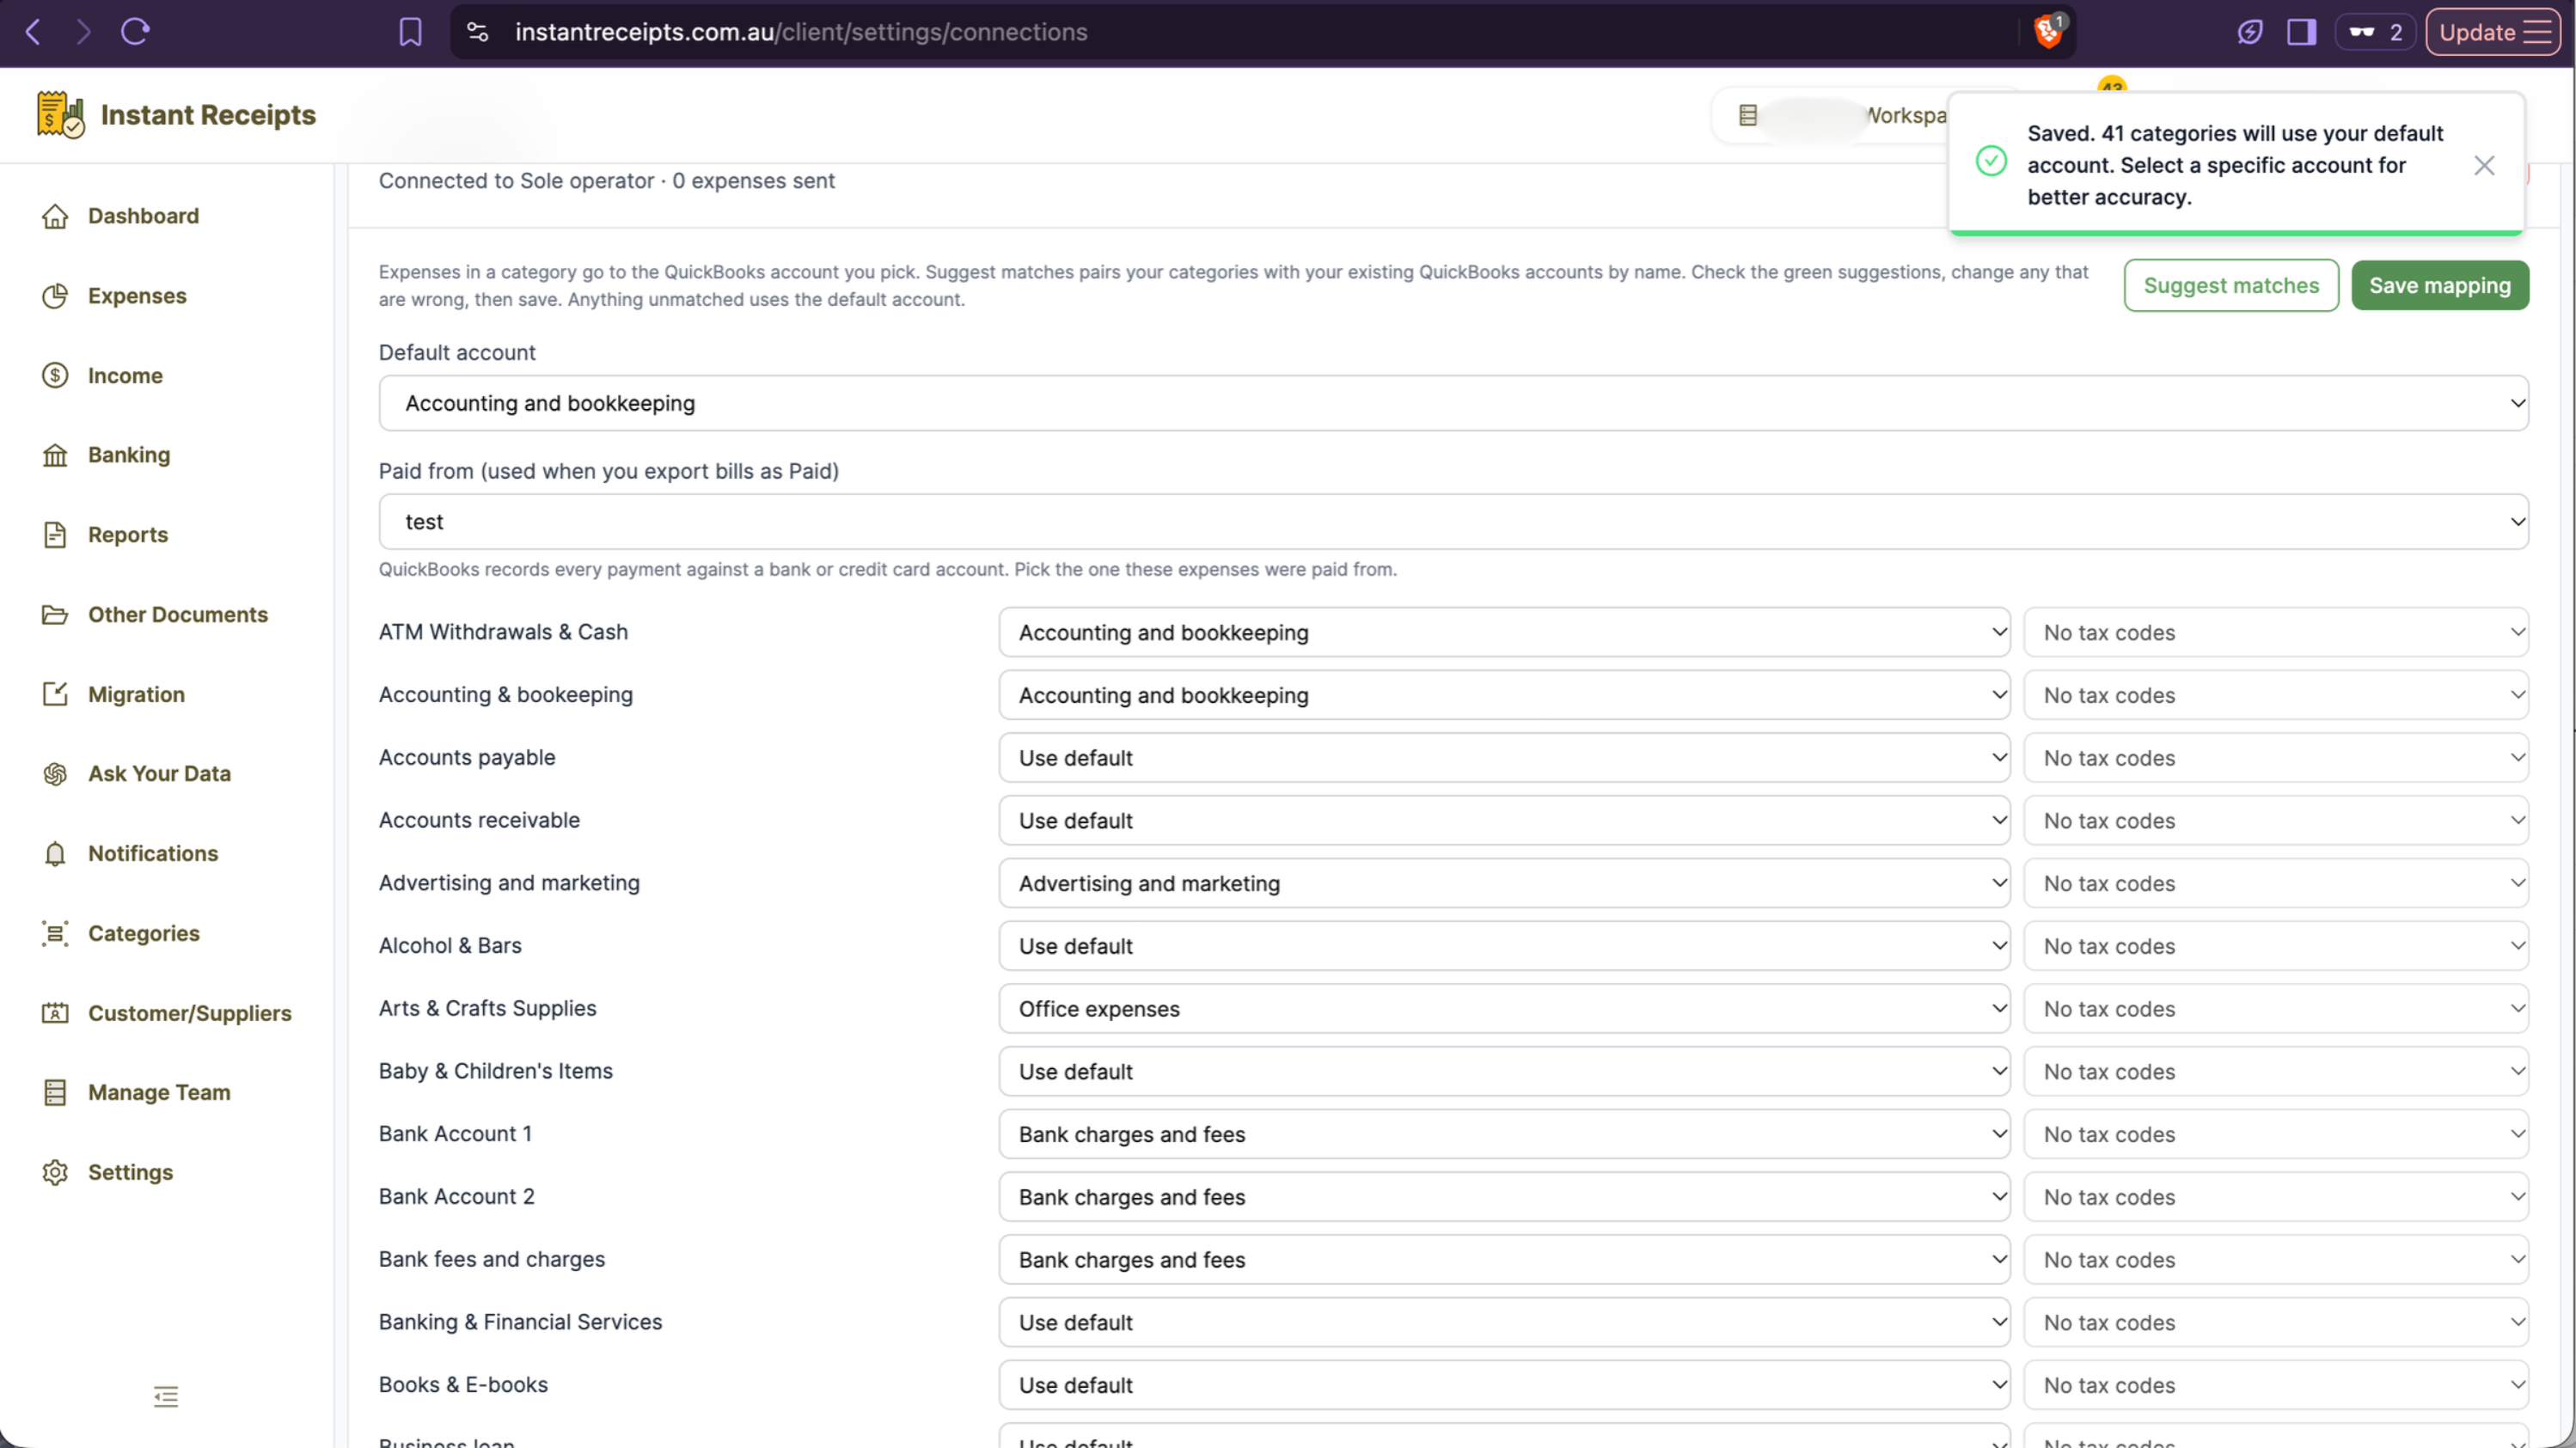
Set a default account and save
Choose a default account for expenses without a match. Also choose the bank or credit card account the payments came from in Paid from. You need it for paid bills, and for QuickBooks plans without bills (such as Simple Start), where expenses are sent as paid expenses. Click Save mapping again to keep your changes. You only do this once.
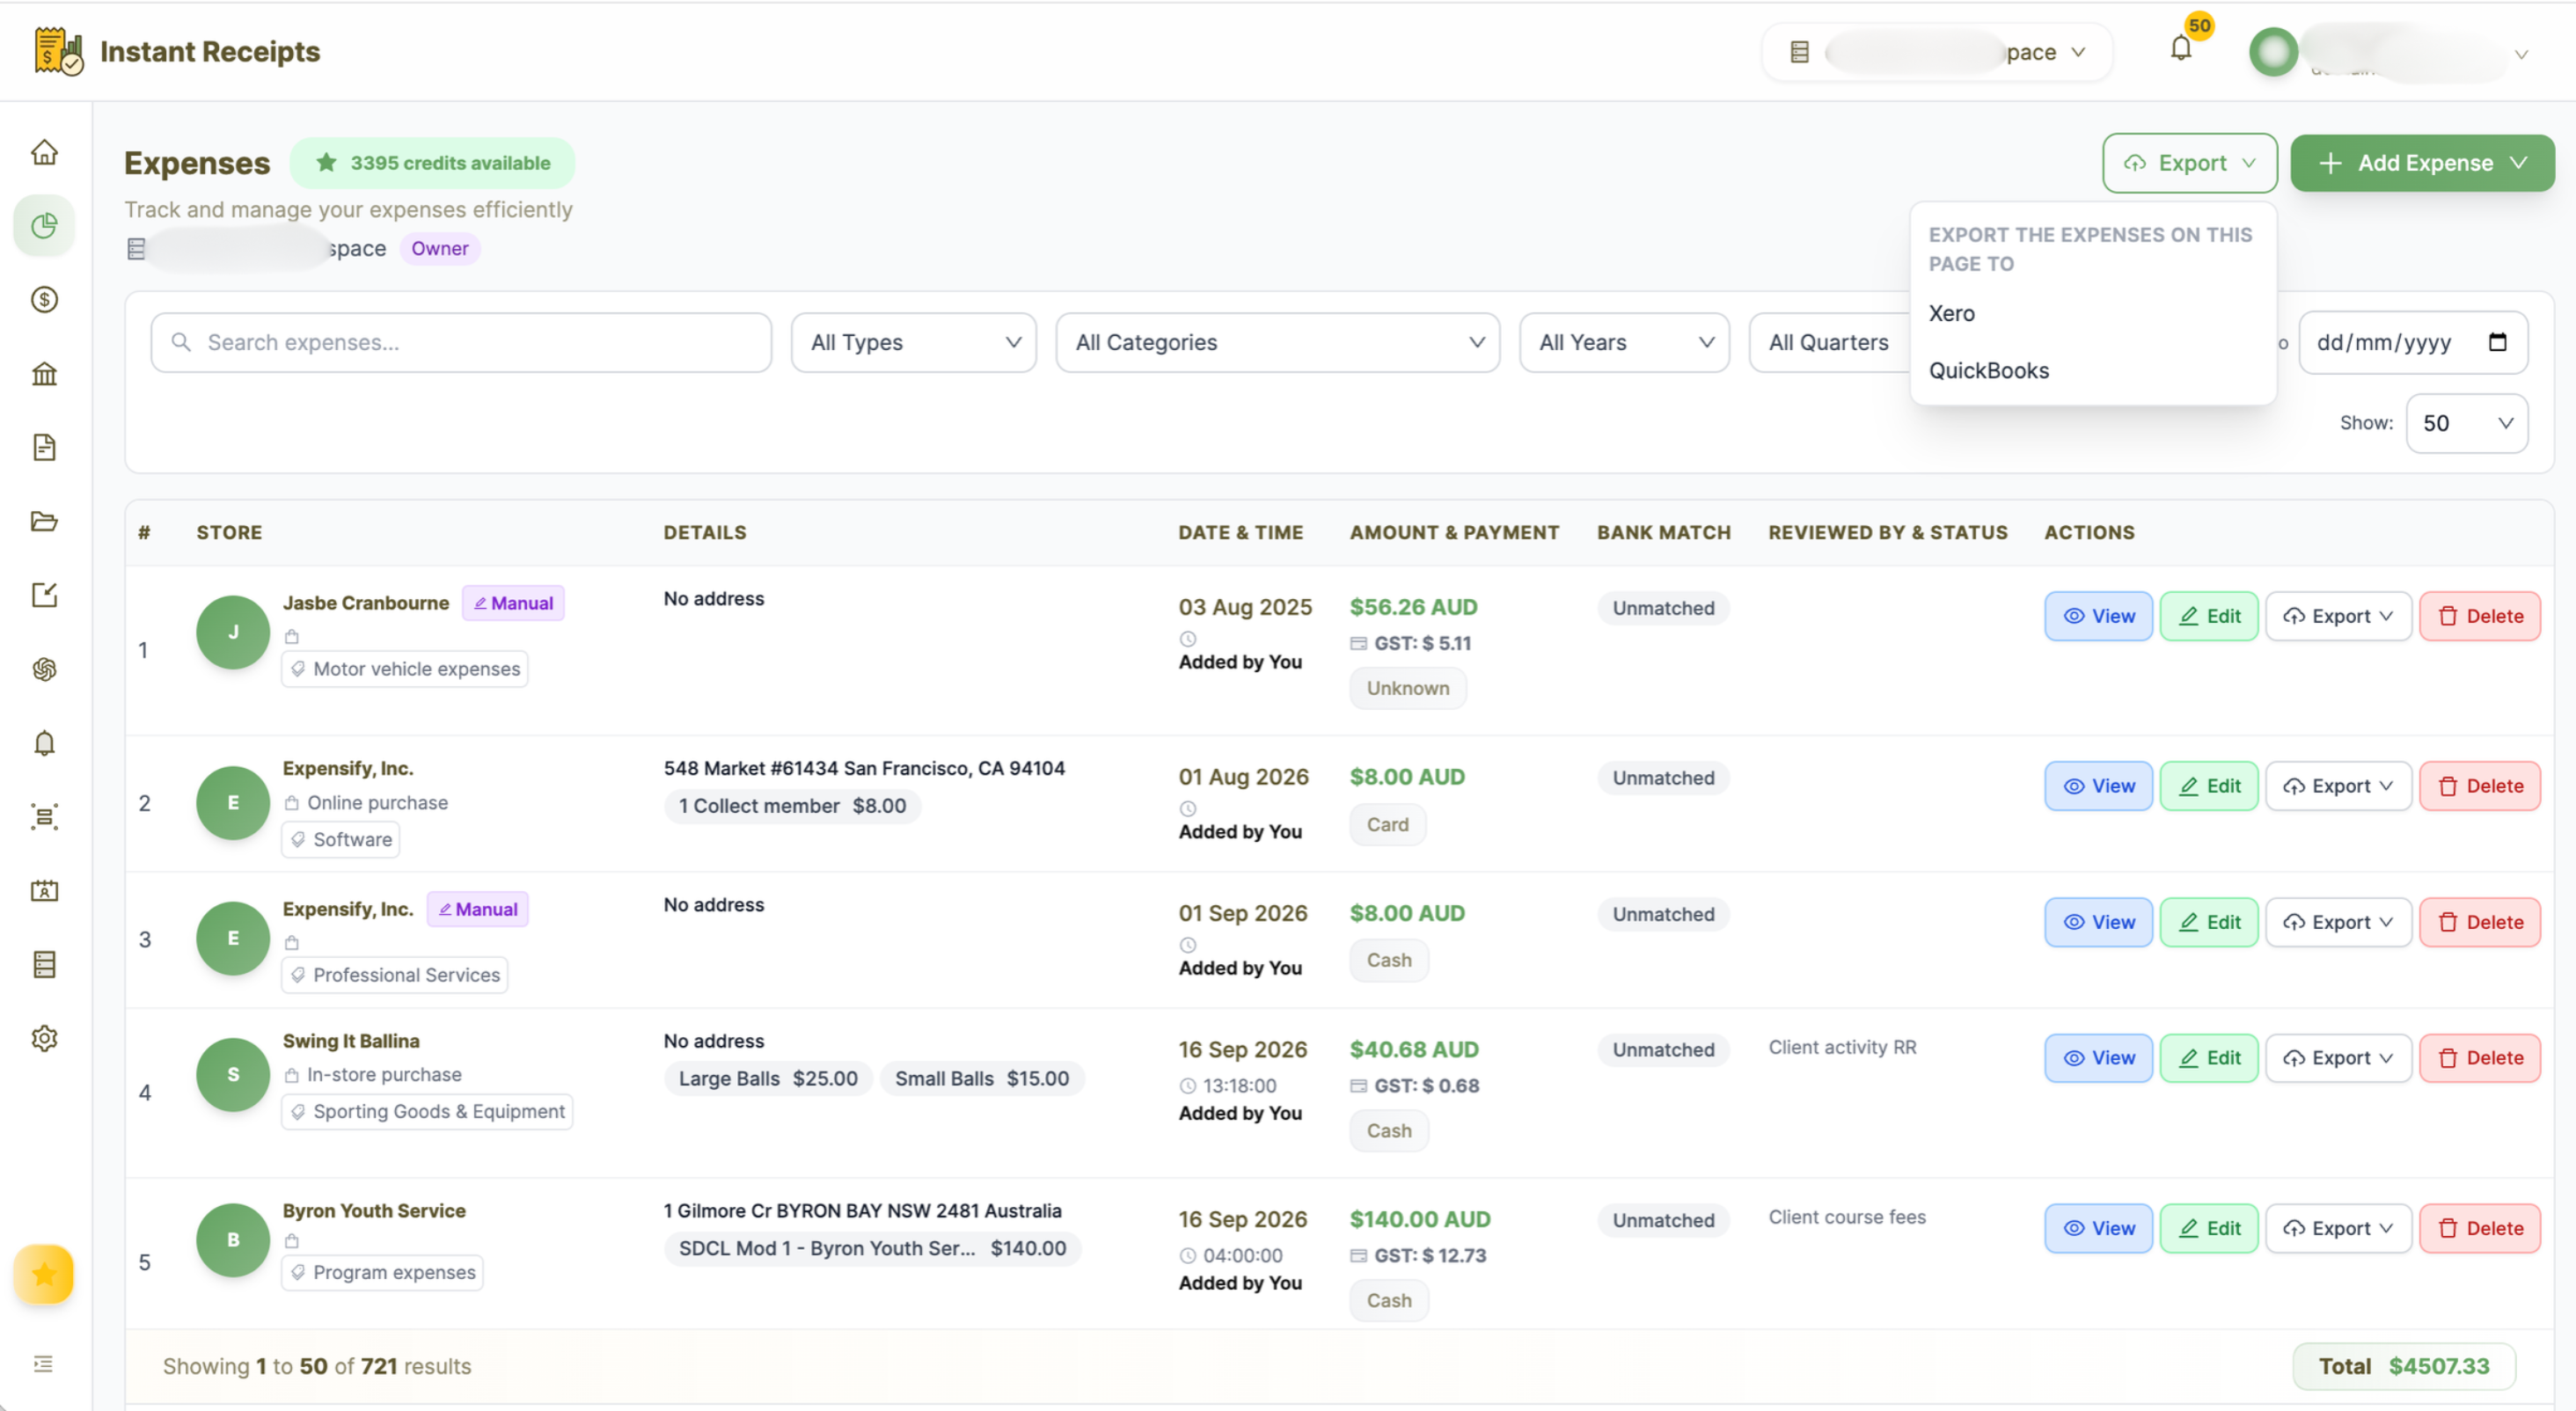
Open Expenses and click Export
Go to Expenses and click the green Export button next to Add Expense, then choose QuickBooks.
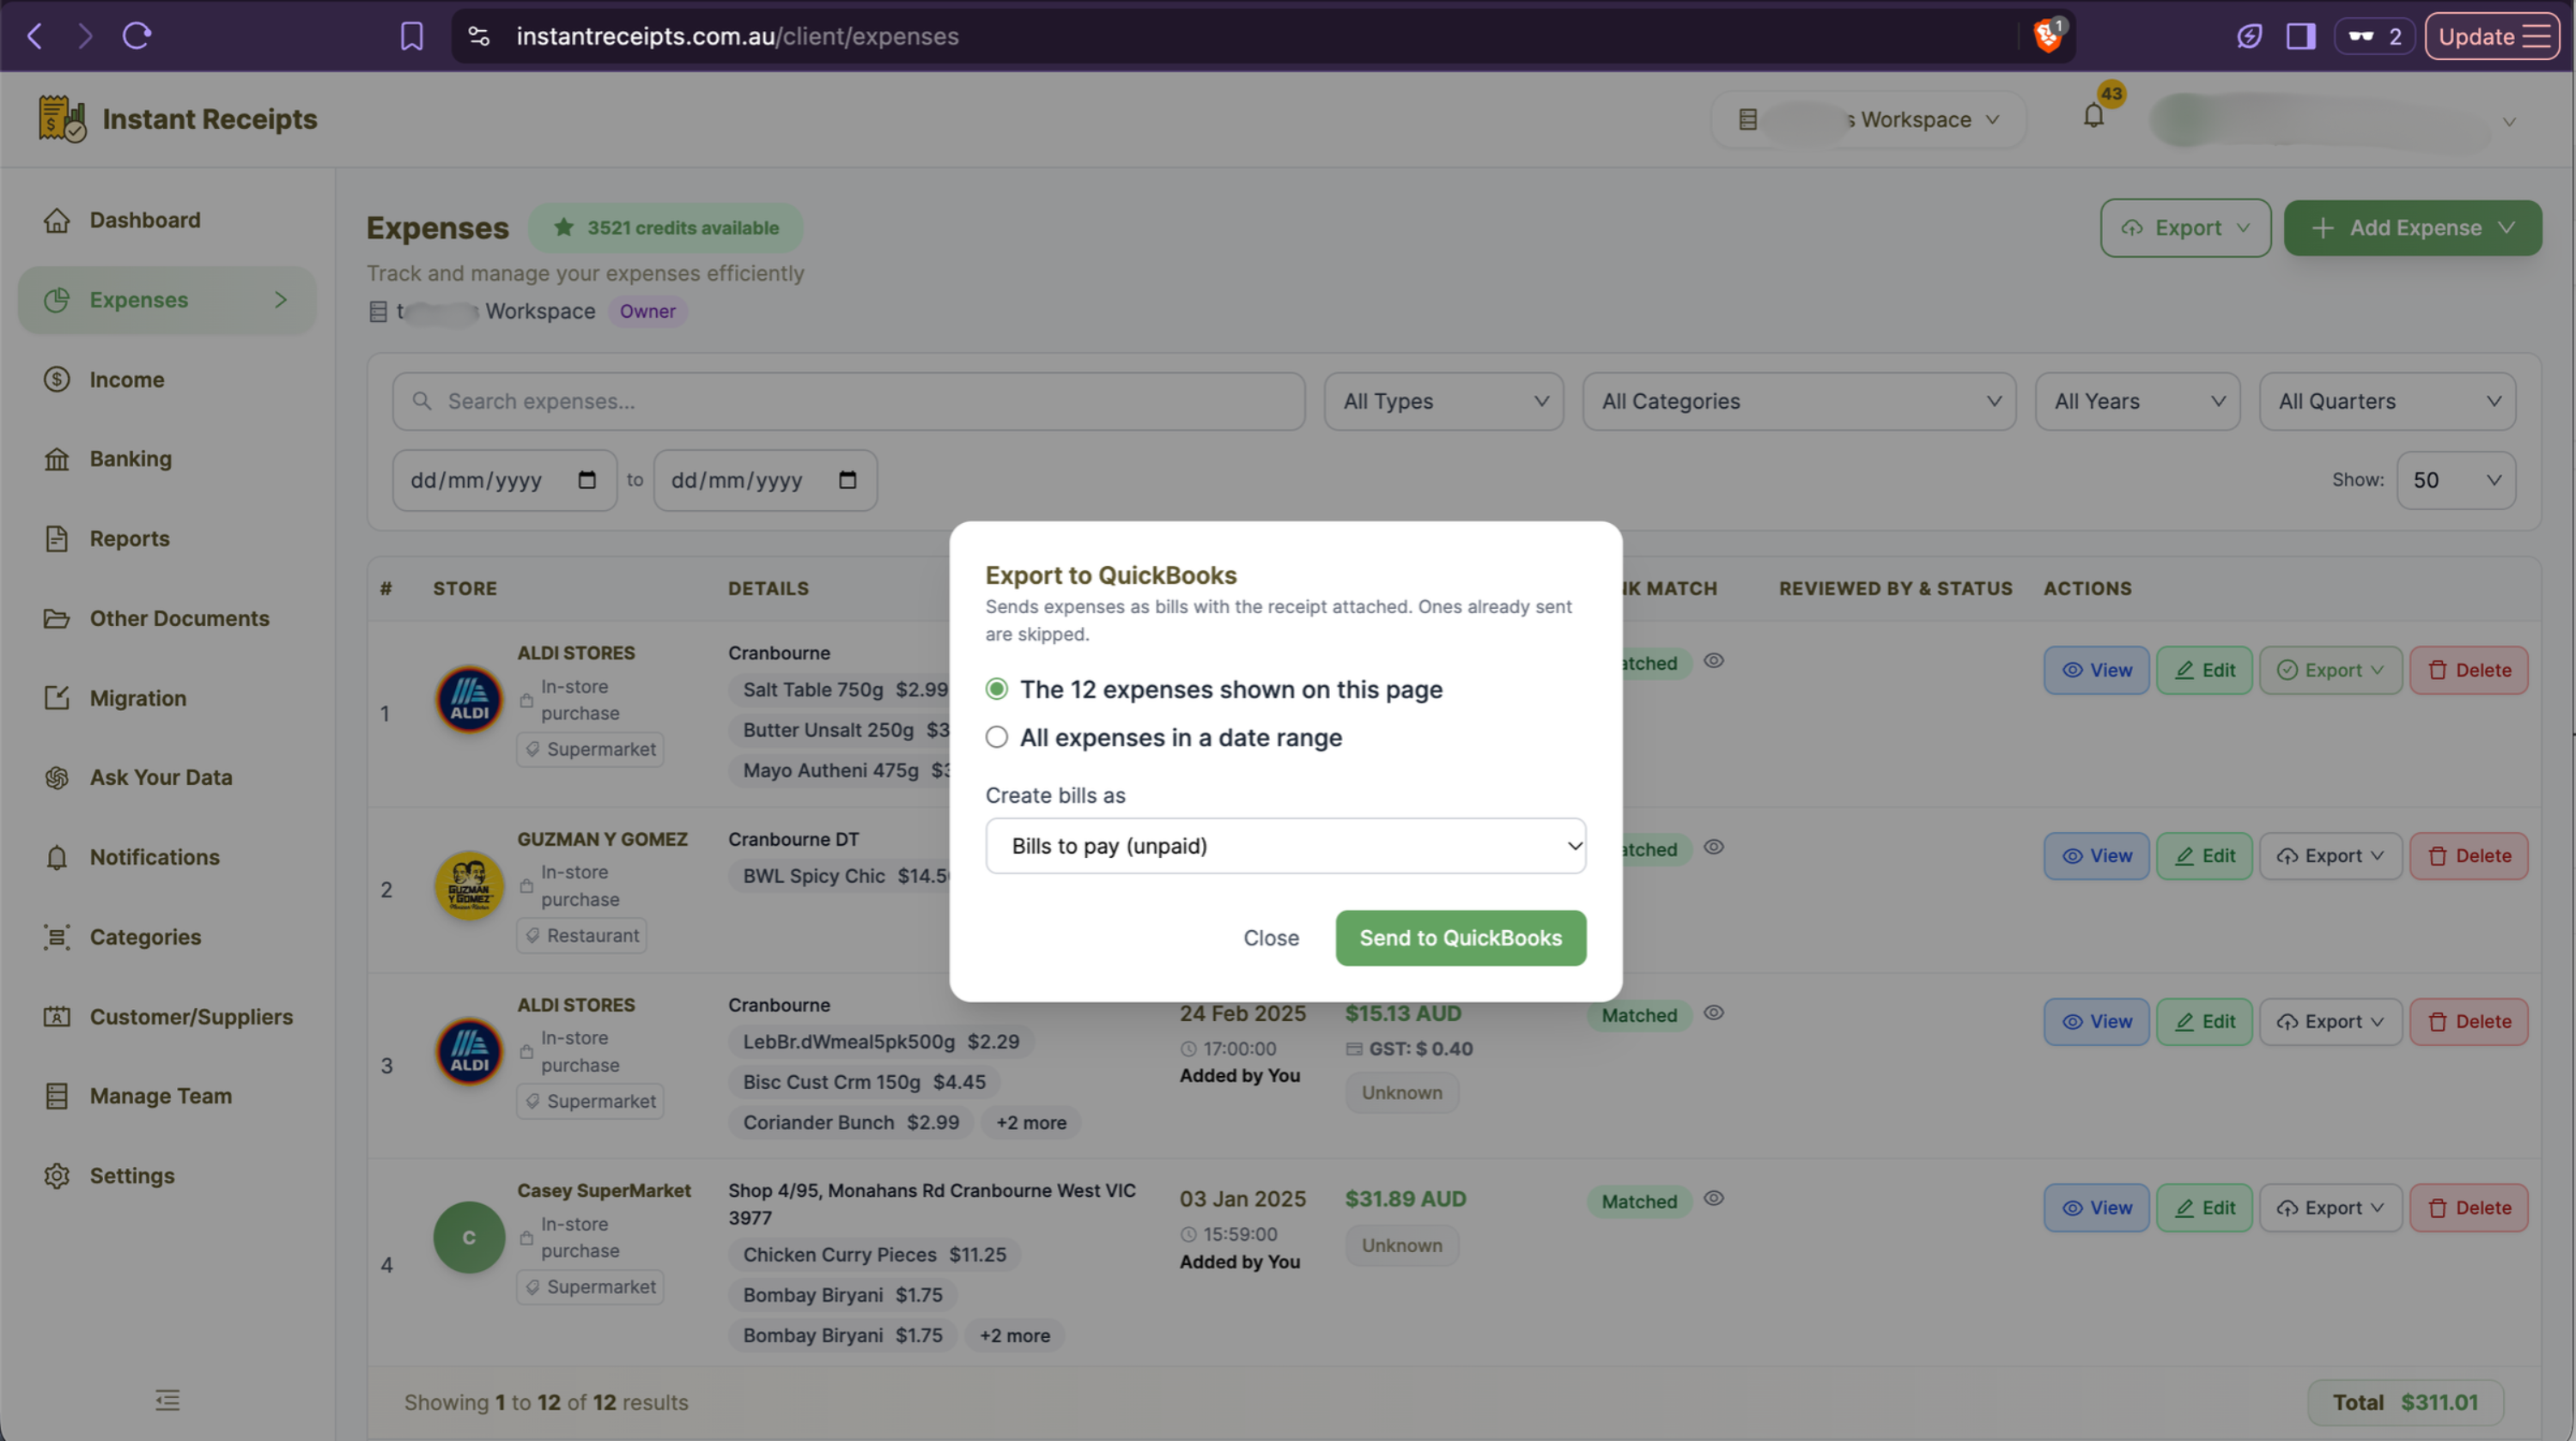
Choose what to send
Pick the expenses shown on the page, or all expenses in a date range. Then choose how to create the bills: Bills to pay (unpaid) or Paid (already paid). If your QuickBooks plan doesn't include bills, they are sent as paid expenses.
Or send a single expense
You can also send expenses one at a time. Every expense has its own Export button on its row. Click it, choose QuickBooks, pick how to create the bill and send it.
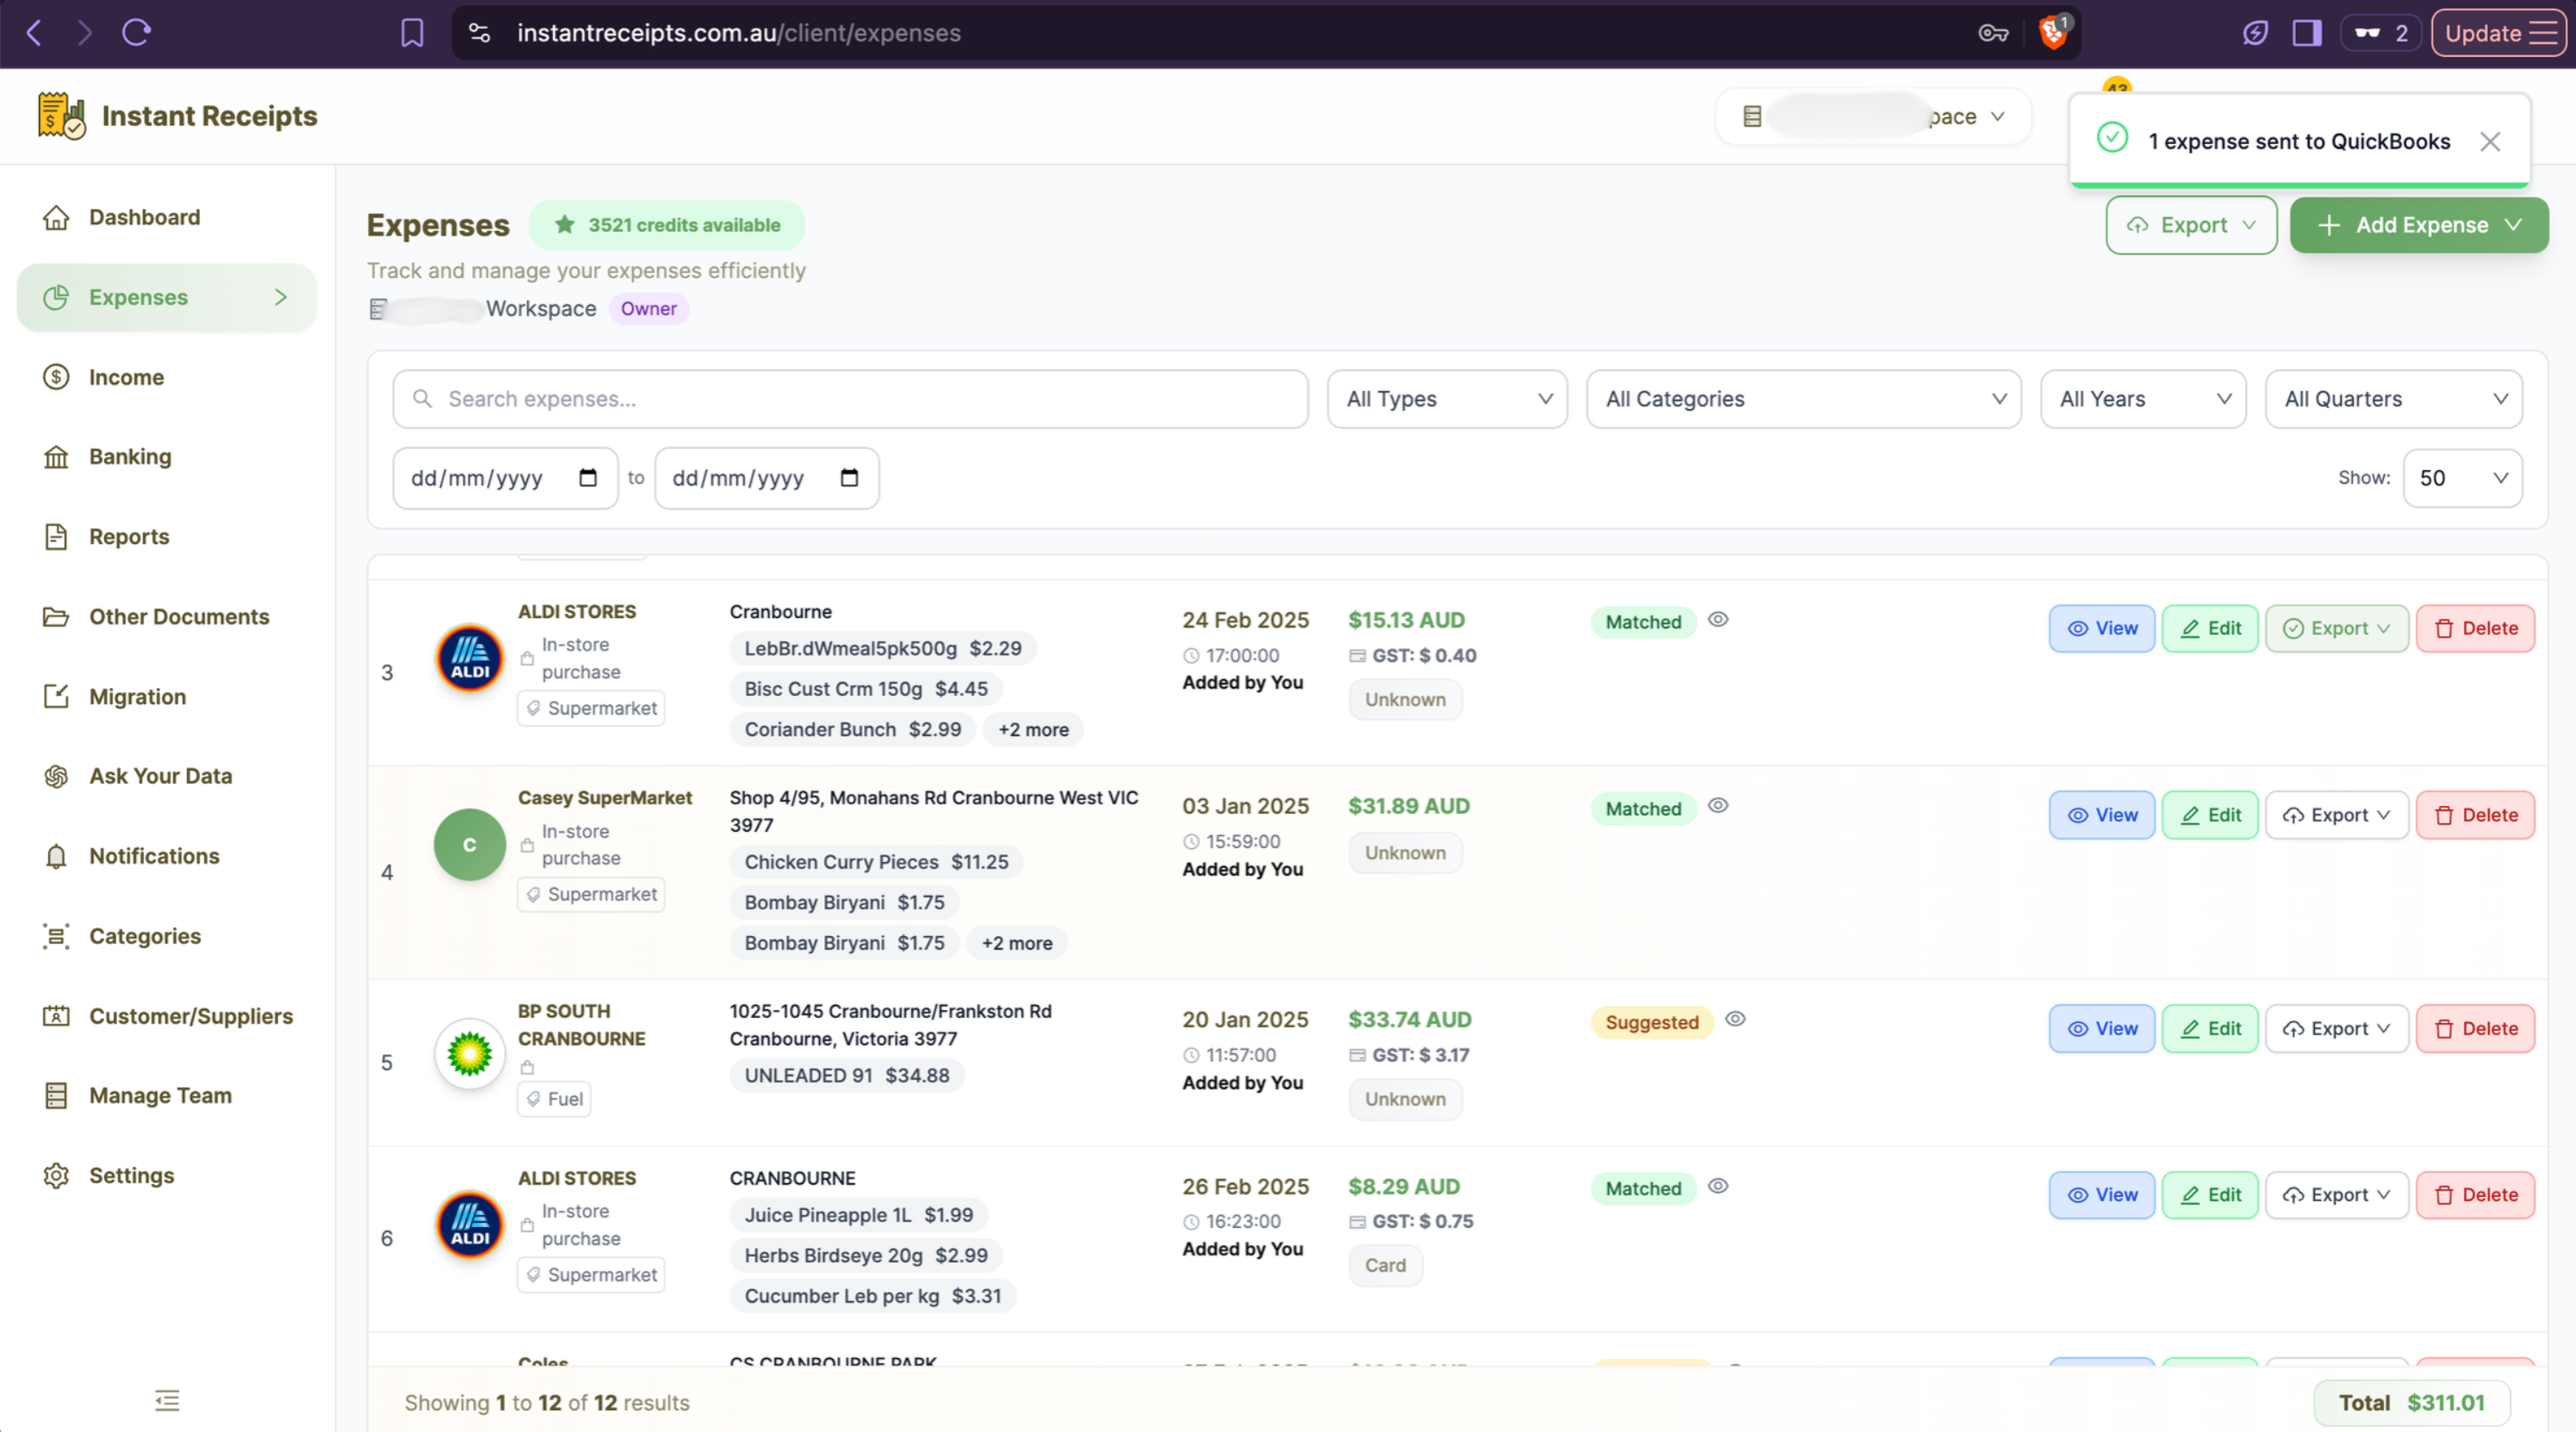
Send to QuickBooks and check the bills
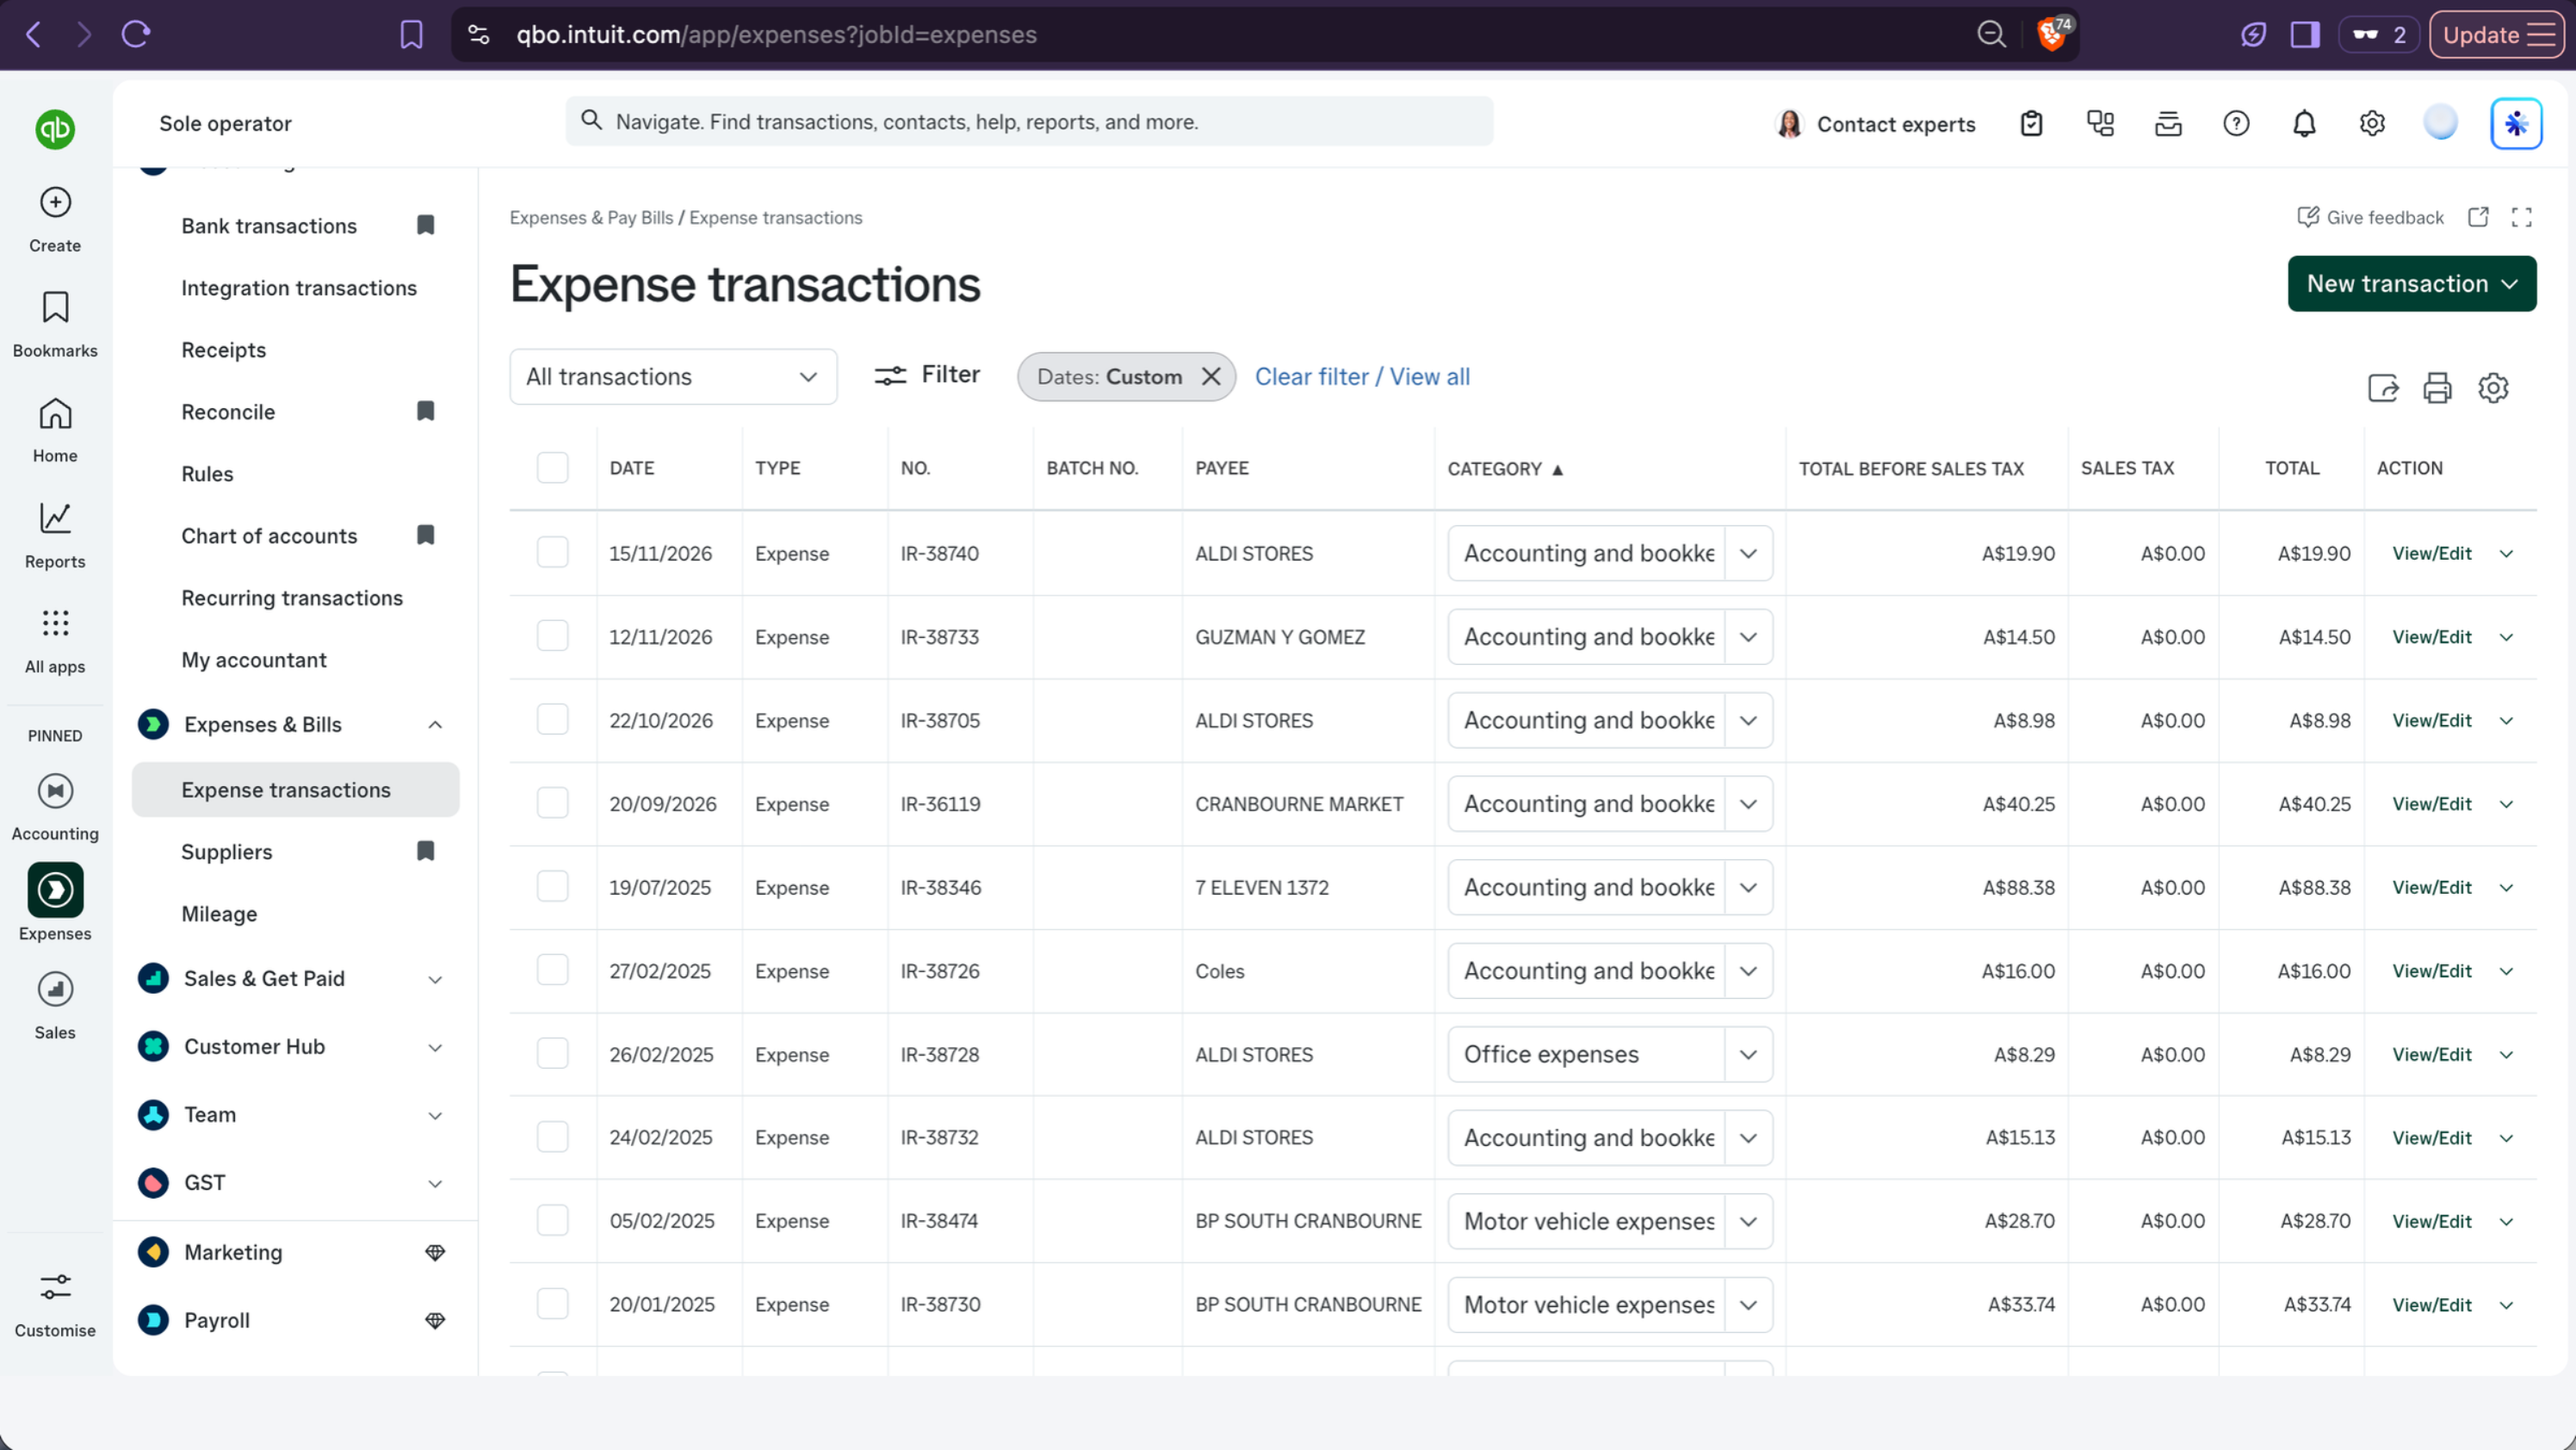
Click Send to QuickBooks. You'll see how many were sent, how many were already sent and how many failed. Expenses already sent are skipped, so it is safe to send again. Then open QuickBooks. Each expense is there with its receipt attached, as a bill, or under Expenses & Bills > Expense transactions if your plan doesn't include bills. Look for the reference starting with IR-. In Instant Receipts, expenses you've sent show a green Export button. Screenshots are for illustration only. We are not affiliated with or endorsed by Intuit Inc.
Troubleshooting
The QuickBooks option shows a lock and says Yearly plans.
Direct QuickBooks sync is included with yearly plans. Click See yearly plans to upgrade, then connect QuickBooks.
I can't see QuickBooks in the Export menu.
Only the workspace owner can connect and export to QuickBooks. Ask the owner to do it, or to connect QuickBooks in Settings > Connections.
The page says your connection has expired.
Go to Settings > Connections and click Reconnect.
Some expenses failed to send.
A category is missing a QuickBooks account. Go to Settings > Connections > Match accounts, match every category or choose a default account, save, then send again.
Paid is not letting me send.
Choose the bank or credit card account the payments come from in Settings > Connections > Match accounts, then try again.
The Paid from list is empty.
QuickBooks has no bank or credit card account yet. In QuickBooks go to Chart of accounts, click New account, choose Bank or Credit Card and save. Then reload Settings > Connections and pick it.
My expenses arrived as expenses, not bills.
Your QuickBooks plan (for example Simple Start) doesn't include bills, so expenses are sent as paid expenses from your Paid from account. Look under Expenses & Bills > Expense transactions.